1. Welcome to Tundras.com!

    You are currently viewing as a guest! To get full-access, you need to register for a FREE account.

    As a registered member, you’ll be able to:
    • Participate in all Tundra discussion topics
    • Transfer over your build thread from a different forum to this one
    • Communicate privately with other Tundra owners from around the world
    • Post your own photos in our Members Gallery
    • Access all special features of the site

RIP Pro...Long Live the Limited

Discussion in '2.5 Gen Builds (2014-2021)' started by GodlessPro, Sep 25, 2017.

  1. Sep 30, 2017 at 3:37 AM
    #31
    dcsleeper408

    dcsleeper408 BASTRDS

    Joined:
    Nov 10, 2015
    Member:
    #2081
    Messages:
    4,946
    Gender:
    Male
    First Name:
    mark
    San Jose CA
    Vehicle:
    2015 TRD PRO
    Sweet!!
    What light patterns you using for the rear setup? I can’t wait to see the out put on those things. Especially that 5d one I believe?
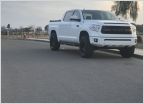
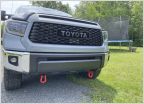
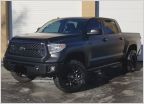
    Presley just got some lighting too.. dust lights and front bar! Looks like the team is getting ready for a night run...?
     
  2. Oct 1, 2017 at 9:04 AM
    #32
    GodlessPro

    GodlessPro [OP] Bougie BASTRD

    Joined:
    Oct 14, 2016
    Member:
    #4867
    Messages:
    2,495
    Gender:
    Male
    First Name:
    Matthew
    NorCal
    Vehicle:
    2018 Cement CM Limited
    The rears are spots. I thought that a diffused lens would be better, but after reading pages on the expensive brands websites, they recommend spots for rear lights.
    Front - https://caliraisedled.com/collections/led-pods-and-work-lights/products/2x2-20w-osram-pod
    Rear - https://caliraisedled.com/collections/led-pods-and-work-lights/products/3x2-18w-amber-pod

    After 6 hours of working at it yesterday, I'm almost complete with the install of 4 lights. Did I mention that I hate wiring. The ditch lights are on and wiring is complete. I'm not overly impressed with the output after a quick test on a dark road last night. Maybe they will be better after I have a chance to aim them.
    The rear are on and mostly wired up, I just need to put in the switch. Which leads me to my question for the day. How do I access the panel that is to the right of the steering wheel?


  3. Oct 1, 2017 at 9:05 AM
    #33
    joonbug

    joonbug °°°°°°°°°°

    Joined:
    Oct 13, 2015
    Member:
    #1948
    Messages:
    16,688
    Gender:
    Male
    First Name:
    Joon
    NorCal - Dublin
    Vehicle:
    2020 Long Travel DC
    It just pulls out.
     
  4. Oct 1, 2017 at 9:06 AM
    #34
    joonbug

    joonbug °°°°°°°°°°

    Joined:
    Oct 13, 2015
    Member:
    #1948
    Messages:
    16,688
    Gender:
    Male
    First Name:
    Joon
    NorCal - Dublin
    Vehicle:
    2020 Long Travel DC
    Oh, the blank? Thought you meant the panel. Let me go check.
     
  5. Oct 1, 2017 at 9:07 AM
    #35
    GodlessPro

    GodlessPro [OP] Bougie BASTRD

    Joined:
    Oct 14, 2016
    Member:
    #4867
    Messages:
    2,495
    Gender:
    Male
    First Name:
    Matthew
    NorCal
    Vehicle:
    2018 Cement CM Limited
    I was able to easily pry out the panel on the left, but I can't figure out the one on the right.
     
    joonbug likes this.
  6. Oct 1, 2017 at 9:15 AM
    #36
    joonbug

    joonbug °°°°°°°°°°

    Joined:
    Oct 13, 2015
    Member:
    #1948
    Messages:
    16,688
    Gender:
    Male
    First Name:
    Joon
    NorCal - Dublin
    Vehicle:
    2020 Long Travel DC
  7. Oct 1, 2017 at 9:18 AM
    #37
    BlueBottle

    BlueBottle not a PRO

    Joined:
    Sep 17, 2016
    Member:
    #4572
    Messages:
    5,084
    Vehicle:
    '16 Platinum 4x4
    See fine print
    @GodlessPro to remove that blank, you have to remove the lower dash panel which means you need to remove the side sill plate first, then the kick panel, 2x 10mm bolts for the lower panel and pull it out. You will be able to pull that panel out now.

    Are you happy with the combo lens on your fogs? Do the spots work well on them? Do they overpower our high beams?
     
    GodlessPro[OP] likes this.
  8. Oct 1, 2017 at 9:20 AM
    #38
    BlueBottle

    BlueBottle not a PRO

    Joined:
    Sep 17, 2016
    Member:
    #4572
    Messages:
    5,084
    Vehicle:
    '16 Platinum 4x4
    See fine print
    I just watched that video @joonbug posted.. I guess that works too! lol. I don't like forcing plastic pieces so just be careful doing it that way. If you do it that way, remove the lower right 10mm bolt so that lower panel will have more flexibility. You should be fine if you do that..
     
    GodlessPro[OP] and joonbug like this.
  9. Oct 1, 2017 at 9:25 AM
    #39
    joonbug

    joonbug °°°°°°°°°°

    Joined:
    Oct 13, 2015
    Member:
    #1948
    Messages:
    16,688
    Gender:
    Male
    First Name:
    Joon
    NorCal - Dublin
    Vehicle:
    2020 Long Travel DC
    What? No! Just yank the crap out of it! I don’t even use the pry tool... just yank!! :p
     
  10. Oct 1, 2017 at 9:28 AM
    #40
    BlueBottle

    BlueBottle not a PRO

    Joined:
    Sep 17, 2016
    Member:
    #4572
    Messages:
    5,084
    Vehicle:
    '16 Platinum 4x4
    See fine print
    This is why you and plastics don't get along very well..:devil:
     
  11. Oct 1, 2017 at 9:30 AM
    #41
    joonbug

    joonbug °°°°°°°°°°

    Joined:
    Oct 13, 2015
    Member:
    #1948
    Messages:
    16,688
    Gender:
    Male
    First Name:
    Joon
    NorCal - Dublin
    Vehicle:
    2020 Long Travel DC
    True dat. Especially the damn kick panels. I want to burn them down to a little ball of plastic. :mad:
     
  12. Oct 1, 2017 at 9:48 AM
    #42
    GodlessPro

    GodlessPro [OP] Bougie BASTRD

    Joined:
    Oct 14, 2016
    Member:
    #4867
    Messages:
    2,495
    Gender:
    Male
    First Name:
    Matthew
    NorCal
    Vehicle:
    2018 Cement CM Limited
    Thanks for the video @joonbug . When I was feeling around trying to figure it out, I thought that I would end up breaking something if I tried to force it, so I'll take the advice of @BlueBottle and remove the lower bolt to give it more flexibility.
     
    BlueBottle[QUOTED] and joonbug like this.
  13. Oct 1, 2017 at 9:54 AM
    #43
    GodlessPro

    GodlessPro [OP] Bougie BASTRD

    Joined:
    Oct 14, 2016
    Member:
    #4867
    Messages:
    2,495
    Gender:
    Male
    First Name:
    Matthew
    NorCal
    Vehicle:
    2018 Cement CM Limited
    The way they are now with the clear lenses, I have absolutely no need for the high beams. I'm going to be adding the filler bezel and switching the lenses to amber. Once I get the bezel installed there is going to be even less adjustment and aiming possible. I don't understand how people think they can use them on the street. I knew going into it that I wasn't going to be able to use them on the street and they were going to be offroad only, or possibly deserted backroad.
     
    joonbug and BlueBottle[QUOTED] like this.
  14. Oct 1, 2017 at 10:02 AM
    #44
    BlueBottle

    BlueBottle not a PRO

    Joined:
    Sep 17, 2016
    Member:
    #4572
    Messages:
    5,084
    Vehicle:
    '16 Platinum 4x4
    See fine print
    Thanks and yes I totally agree with you these being off-road lights only. Which is fine with me because in case we have zombie apocalypse we will need all the lights we can get!!! I think I may switch the the combo lens. I bought an extra clear combo lens in addition to the amber wide cornering lens with my fogs.
     
  15. Oct 1, 2017 at 10:03 AM
    #45
    BlueBottle

    BlueBottle not a PRO

    Joined:
    Sep 17, 2016
    Member:
    #4572
    Messages:
    5,084
    Vehicle:
    '16 Platinum 4x4
    See fine print
    Surprised you didnt go with switchpro with the amount of lights you are adding. I want to get switchpro then move the fogs to that too so I have more control and can make it strobe too lol.
     
  16. Oct 1, 2017 at 10:05 AM
    #46
    GodlessPro

    GodlessPro [OP] Bougie BASTRD

    Joined:
    Oct 14, 2016
    Member:
    #4867
    Messages:
    2,495
    Gender:
    Male
    First Name:
    Matthew
    NorCal
    Vehicle:
    2018 Cement CM Limited
    Exactly, you have to be prepared for the zombie apocalypse, that is why I'm also going to be adding spikes to my sliders.
     
  17. Oct 1, 2017 at 10:09 AM
    #47
    GodlessPro

    GodlessPro [OP] Bougie BASTRD

    Joined:
    Oct 14, 2016
    Member:
    #4867
    Messages:
    2,495
    Gender:
    Male
    First Name:
    Matthew
    NorCal
    Vehicle:
    2018 Cement CM Limited
    Switchpro seemed like overkill. I'm only planning on doing these these two sets of lights unless I'm completely underwhelmed and need more. Plus I like the idea of OEM style switches.
     
    joonbug and BlueBottle[QUOTED] like this.
  18. Oct 1, 2017 at 10:12 AM
    #48
    BlueBottle

    BlueBottle not a PRO

    Joined:
    Sep 17, 2016
    Member:
    #4572
    Messages:
    5,084
    Vehicle:
    '16 Platinum 4x4
    See fine print
    That's what we always say.. just 1 or 2 drinks..... :cheers:
     
  19. Oct 1, 2017 at 10:15 AM
    #49
    GodlessPro

    GodlessPro [OP] Bougie BASTRD

    Joined:
    Oct 14, 2016
    Member:
    #4867
    Messages:
    2,495
    Gender:
    Male
    First Name:
    Matthew
    NorCal
    Vehicle:
    2018 Cement CM Limited
    Too funny, I have the Baja Designs website open right now looking at the Squadron Pros.
     
    joonbug likes this.
  20. Oct 1, 2017 at 10:23 AM
    #50
    BlueBottle

    BlueBottle not a PRO

    Joined:
    Sep 17, 2016
    Member:
    #4572
    Messages:
    5,084
    Vehicle:
    '16 Platinum 4x4
    See fine print
    I want to get more of their lights too lol. Do you know which one of theirs will fit well behind the PRO grill?
     
  21. Oct 1, 2017 at 10:27 AM
    #51
    GodlessPro

    GodlessPro [OP] Bougie BASTRD

    Joined:
    Oct 14, 2016
    Member:
    #4867
    Messages:
    2,495
    Gender:
    Male
    First Name:
    Matthew
    NorCal
    Vehicle:
    2018 Cement CM Limited
    I know I've seen some trucks on here that have Baja Design bars behind the Pro grill, but I don't remember off hand. I don't think I've seen anyone with any of the other lights behind the grill.
     
    joonbug and BlueBottle[QUOTED] like this.
  22. Oct 1, 2017 at 2:02 PM
    #52
    GodlessPro

    GodlessPro [OP] Bougie BASTRD

    Joined:
    Oct 14, 2016
    Member:
    #4867
    Messages:
    2,495
    Gender:
    Male
    First Name:
    Matthew
    NorCal
    Vehicle:
    2018 Cement CM Limited
    I dropped by Toyota on Friday to get an estimate for fixing the dents and scratches that I got on the last run. They want $3600! That isn't going to happen.
    I might stop by a couple local shops to see what they have to say.
    My sliders can't get here soon enough.
     
    joonbug likes this.
  23. Oct 1, 2017 at 2:08 PM
    #53
    joonbug

    joonbug °°°°°°°°°°

    Joined:
    Oct 13, 2015
    Member:
    #1948
    Messages:
    16,688
    Gender:
    Male
    First Name:
    Joon
    NorCal - Dublin
    Vehicle:
    2020 Long Travel DC
    :eek: That’s a bed rack and RTT!! Oh hell no!! Just keep telling yourself that battle scars are sexy... you can convince yourself. I’ve convinced myself that pinstripes help my mpg’s. :D
     
  24. Oct 1, 2017 at 2:58 PM
    #54
    GodlessPro

    GodlessPro [OP] Bougie BASTRD

    Joined:
    Oct 14, 2016
    Member:
    #4867
    Messages:
    2,495
    Gender:
    Male
    First Name:
    Matthew
    NorCal
    Vehicle:
    2018 Cement CM Limited
    They don't bother me that much, I just figured I would check. I'm going to order some touch-up paint, so that I at least can prevent rust.
     
    joonbug[QUOTED] likes this.
  25. Oct 2, 2017 at 2:50 PM
    #55
    GodlessPro

    GodlessPro [OP] Bougie BASTRD

    Joined:
    Oct 14, 2016
    Member:
    #4867
    Messages:
    2,495
    Gender:
    Male
    First Name:
    Matthew
    NorCal
    Vehicle:
    2018 Cement CM Limited
    I just got a delivery. I'm not sure what I was expecting, but wow these things are serious.
     
  26. Oct 2, 2017 at 3:16 PM
    #56
    smslavin

    smslavin Behind a lens...

    Joined:
    Jul 15, 2017
    Member:
    #8578
    Messages:
    7,208
    Gender:
    Male
    First Name:
    Sean
    Hudson Valley
    Vehicle:
    2016 Tundra CrewMax SR5
    Some stuff
    chicks dig scars
     
  27. Oct 4, 2017 at 9:06 AM
    #57
    Caliraisedled

    Caliraisedled New Member

    Joined:
    Aug 25, 2016
    Member:
    #4313
    Messages:
    665
    Gender:
    Male
    First Name:
    Jake
    Thank you very much for choosing us!
     
  28. Oct 4, 2017 at 6:27 PM
    #58
    gan

    gan New Member

    Joined:
    Jul 5, 2017
    Member:
    #8420
    Messages:
    140
    Gender:
    Male
    Rgv Texas
    Vehicle:
    2021 Black Tundra Pro
    Where did you ge t the switch for the left side? I am thinking of adding a hidden light bar and looking for a switch for the left side.
     
  29. Oct 5, 2017 at 8:10 AM
    #59
    GodlessPro

    GodlessPro [OP] Bougie BASTRD

    Joined:
    Oct 14, 2016
    Member:
    #4867
    Messages:
    2,495
    Gender:
    Male
    First Name:
    Matthew
    NorCal
    Vehicle:
    2018 Cement CM Limited
    It is a custom switch from CH4x4.com. http://www.ch4x4.com/product/ch4x4-custom-laser-etched-toyota-small-push-switches/
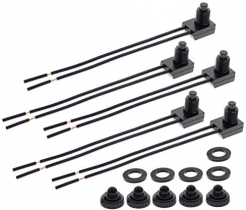
    If you search on Amazon for "Toyota Small Push Switch" you should be able to find less expensive premade switches. I couldn't find a picture and word combination that I really liked, so I got a custom one made. The push action quality isn't quite up to OEM standards, but it is entirely functional.
     
    joonbug and dcsleeper408 like this.
  30. Oct 9, 2017 at 9:28 AM
    #60
    GodlessPro

    GodlessPro [OP] Bougie BASTRD

    Joined:
    Oct 14, 2016
    Member:
    #4867
    Messages:
    2,495
    Gender:
    Male
    First Name:
    Matthew
    NorCal
    Vehicle:
    2018 Cement CM Limited
    Thanks to @joonbug and @BlueBottle I got the switch panel out without breaking anything. Unfortunately, I found out that the rear light switch that I bought is faulty, so I have another one on the way.

    On another note, I have decided that I'm not going to install my shims and shackles myself. Since I'm going to have to take it in for an alignment anyway, I might as well just have them do the install. With that said does anyone have a shop recommendation near Sacramento?
    Or alternately near Sunnyvale? I'm in Sunnyvale once a week, so it would be nice to drop off my truck in the morning and pick it up after work.
     
    dcsleeper408 and joonbug like this.

Products Discussed in

To Top