1. Welcome to Tundras.com!

    You are currently viewing as a guest! To get full-access, you need to register for a FREE account.

    As a registered member, you’ll be able to:
    • Participate in all Tundra discussion topics
    • Transfer over your build thread from a different forum to this one
    • Communicate privately with other Tundra owners from around the world
    • Post your own photos in our Members Gallery
    • Access all special features of the site

Center Console Switch Panel Lighting & Button Install

Discussion in 'General Tundra Discussion' started by Sas, Jul 27, 2018.

  1. Jul 27, 2018 at 11:47 PM
    #1
    Sas

    Sas [OP] Humor is everywhere

    Joined:
    Jul 16, 2018
    Member:
    #17087
    Messages:
    4,410
    Gender:
    Male
    First Name:
    Jason
    OKC, OK
    Vehicle:
    '17 SR5 CM TSS 4WD MGM 5.7 FF
    Lost track after #1.
    Man, I'm really happy with how this one turned out. I used GTR Lighting's flexible LED strip and latching button for this (disregard the Lightning strips and second button in the pic).

    https://gtrlighting.com/gtr-lighting-12-flexible-led-strip/
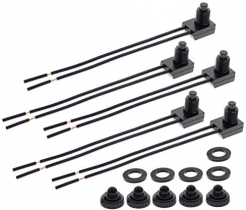
    https://gtrlighting.com/gtr-lighting-led-halo-switch-black-bezel-latching-switch/


    The hardest part is just figuring out how the wiring needs to go so the the button will behave as expected. You can either have it light up when the button is pushed and the LED is on, or have the button always lit regardless of whether the LED is on. I chose the latter. Because I have the NSV bar I had an unused cigarette lighter connector, so I tapped into that for my power. The button turns on when the key is in position 1.

    There are wiring diagrams out there to help with this and there is info on which wires are which that come with the button. Here's a pic of how I had mine wired if it helps. The LED strip is hanging down.


    You'll need to solder some additional lengths of 22awg wire to the button wires in order to feed it along the center console and into the switch panel area. I ended out cutting about 5-6' for each wire to make it easier then cut off the excess once they were in place. If you don't have different color wires, make sure you mark the ends somehow so you know which is which once you get them routed. The LED strip won't need any additional wire.

    Start by drilling the smallest hole you can that will accommodate the smallest rubber grommet you have. You can pick up a pack of rubber grommets at AutoZone, O'Reilly, etc. I would highly recommend buying a step bit that goes beyond 1/2" and steps in 1/16" increments. You might end out having to buy two to get the really small hole for the LED strip wires. They are pretty inexpensive at Harbor Freight last I looked.


    Sand the underside of the switch panel where the LED strip will go with 150 grit sandpaper and clean it well with isopropyl alcohol to remove all the dust. If you have any switches with flip-up covers be sure to open those up so you're not covering the light when they're open. Cut the strip to length at the designated cutting spots and stick the strip to the panel and feed the wires thru the grommet. I think I cut two lengths off the end. I also ended out painting the edge of the LED strip with a black paint pen because I didn't want light shining up towards me.


    Next you need to find a place to mount the button. It's a little too big to put anywhere on the panel because you need to be able to tighten the nut on the backside of the button. There are a number of places you can choose on the center console, but I chose that little corner of the cup holder. Whatever place you choose, make sure the nut will fit flush to the back of the mounting surface. Drill from the center of the nut, not from the front side. It pays to triple check that everything is going to fit before drilling! Again, using a step drill bit here will give you a clean hole. I think the button was 9/16" in size, but be sure to measure it before drilling to be sure. You want the button to fit thru the hole as tightly as possible to catch the lip. Don't forget to install the rubber o-ring that came w/the button too!


    Once that's done you're ready to run your button wires. I ended out having to run them up the left side of the center console, around the back side of the screw that holds it in under the dash and thru the same hole that the other harnesses are using. You'd think that there would have been a hole or something that would allow you to go right up the middle, but without taking the whole center console off I didn't find one. Routing it up the side was the next best option.


    Check your connections again to make sure that everything operates the way you want it to before making your final connections and wiring everything up. Alligator clips help here a lot. Be careful about shorting the connection.

    Once you're all wired in, check it one last time for functionality before putting the switch panel and center console back on.

    Final product:


    Album at:
    https://www.tundras.com/media/albums/switch-panel-center-console-lighting-and-button-install.3338/
     
    Last edited: Jul 27, 2018
  2. Jul 28, 2018 at 12:41 AM
    #2
    trdprobped17

    trdprobped17 New Member

    Joined:
    Feb 5, 2018
    Member:
    #12690
    Messages:
    912
    Gender:
    Male
  3. Jul 28, 2018 at 12:59 AM
    #3
    TXRailRoadBandit73

    TXRailRoadBandit73 YOTAS,RAILROADIN',RÖKnRÖLLN',BEER,MAX/GEMMA

    Joined:
    May 30, 2016
    Member:
    #3487
    Messages:
    50,372
    Gender:
    Male
    First Name:
    Adam
    The 956, TEXAS
    None yet
    Man @Sas ! your on a roll, I like this one too!
     
    trdprobped17 and Sas[OP] like this.
  4. Jul 28, 2018 at 1:05 AM
    #4
    TXRailRoadBandit73

    TXRailRoadBandit73 YOTAS,RAILROADIN',RÖKnRÖLLN',BEER,MAX/GEMMA

    Joined:
    May 30, 2016
    Member:
    #3487
    Messages:
    50,372
    Gender:
    Male
    First Name:
    Adam
    The 956, TEXAS
    None yet
    @Sas with the exception of the switch button, can you put that light tapped with parking lights?
     
  5. Jul 28, 2018 at 1:05 AM
    #5
    Sas

    Sas [OP] Humor is everywhere

    Joined:
    Jul 16, 2018
    Member:
    #17087
    Messages:
    4,410
    Gender:
    Male
    First Name:
    Jason
    OKC, OK
    Vehicle:
    '17 SR5 CM TSS 4WD MGM 5.7 FF
    Lost track after #1.
    Thanks man! These little upgrades are a lot of fun and have really added to the enjoyment of the truck.
     
    TXRailRoadBandit73 likes this.
  6. Jul 28, 2018 at 1:08 AM
    #6
    Sas

    Sas [OP] Humor is everywhere

    Joined:
    Jul 16, 2018
    Member:
    #17087
    Messages:
    4,410
    Gender:
    Male
    First Name:
    Jason
    OKC, OK
    Vehicle:
    '17 SR5 CM TSS 4WD MGM 5.7 FF
    Lost track after #1.
    I don't see why not. I'm not sure which wires those are but I'm sure someone here knows the best location to tap into them.
     
  7. Jul 28, 2018 at 1:10 AM
    #7
    TXRailRoadBandit73

    TXRailRoadBandit73 YOTAS,RAILROADIN',RÖKnRÖLLN',BEER,MAX/GEMMA

    Joined:
    May 30, 2016
    Member:
    #3487
    Messages:
    50,372
    Gender:
    Male
    First Name:
    Adam
    The 956, TEXAS
    None yet
    Thx!
     
  8. Jul 28, 2018 at 7:19 PM
    #8
    Sas

    Sas [OP] Humor is everywhere

    Joined:
    Jul 16, 2018
    Member:
    #17087
    Messages:
    4,410
    Gender:
    Male
    First Name:
    Jason
    OKC, OK
    Vehicle:
    '17 SR5 CM TSS 4WD MGM 5.7 FF
    Lost track after #1.
    You bet, you gonna do this?
     
  9. Jul 28, 2018 at 7:20 PM
    #9
    TXRailRoadBandit73

    TXRailRoadBandit73 YOTAS,RAILROADIN',RÖKnRÖLLN',BEER,MAX/GEMMA

    Joined:
    May 30, 2016
    Member:
    #3487
    Messages:
    50,372
    Gender:
    Male
    First Name:
    Adam
    The 956, TEXAS
    None yet
    Yes Sir
     
    nk1794 and Sas[QUOTED][OP] like this.
  10. Jul 28, 2018 at 7:20 PM
    #10
    TXRailRoadBandit73

    TXRailRoadBandit73 YOTAS,RAILROADIN',RÖKnRÖLLN',BEER,MAX/GEMMA

    Joined:
    May 30, 2016
    Member:
    #3487
    Messages:
    50,372
    Gender:
    Male
    First Name:
    Adam
    The 956, TEXAS
    None yet
    And like to do foot well lighting, all 4 locations
     
    nk1794 and Sas[QUOTED][OP] like this.
  11. Jul 30, 2018 at 6:41 AM
    #11
    Sas

    Sas [OP] Humor is everywhere

    Joined:
    Jul 16, 2018
    Member:
    #17087
    Messages:
    4,410
    Gender:
    Male
    First Name:
    Jason
    OKC, OK
    Vehicle:
    '17 SR5 CM TSS 4WD MGM 5.7 FF
    Lost track after #1.
    Awesome! You might want to check out the footwell lighting install video @nk1794 did as well. He came at it from a different approach.
     
    nk1794 likes this.
  12. Jul 30, 2018 at 7:13 AM
    #12
    nk1794

    nk1794 Always torque to spec

    Joined:
    Jan 24, 2018
    Member:
    #12420
    Messages:
    3,755
    Gender:
    Male
    San Jose, CA
    Vehicle:
    2016 1794
    SnugTop, TRD Catback, DECKed Storage, TRD Sway Bar, ESP Under Seat Storage, Blackvue DR750S-2CH Dashcam
    Assuming that those LEDs don't draw a lot of power you should be able to tap into the parking lights. I'm planning to do that for the LED at the center console, it's currently on a switch. I'm using a small LED so I can actually tap into the illuminated wire on one of those knobs above. The same approach as the one I did for the side mirror LED.
     
    Last edited: Jul 30, 2018
    Sas[OP] and NewImprovedRon like this.
  13. Jul 30, 2018 at 7:55 AM
    #13
    Sas

    Sas [OP] Humor is everywhere

    Joined:
    Jul 16, 2018
    Member:
    #17087
    Messages:
    4,410
    Gender:
    Male
    First Name:
    Jason
    OKC, OK
    Vehicle:
    '17 SR5 CM TSS 4WD MGM 5.7 FF
    Lost track after #1.
    I think the specs were 0.55 amps and 7.7 watts per strip, so very negligible.
     
  14. Jul 30, 2018 at 9:43 AM
    #14
    Bigdog

    Bigdog New Member

    Joined:
    Jul 8, 2018
    Member:
    #16846
    Messages:
    162
    Gender:
    Male
    Vehicle:
    2014 sr5 tundra 4x4
    7 inch pro comp lift 37 12.5 nitro ridge grapplers 639 k&n cai hyperforce interceptor tuner
    Very nice BigReds getting all dressed up thanks she'll have that by next weekend lol
     
    Sas[OP] and nk1794 like this.

Products Discussed in

To Top