1. Welcome to Tundras.com!

    You are currently viewing as a guest! To get full-access, you need to register for a FREE account.

    As a registered member, you’ll be able to:
    • Participate in all Tundra discussion topics
    • Transfer over your build thread from a different forum to this one
    • Communicate privately with other Tundra owners from around the world
    • Post your own photos in our Members Gallery
    • Access all special features of the site

Amp Research install on 2018

Discussion in '2.5 Gen Tundras (2014-2021)' started by flying dave, Feb 21, 2019.

  1. Feb 21, 2019 at 12:19 PM
    #1
    flying dave

    flying dave [OP] New Member

    Joined:
    Nov 23, 2018
    Member:
    #22069
    Messages:
    157
    Gender:
    Male
    NC
    So my steps came in last week that I ordered and today was going to be the day. I figured I'd try to take as many useful pictures as I could to help others.

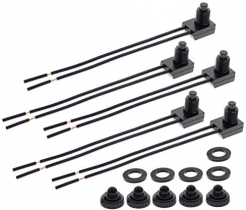
    Apparently the wiring has changed on the 18+ models so you can not get the plug and play. I also ordered the override switch which is what should be in the small box.

    20190221_124320.jpg

    Started the unpacking/inspection process. There are 3 boxes inside along with the steps. Removed the 3 boxes and also found a zombie cat.

    20190221_125528.jpg

    Laid the boxes out to inspect the internals. Found zombie cat approved. I was going to open them up and proceed with installing the arms and start on the wiring when a voice told me to inspect the steps as well before going any further.

    20190221_125726.jpg

    Glad I did. Found one of the attachment slides had not been tapped. Called AMP and they asked where I bought it from, took my info and said they would expedite one out to me. So, for now, I am dead in the water.

    20190221_132853.jpg


    I would have been pissed if I had installed the arms and started in on the wiring only to find I would have had to remove it all so I can drive my truck while I wait for the part.

    So, for now, I wait.

    To be continued..........
     
    Last edited: Feb 21, 2019
    panicman and 040Tundra like this.
  2. Feb 21, 2019 at 1:34 PM
    #2
    040Tundra

    040Tundra Teddy 2013-2019

    Joined:
    Nov 13, 2016
    Member:
    #5188
    Messages:
    3,809
    Gender:
    Male
    First Name:
    Aaron
    Las Vegas, NV
    Vehicle:
    040 '16 CM LTD 4x4
    A little of this and a little of that.
  3. Feb 21, 2019 at 1:45 PM
    #3
    Omohundro

    Omohundro 2018 Not a Pro

    Joined:
    Sep 8, 2017
    Member:
    #9530
    Messages:
    1,639
    Gender:
    Male
    First Name:
    Jody
    McMinnville TN
    Vehicle:
    2018 Tundra Platinum
    Bak Revolver, BedRug, Undercover Swingcase, PopLock, Bilstein 5160(rear), Firestone RideRite, TRD rear sway bar, Coachbuilder +2 rear shackles, Andersen 5” aluminum adjustable hitch, TRD dual exhaust, VLEDS interior leds including the footwell kit, TundraTex FRAC mod, VLEDS LPR backup tag mount led, Husky X-Act mats, Color matched cup holder bezel (silver), Ceramic 20% tint all around, 50% Ceramic windshield, Color Matched door handles & mirror caps, The “Stubby” antenna, AMP Research steps, VLEDS 6”step lights, ToyTec/5100 Bilstein coil overs, 700lbs red ToyTec springs (2.75” lift), 20x9 +18 Method 306 custom painted and custom fit center caps, Gorilla spline lugs, Bridgestone Revo 3s 285/60R20, TRD skid plate, RaptorLiner “Red” tow hooks, 19 Pro black LED headlights, VLEDS Triton V6 turns, Rigid SAE D series fog lamps, 19 TRD hood scoop, 2019 TRD Pro grille, Coachbuilder bumper shims, X-Pel protect under mud guards, Opti Coat Ceramic, Opti Coat Sealed. And some snakes and sparklers, because they are my favorite!
    That my biggest problem, I find out something is wrong to late.
     
  4. Feb 21, 2019 at 3:03 PM
    #4
    Snowcat4360

    Snowcat4360 New Member

    Joined:
    Oct 17, 2018
    Member:
    #20683
    Messages:
    202
    Gender:
    Male
    First Name:
    Derek
    Colorado
    Vehicle:
    2018 TRD Sport Crewmax
    Century topper, bed rug, ultimate rod case
    Nice job flying dave,

    I did the same and luckily had no issues with mine. Hopefully you do not have to wait too long! Still waiting on the override switch to arrive to finish up. Should be here today so I can install it this weekend. You will absolutely love these boards! My wife loves them too.
     
  5. Feb 21, 2019 at 3:10 PM
    #5
    Napvid

    Napvid New Member

    Joined:
    Oct 25, 2018
    Member:
    #20939
    Messages:
    88
    Gender:
    Male
    First Name:
    Dave
    Vehicle:
    2018 Cement CM Limited XP
    ASV Vent Visors, Rough Country Bull Bar With LED, Rough Country Fender Flare/Rivets, Rough Country Floor Mats......
    Just a tip in case you didn't know. The wire you need to tap into for the driver rear door that is in the 20 pin connector under the dash is red wire above the black wire. It is not the purple wire with the red stripe that they tell you. Because amp is not making a plug-in play OBD2 port harness for 18+ I went through some trials and tribulations during install. I know the ins-and-outs of the install and if you need any help or advice I would be glad to assist. I installed the steps on my 18 and then that got totaled bought a 19 and it had to install on the 19 again. I can send you direct pictures of wires that you need to tap into. And yeah that sucks to get a new present and you can't install because of a quality control issue. But once installed and operational they really are a badass.
     
  6. Feb 25, 2019 at 6:00 PM
    #6
    flying dave

    flying dave [OP] New Member

    Joined:
    Nov 23, 2018
    Member:
    #22069
    Messages:
    157
    Gender:
    Male
    NC
    Had some time to attack the steps today. It is pretty straight forward and if you have seen the video it is quite helpful as well as the other threads so I won't go into the wiring in the engine compartment.

    Removed the passenger side kick panel to gain access for the wire taps.
    20190225_125034.jpg

    The rubber stopper was easier to remove than try to cut in place so I popped it out from the top pushing it out of the bottom.

    20190225_130004.jpg

    Used a razor blade to cut a small slit and ran the wires through. Installed the stopper from the bottom. Make sure you get in in completely.

    20190225_133039.jpg
     
  7. Feb 25, 2019 at 6:08 PM
    #7
    flying dave

    flying dave [OP] New Member

    Joined:
    Nov 23, 2018
    Member:
    #22069
    Messages:
    157
    Gender:
    Male
    NC
    My instructions were revised 06.07.18 and were mostly accurate. I started on the passenger side as noted above and it is definitely easier than the other side. The instructions are a little vague on this step for the wiring you push through the bottom. If you look at the driver's side instructions it says the blue wire is the front and the grey (looked white to me) is the rear. So the blue wire goes to the green wire in the connector at pin 22 and the grey wire goes to the tan wire at pin 3 as per the instructions.

    I had disconnected the yellow connector to inspect the plug near it and had not plugged it back in before I took the pictures if you have a sharp eye...

    20190225_134127.jpg
    20190225_134143.jpg
    20190225_134146.jpg
    20190225_135344.jpg
    20190225_135354.jpg

    20190225_135429.jpg
     
    Last edited: Feb 25, 2019
  8. Feb 25, 2019 at 6:26 PM
    #8
    flying dave

    flying dave [OP] New Member

    Joined:
    Nov 23, 2018
    Member:
    #22069
    Messages:
    157
    Gender:
    Male
    NC
    The rubber stopper is slightly less accessible than the other side but I did the same thing. Pushed it through the bottom, sliced it, pushed the two wires through and reinstalled.

    20190225_135747.jpg
    20190225_141008.jpg

    I just realized I forgot to snap a pic of the connector on the bottom. This is the only one I have at the moment. I will pull it back apart later and edit this with a better pic but you can see the blue power step wire attached to the blue wire that was in the connector. The instructions were right with the location but wrong saying it was a 20 connector plug when it was a 22.

    20190225_150629.jpg

    The instructions were sort of correct in this step. The location of the wire was correct but it says the wire is pink with a red stripe and my wire was solid red which I think I read some have found as well.

    20190225_150634.jpg
    20190225_150645.jpg
    20190225_151556.jpg


    After wiring it up I checked all four doors and it all worked correctly. After I had all of the interior panels re-installed and the covers installed on the step actuator motors (which I ziptied on instead of using the push pins and not a huge fan of their design) I decided to recheck the operation and had nothing on either side. I checked a few things, pulled and reinstalled the fuse a few times and still had nothing. I remembered reading a post about disconnecting the two connections at the module under the hood and tried that. Boom, back in business. Not sure why but that worked.

    I am not sure if I want to use the LED's that came with the kit, use some others that I have read about on other install threads, or just tape off the ends, zip tie the wiring to the frame, and go without. Will sleep on that and figure it out tomorrow. Other than that, the right side needs a little adjustment it appears as it does not go up and down as smoothly as the left, I need to ziptie the wiring in a few more places and I should be close to being done. I am saving the override switch install for a later date. I wanted to get it operational first and adjusted correctly before I got into that mod.
     
    Last edited: Feb 25, 2019
  9. Feb 27, 2019 at 8:14 PM
    #9
    flying dave

    flying dave [OP] New Member

    Joined:
    Nov 23, 2018
    Member:
    #22069
    Messages:
    157
    Gender:
    Male
    NC
    After a few days in I'm a little surprised at the force these things "clunk" when retracting. I have a friend with a F150 that came with these steps and his are not as noticeable. Maybe that's because the have cycled hundreds of times. Either way I am happy so far.

    20190226_103313.jpg
    20190226_103336.jpg
     
  10. Feb 28, 2019 at 3:44 AM
    #10
    shinobitactical

    shinobitactical Tundra buddies for life!

    Joined:
    Jun 2, 2018
    Member:
    #15825
    Messages:
    85
    Texas
    Vehicle:
    2022 Platinum Tundra long bed
    Black out emblems, tailgate insert, airbag rear suspension, Toyota branded bakflip bed cover.
  11. Feb 28, 2019 at 4:33 AM
    #11
    robc

    robc New Member

    Joined:
    Feb 28, 2019
    Member:
    #26801
    Messages:
    4
    Vehicle:
    2017 Crewmax Limited 4x4
    Where did you mount the over-ride switch? I have a 2017 and had the AMP's installed. Love them. Only complaint is that they are slightly loud opening and closing when compared to the Ford OEM's
     
  12. Feb 28, 2019 at 6:31 AM
    #12
    r1-superstar

    r1-superstar Kailua Boy

    Joined:
    Jun 20, 2018
    Member:
    #16296
    Messages:
    1,676
    First Name:
    DB
    UTAH
    Vehicle:
    2018 TUNDRA CM SR5 TRD SPORT 4x4 MGM
    Welcome to the forum!! I think the OP stated he didn't install it yet. OP wanted to get operational first.
     
  13. Feb 28, 2019 at 6:54 AM
    #13
    B737

    B737 Throbbing Member

    Joined:
    Feb 17, 2015
    Member:
    #976
    Messages:
    721
    Gender:
    Male
    Jersey Shore
    Vehicle:
    2015 Tundra Double Cab Limited
    very nice!!
     
  14. Feb 28, 2019 at 7:17 AM
    #14
    owb2gp

    owb2gp New Member

    Joined:
    Feb 12, 2018
    Member:
    #12848
    Messages:
    1,186
    Gender:
    Male
    First Name:
    Jason
    ID
    This is where I had mine mounted.

    IMG_20180823_130159.jpg
     
  15. Feb 28, 2019 at 5:14 PM
    #15
    Gixxertek

    Gixxertek New Member

    Joined:
    Nov 8, 2018
    Member:
    #21485
    Messages:
    14
    Vehicle:
    2019 Cement Crew Max
    Did they stop selling the over ride switch? I didn't see it online. If so can somebody post up the schematic as to the wires (color) that the switch bridges? It is a normal switch so shouldn't be difficult to duplicate if I am missing something please let me know. Cheers
     
  16. Feb 28, 2019 at 7:28 PM
    #16
    Snowcat4360

    Snowcat4360 New Member

    Joined:
    Oct 17, 2018
    Member:
    #20683
    Messages:
    202
    Gender:
    Male
    First Name:
    Derek
    Colorado
    Vehicle:
    2018 TRD Sport Crewmax
    Century topper, bed rug, ultimate rod case
  17. Feb 4, 2021 at 1:32 PM
    #17
    BPsTundra

    BPsTundra New Member

    Joined:
    Feb 4, 2021
    Member:
    #58617
    Messages:
    10
    Vehicle:
    2018 SR5
    K&N engine air filter, Rough Country rear bumper with LED reverse, Rough Country bullbar w LED light bar, Ridge Grappler 295/60/20, Moto Metal rims, 3" leveling kit, Amp Research steps, all bulbs replaced w LED, black wrapped front bumper, LED headlight TRD upgrade
    Did y'all find that the driver side door step is closer to the front than the passenger side?
     
  18. Jul 1, 2021 at 11:27 AM
    #18
    cleb4x4

    cleb4x4 New Member

    Joined:
    May 17, 2021
    Member:
    #63181
    Messages:
    4
    Gender:
    Male
    Vehicle:
    2021 Tundra
    ....Need Truck first....
    I know this is a dated thread but wanted to say thanks Dave, your pics just helped me solve the problem without having to sit on the phone with AMP support!!! The AMP directions/visuals are pitiful for this stage of installation.......
     
  19. Sep 18, 2021 at 11:48 PM
    #19
    Wero94

    Wero94 New Member

    Joined:
    Sep 18, 2021
    Member:
    #68252
    Messages:
    8
    Vehicle:
    Tundra 2016 crew cab limited
    Wish color do you have on the pasan get side ?
     
  20. Sep 19, 2021 at 12:01 AM
    #20
    ZappBrannigan

    ZappBrannigan The mind is willing but the flesh is weak

    Joined:
    Dec 31, 2018
    Member:
    #23724
    Messages:
    2,154
    Gender:
    Male
    Canada, by way of Hawaii
    Vehicle:
    2018 1794 MGM
    NVS light bar
    Don’t use these wiring instructions for a 2016, the wiring is different. 2018-2021 are different than prior years.
     
  21. Sep 19, 2021 at 12:20 AM
    #21
    Wero94

    Wero94 New Member

    Joined:
    Sep 18, 2021
    Member:
    #68252
    Messages:
    8
    Vehicle:
    Tundra 2016 crew cab limited
    He has a 2017 that’s why I’m asking
     

Products Discussed in

To Top