1. Welcome to Tundras.com!

    You are currently viewing as a guest! To get full-access, you need to register for a FREE account.

    As a registered member, you’ll be able to:
    • Participate in all Tundra discussion topics
    • Transfer over your build thread from a different forum to this one
    • Communicate privately with other Tundra owners from around the world
    • Post your own photos in our Members Gallery
    • Access all special features of the site

Simple Bed Lights

Discussion in 'Lighting' started by metalsideup, Jan 18, 2019.

  1. Jan 18, 2019 at 5:13 PM
    #1
    metalsideup

    metalsideup [OP] New Member

    Joined:
    Jan 18, 2019
    Member:
    #24711
    Messages:
    3
    Gender:
    Male
    After moving from a 2008 to my 2019, I vowed to rectify a problem I had endured for 10 years: inadequate cargo lighting under my tonneau cover. Enough with holding a flashlight in my mouth...
    My search parameters were simple. I wanted to rely on my truck's battery for the power, no "flashlight" batteries to leak or LED strips to come unglued in the heat. I wanted a system that was simple, meaning no "flashing" from the dealer and with built-in auto-off, just in case I forget to turn off the lights. KISS.
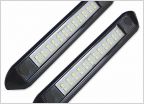
    After extensive searching, I went with a new offering set-up using 4 LED lights very similar to Toyota's offering, hardwired to battery, and the best part is...there is NO switch, they turn off either by touch, or after 1 hour, or when the engine is started. Research them for yourself at Amazon, Robin Electronics.
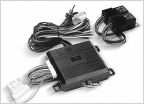
    There is a kit that comes with automotive wire harness and connectors. I didn't use that one because I didn't know if their connectors would pass thru the existing holes. I went with the 4- light hard wire system designed for campers & boats because I wanted to use the four holes that Toyota put in all 4 corners of my 2019's bed. Don't know why they're there, but I used them. I started off by putting in a rubber grommet from my local home-stuff store in each hole. The 4 lights need to be connected together at 3 points: 12vdc power, 12vdc negative, and a 3rd wire that is communicative for the group...let me explain that one. These lights do not require a switch of any kind. They use technology that is called "capacitive touch activation" just like our cell phone screens, meaning if you touch any of the lens with a finger, they ALL turn on, or they ALL turn off. So they communicate. Read that again, no switch is required or necessary, no special wire = tapping, just go to mother battery. These lights turn on with a touch of a finger. They turn off with another touch; or they turn off automatically after 1 hour; or they turn off if the engine is started. Just connect them together and run a line up to the battery, fused of course. Use the existing holes Toyota gave you. Basic circuit wiring is required. Very cool.

    20181205_153916.jpg
    20181205_153932 (1).jpg
    20181205_153940.jpg
     
    Julikins53, 56Pete, PMG and 1 other person like this.
  2. Jan 19, 2019 at 9:51 AM
    #2
    waynescaggs

    waynescaggs No more of that .

    Joined:
    Nov 21, 2018
    Member:
    #22019
    Messages:
    240
    Gender:
    Male
    First Name:
    Wayne
    Idaho
    Vehicle:
    2019 tundra Crewmax Limited
  3. Jan 19, 2019 at 9:57 AM
    #3
    Midnite72

    Midnite72 Anything DIRT !!

    Joined:
    May 26, 2018
    Member:
    #15623
    Messages:
    890
    Gender:
    Male
    First Name:
    Bill
    Northern MD
    Vehicle:
    18 SR 5.7 4x4
    2” level P&P sliders
    Very nice- SIMPLE!!

    Have any nite photos?

    Give us an update in 6- months/ year as to how they are holding up

    Thx for write up
     
  4. Jan 19, 2019 at 10:02 AM
    #4
    Padj

    Padj Life is what happens when you're making plans

    Joined:
    Nov 30, 2018
    Member:
    #22394
    Messages:
    560
    Gender:
    Male
    Denver, Colorado
    Vehicle:
    2019 Limited CM TRD MGM
    Good job. I'm looking for something like this. How long did it take and what was the final cost?
     
    NewImprovedRon likes this.
  5. Jan 19, 2019 at 10:20 AM
    #5
    PMG

    PMG New Member

    Joined:
    Jul 20, 2016
    Member:
    #3936
    Messages:
    791
    Gender:
    Male
    very cool.. interested to hear a longevity review.
     
  6. Jan 20, 2019 at 10:07 PM
    #6
    TundraPro2019

    TundraPro2019 New Member

    Joined:
    Dec 31, 2018
    Member:
    #23769
    Messages:
    107
    Gender:
    Male
    First Name:
    Barthold
    Western Slope, CO
    Vehicle:
    2019 Tundra TRD Pro
    Very cool! I just ordered the Robin lights, thanks for the pointer! Do you have any pictures or tips on how you ran the wiring to the battery?

    Thanks!
     
  7. Jan 21, 2019 at 5:09 AM
    #7
    ldale

    ldale New Member

    Joined:
    Feb 29, 2016
    Member:
    #2800
    Messages:
    294
    Gender:
    Male
    Txk Tx
    Vehicle:
    17' Limited Silver Sky Metalic
    Tonno Pro LowPro , TRD Sway Bar, Helwig Leaf Pack
    I assume that they can be turned Back on after the truck is running. I some times access my bed while the truck is running.
     
  8. Jan 25, 2019 at 10:08 AM
    #8
    metalsideup

    metalsideup [OP] New Member

    Joined:
    Jan 18, 2019
    Member:
    #24711
    Messages:
    3
    Gender:
    Male
    Still going strong here in Colorado, the lights work fine in temps in the teens. I will post some photos of the lighting realized within the bed at night within a few days. Let me answer the few questions and provide a few more install details...
    Yes, the lights can be turned right back on after starting and while the engine is running. The feature they have is they will turn off when the engine is started. I can only confirm that feature works when the lights are powered directly from the battery (I assume they sense the power surge of the start-up), so if an install taps power from somewhere else within the truck, I can't say if the off-on-start will work.
    My cost was $70 for 4 lights and about $15 for some Posi-Products wire connectors and fuse link. I also had and used some 3" rubber epdm roof seal tape to anchor the wires at various points to the underside of the Tundra's body panels (like over the wheel wells) to minimize movement. By the way, I bought this stuff (available everywhere) to completely line the interior of the tailgate when I installed a Pop-n-Lock. This stuff quieted down the activation noise to quieter than the truck's doors...I got the tip from a forum post.

    The wire used I already had in my garage treasure yard. I did use the 2 small screws (included) to mount each light to the bed wall. I thought about using 3M tape, but opted for permanency. The screws got tiny pilot holes first, using the light as the template. Once the light is installed, then the black plastic housing cover you see in my pics gets snapped onto the light covering the screws.
    As mentioned, I started with lining each of the 4 holes already in the Tundra's bed with a rubber grommet, available at Lowes etc. I forget the size, but be prepared to walk back inside to swap out, so bring the Tundra. Each light has 4 wires extending from it about 18" long, 18 ga if memory serves. Three of these wires are used for the simple no-switch set-up, the 4th wire is used if the install will include a mechanical switch. There was no wiring diagram provided, but basic wiring knowledge makes for figuring out the basic circuit. If I recall, all the reds get combined plus 1 run to battery positive; the blacks get combined and 1 run to battery negative (after install I wondered if just creating a ground on the frame would have sufficed and saved some wire); the yellow wires get connected together so they can all communicate when to turn on/off at the same time, and finally the blue wires (used for a mechanical switch if desired) I snipped off. The 2 lights destined for the holes at the tailgate end got their 3 pertinent wires extended by several feet (Posi connectors are low profile and can be fed through the hole one by one) then threaded in the hole. There is a small bracket obstacle behind the hole, but nothing a little determination can't overcome. The wires are then gathered and run over the inside of the wheelwell, then the wires are connected to the wires of the cab-end of the bed lights which are threaded into the hole and end up being accessible between the inside bed skin and frame. Connect the 2 left side lights together, the 2 right side lights together, then run a bridge over and connect the left & right sides together at the 3 wires (I used a length of 4-conductor trailer ribbon cable I had on hand), then run a wire from the left bedside red wire group and a wire from the left bedside black wire group to the battery, installing a simple fuse just prior to the red wire getting connected to the positive terminal of the battery. Your wire routes will vary from mine. One thing to mention is there is another option (mo' money) when ordering these lights where the manufacturer has included a wiring harness ready to go for automotive installs. I didn't go this route because I didn't think the included connectors would pass thru the bed holes. Maybe they will...

    So to recap, my opinion is these lights work well for a truck bed application because there is no switch to forget to turn off. These lights turn on or off by a human finger touching any of the lights on the lens for half a second. They will also turn themselves off automatically after 1 hour. There is no programming involved. They will also turn off automatically when the engine is started. KISS simple.
    I will try to remember to post a 1 year use report next winter.
     
    TundraPro2019 likes this.
  9. Jan 25, 2019 at 6:30 PM
    #9
    TundraPro2019

    TundraPro2019 New Member

    Joined:
    Dec 31, 2018
    Member:
    #23769
    Messages:
    107
    Gender:
    Male
    First Name:
    Barthold
    Western Slope, CO
    Vehicle:
    2019 Tundra TRD Pro
    Great, thank you for the detailed writeup!!
     
  10. Jan 26, 2019 at 9:34 PM
    #10
    TundraPro2019

    TundraPro2019 New Member

    Joined:
    Dec 31, 2018
    Member:
    #23769
    Messages:
    107
    Gender:
    Male
    First Name:
    Barthold
    Western Slope, CO
    Vehicle:
    2019 Tundra TRD Pro
    Installed the lights, really like them! They are super bright. I got the kit with harness. Here's the link. https://www.amazon.com/gp/product/B075Z4QRBX/ref=ppx_yo_dt_b_asin_title_o01__o00_s00?ie=UTF8&psc=1

    As the OP suspected, the connectors on the harness are too big to fit through the existing holes in the side of the truck bed, but no big deal. I just cut off the connectors and soldered the wires together instead. BTW I highly recommend you do this install with two people. So much easier to pull wires.

    upload_2019-1-26_21-52-43.jpg

    The next picture is looking up behind the driver rear wheel (wheel well is to the right, just visible). The left blue arrow points to the box behind the hole in the side of the truck bed. You'll have to do a bit of fishing to get wire through. The other arrow points to the harness wire provided with the kit. I just routed it over the wheel well to the front of the truck bed.

    upload_2019-1-26_21-48-18.jpg

    This picture is looking up on the passenger side, in front of the rear wheel. The arrow points to the box again behind the hole in the side of the truck bed. The wire running to the left goes to the other side of the truck bed. The wire hanging straight down still needs to be pulled over the wheel well to the rear. As you can see the harness was a bit too long so I rolled it up and zip tied it out of the way.

    upload_2019-1-26_21-50-55.jpg


    Running the wire harness to the battery wasn't hard. There's room above the frame to tuck the wire away nicely, and there are a few points where you can zip tie it. Sorry, no pictures. The next picture shows where I routed the wires into the engine bay. It is hard to see, you can just see the black wire harness where the blue arrow is.

    upload_2019-1-26_22-28-54.jpg

    Routing to the battery. Don't forget a fuse! 5 amp is plenty. The other set of wires you see are for my HAM radio.

    upload_2019-1-26_22-27-16.jpg

    Finally a few pictures with the lights installed. As you can see I mounted them at a 45 degree angle to try to get the light more evenly distributed in the truck bed. The lights are quite diffuse, so not sure this really matters.


    upload_2019-1-26_22-31-43.jpg

    upload_2019-1-26_22-32-24.jpg
     

Products Discussed in

To Top