

-
Welcome to Tundras.com!
You are currently viewing as a guest! To get full-access, you need to register for a FREE account.
As a registered member, you’ll be able to:- Participate in all Tundra discussion topics
- Transfer over your build thread from a different forum to this one
- Communicate privately with other Tundra owners from around the world
- Post your own photos in our Members Gallery
- Access all special features of the site
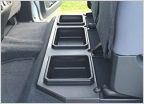 Under Rear Seat Subwoofers???
 No Apple CarPlay? What aftermarket headset?
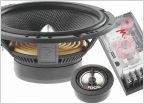 Head unit, subs and amp inbound - now what speakers??
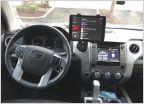 IPad through stock headunit
 Radio wiring SNAFU
Show us your FRAC installation
Discussion in 'Audio & Video' started by TundraTex, Sep 30, 2017.
Page 2 of 4
Page 2 of 4

