1. Welcome to Tundras.com!

    You are currently viewing as a guest! To get full-access, you need to register for a FREE account.

    As a registered member, you’ll be able to:
    • Participate in all Tundra discussion topics
    • Transfer over your build thread from a different forum to this one
    • Communicate privately with other Tundra owners from around the world
    • Post your own photos in our Members Gallery
    • Access all special features of the site

Stuck midway through FRAC install.

Discussion in '2.5 Gen Tundras (2014-2021)' started by Shadowfax1, Oct 10, 2022.

  1. Oct 10, 2022 at 6:28 PM
    #1
    Shadowfax1

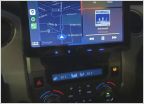
    Shadowfax1 [OP] New Member

    Joined:
    Jan 1, 2022
    Member:
    #72547
    Messages:
    390
    Gender:
    Male
    First Name:
    Dan
    San Francisco Bay Area
    Vehicle:
    2018 Toyota Tundra 1794 Edition w/ TRD Off-Road Package
    Can someone take a moment to give me some guidance? I’m trying to install my FRAC harness from @TundraTex and a Natika front camera (this specific one). I’m not sure where one particular wire goes.

    I started out hooking up the video (yellow) to the yellow connector on the camera’s extension cable.

    I also connected the power (red) and soldered the red power lines together. See photo.

    5AF58D06-3FB1-4403-9607-97FABA69934C.jpg

    That left the other end of the yellow video line…

    34DDB6AD-3CAF-4A31-B1DF-9E1D868E3FC0.jpg

    which has a red wire sticking out that I believe to be the one that gets connected to the red power wire coming off the FRAC harness, once it’s all pulled through and behind the dash.

    6FDC1C96-DCF5-49AE-BDA0-B16C5B88556A.jpg

    The other end of the camera power cable is where I’m confused. It has a split red and black wire…

    0A05316F-E509-4774-9DEF-CD962532F39E.jpg

    My understanding is the black wire gets grounded, and there’s some grounding points along the left wall of the engine bay next to the air box.

    But where does that red wire next to the ground wire get connected???
     
  2. Oct 10, 2022 at 7:13 PM
    #2
    TundraTex

    TundraTex FRAC On!

    Joined:
    Sep 9, 2016
    Member:
    #4476
    Messages:
    1,151
    Gender:
    Male
    First Name:
    Lou
    DFW Texas
    Vehicle:
    '16 TSS CM 4x4
    In every variation of camera wire harnesses I have seen from Natika. The two red wires in the camera power harness are internally connected to each other. So you can use either of them. The remaining red wire in your last photo can be snipped and capped. Make sure it's well insulated because it will be tied internally to the 12 volts. I would suggest a quick check with a multi-meter or continuity tester to verify, but I'm fairly certain this will be the case.
     
  3. Oct 10, 2022 at 8:08 PM
    #3
    Shadowfax1

    Shadowfax1 [OP] New Member

    Joined:
    Jan 1, 2022
    Member:
    #72547
    Messages:
    390
    Gender:
    Male
    First Name:
    Dan
    San Francisco Bay Area
    Vehicle:
    2018 Toyota Tundra 1794 Edition w/ TRD Off-Road Package
    Perfect. Thanks for the fast help!
     
  4. Oct 15, 2022 at 4:18 PM
    #4
    Shadowfax1

    Shadowfax1 [OP] New Member

    Joined:
    Jan 1, 2022
    Member:
    #72547
    Messages:
    390
    Gender:
    Male
    First Name:
    Dan
    San Francisco Bay Area
    Vehicle:
    2018 Toyota Tundra 1794 Edition w/ TRD Off-Road Package
    Hey folks. The FRAC install video shows the video cord being pushed through the bottom grommet on the firewall. Is there any particular reason it has to be the bottom one? Looks like there’s a top grommet as well, and it’s much easier to reach than the bottom one.
     
    Ely010606 likes this.
  5. Oct 15, 2022 at 4:38 PM
    #5
    Rangergillikin

    Rangergillikin New Member

    Joined:
    Jul 14, 2022
    Member:
    #80664
    Messages:
    204
    Gender:
    Male
    First Name:
    Jason
    Alabama
    Vehicle:
    2021 magnetic grey TRD Pro Crew Max.
    TracRac bed rack, Retrax bedcover, Anytime forward facing camera, Rago dash mounting plate, changed all lights to LED with 1200lumen reverse light, added LED above tag reverse light, rear bumper step, Go Rhino step sides, CCM Cat Security Shield, tool mounts on bed rails, added tie down pad eye on bed rails.
    I don’t think it matters.
     
    Ely010606 likes this.
  6. Oct 15, 2022 at 5:05 PM
    #6
    Ely010606

    Ely010606 New Member

    Joined:
    Aug 27, 2017
    Member:
    #9286
    Messages:
    4,033
    Gender:
    Male
    SPARKS, NV
    Vehicle:
    2017 QS SR5 CM TRD 4x4
    I think it’s just preference, I did mine on the top grommet , so much easier.
     
  7. Oct 15, 2022 at 7:35 PM
    #7
    Shadowfax1

    Shadowfax1 [OP] New Member

    Joined:
    Jan 1, 2022
    Member:
    #72547
    Messages:
    390
    Gender:
    Male
    First Name:
    Dan
    San Francisco Bay Area
    Vehicle:
    2018 Toyota Tundra 1794 Edition w/ TRD Off-Road Package
    Did you actually cut off the tip, or push it through? I saw another YouTube video where it said to just push it in, but that doesn’t make sense to me. Cut off just the tip, or did you cut off the whole nipple?
     
    Ely010606[QUOTED] likes this.
  8. Oct 15, 2022 at 7:40 PM
    #8
    Ely010606

    Ely010606 New Member

    Joined:
    Aug 27, 2017
    Member:
    #9286
    Messages:
    4,033
    Gender:
    Male
    SPARKS, NV
    Vehicle:
    2017 QS SR5 CM TRD 4x4
    I got the metal hanger taped the wire on one end and pushed the other end through, and I sprayed the taped side with gun oil so it will slide in smother, I just pushed it through the tip I didn’t cut the nipple. Hopefully that makes sense.
     
    bulldog93 and Shadowfax1[OP] like this.
  9. Oct 15, 2022 at 7:47 PM
    #9
    Shadowfax1

    Shadowfax1 [OP] New Member

    Joined:
    Jan 1, 2022
    Member:
    #72547
    Messages:
    390
    Gender:
    Male
    First Name:
    Dan
    San Francisco Bay Area
    Vehicle:
    2018 Toyota Tundra 1794 Edition w/ TRD Off-Road Package
    It does. I assume there’s a whole in the nipple tip then. I couldn’t reach it well enough to look closely. And the FRAC install video said to make a cut, so just trying to figure it out.

    Thanks!
     
    Ely010606[QUOTED] likes this.
  10. Oct 15, 2022 at 7:52 PM
    #10
    Ely010606

    Ely010606 New Member

    Joined:
    Aug 27, 2017
    Member:
    #9286
    Messages:
    4,033
    Gender:
    Male
    SPARKS, NV
    Vehicle:
    2017 QS SR5 CM TRD 4x4
    There’s no hole in the nipple, I just pushed it through, the metal hanger punctured it through, the nipple will go in forward when you push the hanger through, that’s why i sprayed the oil or grease so it will go in smoothly and when you get through you can push the hanger back and forth and the nipple will come back the the same position.
    Or you can push the grommet in and push the hanger through.
     
    Shadowfax1[OP] likes this.
  11. Oct 15, 2022 at 7:58 PM
    #11
    Ely010606

    Ely010606 New Member

    Joined:
    Aug 27, 2017
    Member:
    #9286
    Messages:
    4,033
    Gender:
    Male
    SPARKS, NV
    Vehicle:
    2017 QS SR5 CM TRD 4x4
    Also you don’t have to use the nipple, you can puncture on the flat side also, that what i did also for my pop and lock taillight wire. But you have to use grease and oil on the hanger and wire
     
    Shadowfax1[OP] likes this.
  12. Oct 16, 2022 at 6:50 AM
    #12
    TundraTex

    TundraTex FRAC On!

    Joined:
    Sep 9, 2016
    Member:
    #4476
    Messages:
    1,151
    Gender:
    Male
    First Name:
    Lou
    DFW Texas
    Vehicle:
    '16 TSS CM 4x4
    Either is fine. I found it easier to access inside the cab going through the bottom, but it is a little more difficult in the engine bay.
     
  13. Nov 2, 2022 at 9:17 AM
    #13
    Shadowfax1

    Shadowfax1 [OP] New Member

    Joined:
    Jan 1, 2022
    Member:
    #72547
    Messages:
    390
    Gender:
    Male
    First Name:
    Dan
    San Francisco Bay Area
    Vehicle:
    2018 Toyota Tundra 1794 Edition w/ TRD Off-Road Package
    morning folks.

    One last problem.

    I swear I’ve almost got this. One last hurdle I hope. I have young kids and an insane job so I never get 2-3 hours at one time to get through it, so im doing it piece by piece.B2E1AC0C-2365-471C-89A1-230EE3356D12.jpg 6475C068-FD5D-40B4-A9CD-0EC3943482D6.jpg

    i can’t figure out how to route the switch wires out of the head unit compartment. I have a 1794 and it’s all but a solid surface in there. There’s several grooves but none of them go down below or out to the sides. (I need to get below as I plan to put the switches in the console trim that surrounds the shifter and cup holders).

    There seems to be a cavity going back behind the instrument cluster, but that won’t help me get back out to the center trim.

    Do I have no choice but to remove the gray trim panel surrounding the radio?
     
    bulldog93 likes this.
  14. Nov 2, 2022 at 9:24 AM
    #14
    Tundra234

    Tundra234 New Member

    Joined:
    Nov 30, 2018
    Member:
    #22402
    Messages:
    16,133
    Gender:
    Male
    First Name:
    George
    Florida
    Vehicle:
    2020 Tundra DC SR5 Barcelona
    Alot of them
    You can drop the wires down to the right side of the radio. If you pull that trim piece above the glove box, that will give you some more room to feel around in there.
     
    Retired...finally and bulldog93 like this.
  15. Nov 2, 2022 at 9:55 AM
    #15
    Shadowfax1

    Shadowfax1 [OP] New Member

    Joined:
    Jan 1, 2022
    Member:
    #72547
    Messages:
    390
    Gender:
    Male
    First Name:
    Dan
    San Francisco Bay Area
    Vehicle:
    2018 Toyota Tundra 1794 Edition w/ TRD Off-Road Package
    i found a way down the side as you mentioned, and also a very small cavity in the front center that goes straight down. Problem though is I need to get it all the way down under the central shift console so it can come up into the bottom of that trim panel. way easier said than done as the side cavity doesn’t seem to go that far. I may just settle for mounting them on the inner top wall of the piece with the power sockets, alarm sensor, and USB.
     
  16. Nov 2, 2022 at 11:00 AM
    #16
    Shadowfax1

    Shadowfax1 [OP] New Member

    Joined:
    Jan 1, 2022
    Member:
    #72547
    Messages:
    390
    Gender:
    Male
    First Name:
    Dan
    San Francisco Bay Area
    Vehicle:
    2018 Toyota Tundra 1794 Edition w/ TRD Off-Road Package
    Gave up on that location to use the much more accessible panel with the power sockets and USB that so many others are using. But ugh!!! Oh so close to being done. Any suggestions how to make this fit?

    131DE0C2-1E5F-4DB8-8964-22A33D27B893.jpg
     
  17. Nov 2, 2022 at 11:56 AM
    #17
    Shadowfax1

    Shadowfax1 [OP] New Member

    Joined:
    Jan 1, 2022
    Member:
    #72547
    Messages:
    390
    Gender:
    Male
    First Name:
    Dan
    San Francisco Bay Area
    Vehicle:
    2018 Toyota Tundra 1794 Edition w/ TRD Off-Road Package
    Okay, here’s where I’m at. I cut off the connectors that came with the wire to solder the wire directly to the switch terminals. When I was done, I was getting only the rear camera on the screen at all times and the switches didn’t work. I figured the quality of my soldering was not very good. I have to get to work and out of town though, so I cut off the wires from the soldered terminal and will re-solder in the days ahead.

    Something interesting though. I’m now getting an “SRS Airbag Malfunction. Visit your dealer.” error on the instrument cluster when I start the car. It wasn’t doing that before.

    Obviously I didn’t work on any wires but the ones related to the FRAC kit, and obviously the kit isn’t going to cause an airbag malfunction. Does anyone happen to know if there is an airbag wire behind the head unit somewhere that maybe got knocked loose, and what it might look like?
     
  18. Nov 2, 2022 at 2:04 PM
    #18
    TundraTex

    TundraTex FRAC On!

    Joined:
    Sep 9, 2016
    Member:
    #4476
    Messages:
    1,151
    Gender:
    Male
    First Name:
    Lou
    DFW Texas
    Vehicle:
    '16 TSS CM 4x4
    Just getting a chance to check in to the forum today. That area above the power sockets is tight. As you discovered. You can use right angle ‘Flag’ spade terminals or solder directly.

    First make sure your switch is wired properly (- is white, 0 is red and = is blue). When you solder a metal terminal in a plastic switch housing, it’s best to use some sort of heat sink at the base of the pin and/or use a very light touch with the soldering iron. It’s possible you melted something in the switch. To check this, move the switch to the center (off, 0) position and then with the ignition on Measure voltage between each of the three pins and ground. You should only have 12 volts on the center (red wire) pin. If you have it on either of the other pins in this position you have a bad switch.

    It’s possible the connector on the back of the Environmental control panel is not reconnected properly. The panel has a passenger airbag indicator. Not sure if that would cause the fault you are seeing but make sure you plugged that back in securely.
     
    Last edited: Nov 2, 2022
  19. Nov 2, 2022 at 8:38 PM
    #19
    Shadowfax1

    Shadowfax1 [OP] New Member

    Joined:
    Jan 1, 2022
    Member:
    #72547
    Messages:
    390
    Gender:
    Male
    First Name:
    Dan
    San Francisco Bay Area
    Vehicle:
    2018 Toyota Tundra 1794 Edition w/ TRD Off-Road Package
    Thank you good sir. Your help is greatly appreciated.

    just in case I did blow the switch, where can I source the ones you included in the kit should I need to replace them?
     
  20. Nov 4, 2022 at 7:25 AM
    #20
    TundraTex

    TundraTex FRAC On!

    Joined:
    Sep 9, 2016
    Member:
    #4476
    Messages:
    1,151
    Gender:
    Male
    First Name:
    Lou
    DFW Texas
    Vehicle:
    '16 TSS CM 4x4
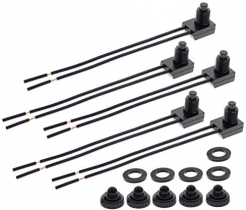
    You can search Amazon for 3 pin on-off-on switch. You can probably buy multiple switches for less than it would cost me to ship one to you. Make sure you get the switch sized for a 20mm hole. I believe there are some that use a 15mm hole as well.
     
  21. Nov 4, 2022 at 10:45 AM
    #21
    Scud

    Scud New Member

    Joined:
    Aug 16, 2017
    Member:
    #9069
    Messages:
    397
    Gender:
    Male
    First Name:
    Mike
    San Francisco Bay Area
    Vehicle:
    2017 1794 Tundra Super White
    Working on it :-)
    @Shadowfax1

    Where in the bay area are you? I may have some extra switches. I am in Livermore. If close by let me know which one your looking for.

    -Mike
     
    Shadowfax1[OP] likes this.
  22. Nov 4, 2022 at 10:50 AM
    #22
    Scud

    Scud New Member

    Joined:
    Aug 16, 2017
    Member:
    #9069
    Messages:
    397
    Gender:
    Male
    First Name:
    Mike
    San Francisco Bay Area
    Vehicle:
    2017 1794 Tundra Super White
    Working on it :-)
    I did find the front/rear unused camera switch. Let me know if you want to grab it.

    -Mike
     
    Shadowfax1[OP] likes this.
  23. Nov 6, 2022 at 11:18 AM
    #23
    Shadowfax1

    Shadowfax1 [OP] New Member

    Joined:
    Jan 1, 2022
    Member:
    #72547
    Messages:
    390
    Gender:
    Male
    First Name:
    Dan
    San Francisco Bay Area
    Vehicle:
    2018 Toyota Tundra 1794 Edition w/ TRD Off-Road Package
    Thanks. I found and ordered some of both the three-way and two-way switches. Not sure yet I burned the originals as I’m still on the road, but I’ll have other uses for these anyway.
     
    TundraTex[QUOTED] likes this.
  24. Nov 6, 2022 at 11:20 AM
    #24
    Shadowfax1

    Shadowfax1 [OP] New Member

    Joined:
    Jan 1, 2022
    Member:
    #72547
    Messages:
    390
    Gender:
    Male
    First Name:
    Dan
    San Francisco Bay Area
    Vehicle:
    2018 Toyota Tundra 1794 Edition w/ TRD Off-Road Package
    Thanks Mike. That’s super kind of you. I’m not far at all from Livermore. We live in the hills above Dublin. But I’m this case, I have a 1794 so there’s no where to put OEM style switches. So I needed the round ones. Found some on Amazon for $6 and free shipping. Thanks so very much for the kind offer though!
     
    TundraTex likes this.
  25. Nov 10, 2022 at 10:33 AM
    #25
    jimmyfu

    jimmyfu New Member

    Joined:
    Feb 5, 2020
    Member:
    #42194
    Messages:
    160
    Gender:
    Male
    N. California
    Vehicle:
    2014 Tundra DC SR
    I'm in the hills between Dublin + CV, let me know if you need some help as well. I've done this install before, albeit on a 2014 SR. I'd like to think I'm decent with wiring though
     
  26. Nov 11, 2022 at 1:47 PM
    #26
    Shadowfax1

    Shadowfax1 [OP] New Member

    Joined:
    Jan 1, 2022
    Member:
    #72547
    Messages:
    390
    Gender:
    Male
    First Name:
    Dan
    San Francisco Bay Area
    Vehicle:
    2018 Toyota Tundra 1794 Edition w/ TRD Off-Road Package
    Thanks brother. Gracious offer.
    I’m down for the count with Covid. I’ll pick up the project after I recover.
    Sent you a PM
     

Products Discussed in

To Top