1. Welcome to Tundras.com!

    You are currently viewing as a guest! To get full-access, you need to register for a FREE account.

    As a registered member, you’ll be able to:
    • Participate in all Tundra discussion topics
    • Transfer over your build thread from a different forum to this one
    • Communicate privately with other Tundra owners from around the world
    • Post your own photos in our Members Gallery
    • Access all special features of the site

Quick, easy, cheap, and versatile dual battery setup.

Discussion in 'Electrical' started by Terndrerrr, Jul 25, 2021.

  1. Jul 25, 2021 at 6:55 PM
    #1
    Terndrerrr

    Terndrerrr [OP] guzzling dealer repellent

    Joined:
    Jul 8, 2019
    Member:
    #32965
    Messages:
    5,042
    Gender:
    Male
    Music City
    Vehicle:
    Dual 5.7s
    TRD Fox, RAS, 285/75 DTs, dual battery, SS3 Pro
    I thought I’d share how I wired up my dual battery system. My goal was to power a Dometic fridge for a full day and night with the truck not running. I used a marine battery box for the house battery, which was kept in the bed. The box was $65 from Amazon and came wired with a 12VDC jack, USB jack, trolling motor terminals, and a battery level indicator. The idea was that I would be driving each day and charging the house battery between campsites. PLUS, I can keep the fridge cold in the truck on the way to the lake, then put the battery box and fridge in the boat and keep everything nice and cold out on the lake for the day. This is the main reason for the battery box–flexibility for use in and out of the truck.

    Special thanks to @blackoutt and his responses in this thread!

    This setup worked perfectly on our recent trip to CO. Bonus: what I ended up with was cheaper and simpler than I initially thought it would be.

    Parts needed:

    You can pick these up at Home Depot:
    #8 self-tapping sheet metal screws (note: this link is for a 100-pack. you only need two. These will be used to mount the PAC500 relay/isolator in the engine bay)
    • 1ft black 12-gauge copper wire from the rack of wire spools in the electrical section
    12 gauge ring terminals (you only need 2 of em)

    From AutoZone:
    • (2) Duralast Platinum AGM 24F batteries (why these batteries? It's easy to find an AutoZone pretty much anywhere)

    From Amazon:
    Red 2Ga copper wire 25'
    Black 2Ga copper wire 5'
    Military grade battery terminal set
    (6) 2Ga 3/8" (M10) ring terminals (buy the 10pack)
    Assorted 3:1 Dual wall glue lined marine heat shrink
    • (1) Add-a-fuse
    (2) mini 20A blade fuses
    (2) 200A 2Ga ANL fuses
    PAC500 relay/isolator
    Trolling motor battery box
    Thermo-Tec 8x40 battery insulation
    GM diode

    Tools needed:
    Wrenches (Allen, box-end ratcheting)
    Drill
    Impact driver
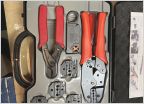
    10-Ton Hydraulic crimper tool
    Heat gun or hair dryer for the heat shrink
    Benchmade pocketknife

    This is an easy project. The only tough part is that you are essentially making your own 2gauge battery cables out of the wires and the terminal ends. You’ll need the hydraulic crimper tool to secure the ring terminal ends on the 2Ga wire. It is very intuitive to operate.

    1. Under the hood:
    I read that AGMs don’t typically like to be in the engine bay, so I wrapped this one in some battery insulation. Here, just to the right of the battery, you can see the PAC500 relay/isolator. The two large posts connect to the (+) terminals of the two batteries. The smaller posts provide power to the PAC500. It doesn’t matter which of the smaller posts you use for ground and which you use to run to the fuse box with the add-a-fuse. The way the PAC500 works is it relays power from the alternator to charge both batteries while the truck is running, and it isolates the two from each other when the truck is off, so your fridge won't drain your starting battery.
    0C3A088F-7ADF-457B-AFED-D8770508812F.jpg
    Note: look at the red cables. 1 ring terminal end on the battery, and one on the PAC500. The ends that connect to the 200A fuse are bare. Use your sweet Benchmade to cut the insulation and expose 1/2" of the wire and crimp it into the fuse ends using the included Allen wrench. You'll use (4) ring terminals wiring your two batteries to the PAC500 and (2) ring terminals wiring your short ground cable to the second battery.

    2. In the fuse box:
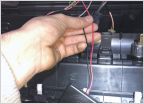
    I used my add-a-fuse to plug the PAC500’s hot wire into the 20A fuse labeled WASHER. The PAC500 needs to see a certain level of constant power. I used my multimeter to check, and this washer fuse spot works perfectly. This is for the windshield washer fluid pump. The way an add-a-fuse works is it jumpers a 2nd circuit into the same fuse slot. So, you have to put an equivalent fuse into the bottom slot on the side of the add-a-fuse to the fuse you removed from the fuse box. In this pic, the bottom fuse is for the Washer fluid pump , and the top fuse is for the PAC500. Crimp your 12Ga ring terminal to the other end, add your heat shrink, and you’re good to go.
    47FECF3D-8F93-4359-B088-3B9383744973.jpg

    2a. The GM Diode:
    This replaces the fuse in your Alt-S slot. It allows your battery to charge the AGM batteries to what they want to be charged up to. You have to shave the sides down so that they are flush with the blades just like a mini blade fuse. It only works one way. Below it is the taller black diode between the red 10A fuses. Note the arrow on the top. It appears that the voltage fed to the batteries is regulated because I observe it backing off about .5V after a while on my Fusion app.
    IMG_6836.jpg

    I ran the other 2Ga hot from the PAC500 to the house battery in the bed along the top of the drivers side frame. It is zip-tied in several places. I crossed to the other side of the truck and came into the bed via the rightmost drain hole. These two battery cables have 2ga ring terminal ends crimped on and are connected to the battery via the pair of military terminals from Amazon. The second 200A fuse is inside the battery box with the house battery:
    60127D73-9684-4129-A01B-960C2B54C3F3.jpg

    The ground cable for the house battery has been run through the same drain hole in the pic above to an existing bolt on the underside of the cab right above the frame rail in front of the rear passenger side tire:
    26C5549C-06B1-415A-BC2D-BDC04EF67928.jpg

    All I need to do is place my fridge in the slide and plug its DC power cord into the 12VDC jack on the battery box. Here’s a pic of the battery box tucked in and strapped to the tie-down in the corner:
    22EBB075-88C0-457B-94FB-736DFB422EEF.jpg
     
    Last edited: Jul 28, 2021
  2. Jul 25, 2021 at 6:55 PM
    #2
    Terndrerrr

    Terndrerrr [OP] guzzling dealer repellent

    Joined:
    Jul 8, 2019
    Member:
    #32965
    Messages:
    5,042
    Gender:
    Male
    Music City
    Vehicle:
    Dual 5.7s
    TRD Fox, RAS, 285/75 DTs, dual battery, SS3 Pro
    reserved
     
  3. Jul 25, 2021 at 7:26 PM
    #3
    gosolo

    gosolo You Don’t Know Who I Am But I Know Where You Live

    Joined:
    Nov 5, 2015
    Member:
    #2064
    Messages:
    7,937
    Gender:
    Male
    First Name:
    Ray
    NW Oregon
    Vehicle:
    2015 DC Super Fine Super White Pro
    2"CB shackles, bushings and 1 shim, lockerdown console vault, rear folding seat back mod, snugtop shell with opening side windows, 46g fuel tank, SDHQ sliders and hidden winch, Decked Drawers, Alcan leaf springs and got rid of the interior chrome
    Nice job! Great post!
     
    coldcanuk and Terndrerrr[OP] like this.
  4. Sep 10, 2021 at 7:44 AM
    #4
    BigBlackTundy

    BigBlackTundy New Member

    Joined:
    Sep 10, 2021
    Member:
    #67858
    Messages:
    1
    Gender:
    Male
    @Terndrerrr did this kill the alternator at all having to charge 2 batteries?
     
  5. May 10, 2022 at 11:26 PM
    #5
    Terndrerrr

    Terndrerrr [OP] guzzling dealer repellent

    Joined:
    Jul 8, 2019
    Member:
    #32965
    Messages:
    5,042
    Gender:
    Male
    Music City
    Vehicle:
    Dual 5.7s
    TRD Fox, RAS, 285/75 DTs, dual battery, SS3 Pro
    Sorry I missed this question several months ago. :facepalm:

    I’ve had the second battery in the bed ever since, and everything is still running just fine.
     
  6. Aug 4, 2022 at 6:37 AM
    #6
    synergy58

    synergy58 New Member

    Joined:
    Jan 24, 2022
    Member:
    #73604
    Messages:
    46
    Gender:
    Male
    Somewhere between Pensacola FL and Travis AFB CA
    Great idea, nice job! I’d love to do this for mine (’05 access, TRD 4x4 with topper). I need a cooler set up badly.

    I don’t understand this part of your write up… have some Q’s, if you will.

    "2a. The GM Diode:
    This replaces the fuse in your Alt-S slot. It allows your battery to charge the AGM batteries to what they want to be charged up to. You have to shave the sides down so that they are flush with the blades just like a mini blade fuse. It only works one way. Below it is the taller black diode between the red 10A fuses. Note the arrow on the top. It appears that the voltage fed to the batteries is regulated because I observe it backing off about .5V after a while on my Fusion app.”

    Why did you use a GM Diode?
    What do you mean by “you have to shave the sides down?” Why? You say it only works one way. Is there any chance of mistakingly inserting this “Diode” incorrectly, given the arrow direction? I mean, what happens if its the wrong direction, anything?

    You did a great job on this write up! Thanks!
     
  7. Aug 4, 2022 at 6:58 AM
    #7
    Terndrerrr

    Terndrerrr [OP] guzzling dealer repellent

    Joined:
    Jul 8, 2019
    Member:
    #32965
    Messages:
    5,042
    Gender:
    Male
    Music City
    Vehicle:
    Dual 5.7s
    TRD Fox, RAS, 285/75 DTs, dual battery, SS3 Pro
    I used it because it changes the voltage to what the AGM batteries want to see. It's a common thing to use.
    Make sure the arrow points at the front of the truck as pictured.
    I don't know what happens if you put it in the wrong way.
    Its blades are the right size, but its larger plastic housing prevents you from being able to seat it into the slot.
    Just shave the excess plastic off the sides until it fits.
     
    synergy58[QUOTED] likes this.
  8. Sep 16, 2022 at 9:49 PM
    #8
    Chad D.

    Chad D. New Member

    Joined:
    Feb 12, 2019
    Member:
    #26010
    Messages:
    1,087
    Gender:
    Male
    Western Oregon
    Vehicle:
    2018 CrewMax Platinum
    All I’d change is to use a Blue Sea ACR instead of that basic relay. It’ll keep batteries separate till your start battery is full, and then connect. The two batteries stay connected till voltage drops below 12.6, and then you’re fridge is on just the house battery.

    should you kill the main battery (leave lights on?) and need to jump start yourself, just hit the switch and your ACR connects batteries so you can start from the house….
     
    azTony, KeithH and Saltyhero13 like this.
  9. Apr 19, 2024 at 12:43 PM
    #9
    Delta57

    Delta57 New Member

    Joined:
    Aug 9, 2023
    Member:
    #101829
    Messages:
    48
    Gender:
    Male
    Vehicle:
    2006 Red Tundra DC limited
    So that goes in place of the GM diode? Also would I be able to hook up an agm battery like this without swapping my normal truck battery to one as well?
     
    Last edited: Apr 19, 2024 at 1:16 PM
  10. Apr 19, 2024 at 1:31 PM
    #10
    Terndrerrr

    Terndrerrr [OP] guzzling dealer repellent

    Joined:
    Jul 8, 2019
    Member:
    #32965
    Messages:
    5,042
    Gender:
    Male
    Music City
    Vehicle:
    Dual 5.7s
    TRD Fox, RAS, 285/75 DTs, dual battery, SS3 Pro
    Well, it has been a long time. Setup still works great. Still using the same two AGM 24F batteries that I had when I did this write-up.
    I guess I missed this the first time around. I like the relay I used because I don’t want the fridge seeing my starting battery at all when the truck is off.

    House battery is still mounted in the front right side of the bed.
    He said to use a different relay instead of the one I use. I guess if you really wanted to remove the battery from the bed (it hasn’t got in my way; I just cover it with a tarp when getting mulch or something), you would just disconnect the entire system from the positive post of your starting battery. If you’re using AGM batteries, the GM diode would stay.
     
  11. Apr 19, 2024 at 1:56 PM
    #11
    Delta57

    Delta57 New Member

    Joined:
    Aug 9, 2023
    Member:
    #101829
    Messages:
    48
    Gender:
    Male
    Vehicle:
    2006 Red Tundra DC limited
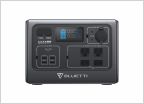
    oh okay, i'm probably gonna put the battery box inside a spot in the cabinet i'm building in the bed so it wouldnt be in the way but its the only truck i have access too so the option to take it all out is key too, if thats the case i could probably easily add a disconnect off the main battery and in the bed...eventually i would love to just get a full solar generator setup that charges off the truck, solar, or shore power.

    other thing would be if i could use an agm and my standard lead acid battery in the same system?

    I guess i'm just realizing too with the fuse block and all that I have an 06 double cab so I wonder how similar that would be and if the gm diode would work still?
     
  12. Apr 19, 2024 at 4:31 PM
    #12
    Chad D.

    Chad D. New Member

    Joined:
    Feb 12, 2019
    Member:
    #26010
    Messages:
    1,087
    Gender:
    Male
    Western Oregon
    Vehicle:
    2018 CrewMax Platinum

    The ACR is an Auto Charge Relay. It will not increase charging voltage like a GM diode. It will just manage how your batteries interface with the charging circuit and each other. It’s just a “smart-ish” relay.

    If you want to use a flooded lead acid battery for the starting and an AGM or LiFePo for your house, you’ll want a DC to DC charger between the batteries. That’ll keep them safe from each other, and let you customize the voltage to the house battery without the use of a GM diode. You would also want a relay to shut off the charger when the vehicle is off. Might need a diode for a sensing wire if you want to use an ACR type relay for this application.

    Solar is also pretty simple. Look up my thread on the system I put in my truck. It’s still working perfectly.
     
  13. Apr 22, 2024 at 1:17 PM
    #13
    Delta57

    Delta57 New Member

    Joined:
    Aug 9, 2023
    Member:
    #101829
    Messages:
    48
    Gender:
    Male
    Vehicle:
    2006 Red Tundra DC limited
    Oh sweet, I'm gonna look up your thread then sounds like between these two I options I should be able to get something to work for me
     
  14. Apr 22, 2024 at 2:31 PM
    #14
    Chad D.

    Chad D. New Member

    Joined:
    Feb 12, 2019
    Member:
    #26010
    Messages:
    1,087
    Gender:
    Male
    Western Oregon
    Vehicle:
    2018 CrewMax Platinum

Products Discussed in

To Top