1. Welcome to Tundras.com!

    You are currently viewing as a guest! To get full-access, you need to register for a FREE account.

    As a registered member, you’ll be able to:
    • Participate in all Tundra discussion topics
    • Transfer over your build thread from a different forum to this one
    • Communicate privately with other Tundra owners from around the world
    • Post your own photos in our Members Gallery
    • Access all special features of the site

What have you done to your 2nd gen Tundra today?

Discussion in '2nd Gen Tundras (2007-2013)' started by T-Rex266, Jan 7, 2014.

  1. Oct 15, 2021 at 6:22 PM
    Retroboy1989

    Retroboy1989 'Course it's 4x4!

    Joined:
    Mar 9, 2021
    Member:
    #60209
    Messages:
    1,017
    Gender:
    Male
    Northern Utah
    Vehicle:
    2012 DC 4x4 5.7 SR5 TRD OR Barcelona
    Snug top 20" TRD Sport wheels 275/60R20 Tires Additional Trans Cooler
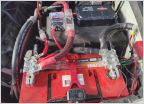
    Started this a few days ago, just got around to pictures. I don't daily drive the Tundra...I really only ever use it on the weekends. I think i have only put about 40 miles on it since August. After all that sitting, my battery was completely discharged. I'm still not convinced something didn't run it down, but no lights were left on. I took out my Bluetooth obd reader for good measure. Battery held to 12.4V after being charged last weekend.

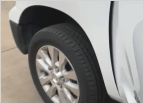
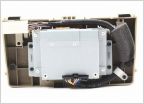
    The fun part- I bought a battery tender and ran a permanent cable to my battery. I zip tied the lead end to the side of my tow hook. I adjusted the length so I can tuck the plug above thr skid plate for driving. My last step is to work out a system so I don't back out while connected to power.:eek2:

    Edit: The ring terminal cable that comes with the battery tender is nowhere near long enough if you want to connect with the hood closed. I extended it by about 7ft to run it across and down to my right tow hook. 14gauge grey jacketed cable is only .69c from super bright leds. It's good stuff that I also used to run constant power to my cap. Link.
    20211015_184236.jpg
    20211015_184257.jpg
     
    Last edited: Oct 15, 2021
  2. Oct 15, 2021 at 6:40 PM
    raymond_hb

    raymond_hb New Member

    Joined:
    Mar 21, 2021
    Member:
    #60752
    Messages:
    188
    Gender:
    Male
    Oakland, CA
    Vehicle:
    07 Tundra Limited 2WD
    Call it “first timer paranoia” since it was my first time doing any oil change I wanted to get it from the dealership and price wasn’t bad either for their synthetic oil. For the differential yes first time previous owner had engine oil change maintenance record only and I’m glad you said it looks fine considering that my tundra is a daily driver, I’ve had multiple trips and have taken it to a few off road areas
     
  3. Oct 15, 2021 at 6:44 PM
    Retroboy1989

    Retroboy1989 'Course it's 4x4!

    Joined:
    Mar 9, 2021
    Member:
    #60209
    Messages:
    1,017
    Gender:
    Male
    Northern Utah
    Vehicle:
    2012 DC 4x4 5.7 SR5 TRD OR Barcelona
    Snug top 20" TRD Sport wheels 275/60R20 Tires Additional Trans Cooler
    Nothing you have shared would give me any concerns. Toyota has been known to spec Mobile 1 for some other applications. I feel pretty safe with that brand regardless. I'm actually running the Valvoline one right now, however.

    Good luck with the new rig.
     
    raymond_hb[QUOTED] likes this.
  4. Oct 16, 2021 at 7:24 AM
    aelarson

    aelarson New Member

    Joined:
    Jun 7, 2021
    Member:
    #63995
    Messages:
    445
    Gender:
    Male
    AZ
    Vehicle:
    2011 SR5 Tundra (Silver Sky Metallic)
    great idea! I’ll keep that noted!
     
  5. Oct 16, 2021 at 6:18 PM
    13TundraRW

    13TundraRW New Member

    Joined:
    Apr 11, 2019
    Member:
    #28966
    Messages:
    171
    Gender:
    Male
    First Name:
    Kyle
    San Diego, CA
    Vehicle:
    2013 White Tundra CM RW
    MCM UCA, MCM Shackles, 2.5 ADS C/O, Durobumps Front, Deaver U748, 2.5 ADS Bypasses, Wheelers/Timbren bumps rear, SoftTop
    Nothing visible but was able to revalve my ADS shocks.
     
    wv00097 and Mountun Goat like this.
  6. Oct 16, 2021 at 7:03 PM
    kparrow

    kparrow New Member

    Joined:
    Jun 22, 2018
    Member:
    #16363
    Messages:
    957
    Gender:
    Male
    First Name:
    Kevin
    Nampa, ID
    Vehicle:
    2008 Tundra DC 4x4 5.7l V8 Blue Streak Metallic
    Goodyear UltraTerrain AT 275/70/r18, Stoptech Cryo Slotted Rotors/Hawk LTS Pads, DECKED, and lots more!
    Leather steering wheel stitched wrap. Took forever but definitely worth it.

    3AEAE3A0-ADCD-418C-9981-256401590A38.jpg
     
  7. Oct 16, 2021 at 8:34 PM
    azimuth

    azimuth New Member

    Joined:
    Jan 2, 2021
    Member:
    #57015
    Messages:
    156
    Gender:
    Male
    Vehicle:
    2010 double cab SR5
    Installed a Pop/lock on my tailgate. For those unaware, this solenoid unit will lock the tailgate when I lock the doors with the remote. Might do it with the key in the drivers' door, though I haven't tried that. Anyway, I have a hard tonneau cover so locking the tailgate adds a bit of security for the stuff I have in there.

    The install was pretty straight forward but there were a couple of hiccups. First was that the splice instructions were wrong for my year. I found a video on youtube that had the splice more appropriate for my 2010. Seems the two wires to splice were the white wire and the blue wire in the pic below. The video uploader said to connect the blue Pop/lock wire to the white harness wire and the green Pop/lock to the blue harness wire as pictured.

    Parenthetically, I should mention that the white and blue OE harness wires go into the third blue harness plug from the top in that series of four blue plugs. These are found in the passenger side foot well under the cover.
    [​IMG]

    On my truck that turned out to be backwards. What happened is that when I unlocked the doors, the tailgate locked. When I locked the doors, the tailgate unlocked. So I swapped the wires to blue Pop/lock wire to blue harness wire and green Pop/lock wire to white harness wire as pictured below. Worked like a charm.

    [​IMG]

    The other complication was that the solenoid arms that move the gate lock pin were too high and would slip off of the pin. So I extended the pin with a vacuum plug I had sitting around. Seems to have worked perfectly. I didn't get a before pic but you can see the plug sitting between the arms of the solenoid in the pic below.
    [​IMG]

    With those two issues resolved, the rest was a very clean install with all of the parts to make it look OEM. The pic below illustrates one of the OEM looking harness grommets that accommodates the back up cam and the Pop/lock harness.
    [​IMG]

    Everything else was equally clean looking.

    Well that's it for today.
     
    Last edited: Oct 16, 2021
  8. Oct 16, 2021 at 8:50 PM
    Shanet421

    Shanet421 (Semi) New Member

    Joined:
    Oct 17, 2020
    Member:
    #53708
    Messages:
    1,276
    Gender:
    Male
    San Diego,CA
    Vehicle:
    2013 CM 5.7L 4x4 SR5 Super White


    Admire the determination and thanks for the write up on this!
     
  9. Oct 17, 2021 at 4:53 AM
    RepeatPete

    RepeatPete New Member

    Joined:
    Aug 13, 2020
    Member:
    #50743
    Messages:
    272
    Gender:
    Male
    First Name:
    Pete
    Vehicle:
    2008 Tundra SR5
    Looks great! Do you have a link for the specific one you bought?
    And did you take off the airbag, or did the cover just pull tight into the gaps?
     
    kparrow[QUOTED] likes this.
  10. Oct 17, 2021 at 8:00 AM
    COTundie

    COTundie Whoa Black Betty

    Joined:
    Jun 15, 2021
    Member:
    #64339
    Messages:
    964
    Gender:
    Male
    First Name:
    Trey
    Vehicle:
    Black 5.7 DC TRD 4x4
    Pretty things
    Very nice. Been meaning to do this for a while, but couldn't figure if the OE kit was REALLY incompatible with the 2.25 Gen.

    Good to hear that the pop-lock is fairly decent and complete.

    I will order one of these if my research (or lack there of) does not pan out.
     
  11. Oct 17, 2021 at 8:33 AM
    Retroboy1989

    Retroboy1989 'Course it's 4x4!

    Joined:
    Mar 9, 2021
    Member:
    #60209
    Messages:
    1,017
    Gender:
    Male
    Northern Utah
    Vehicle:
    2012 DC 4x4 5.7 SR5 TRD OR Barcelona
    Snug top 20" TRD Sport wheels 275/60R20 Tires Additional Trans Cooler
    Has anyone made a non-splice kit? A t-tap with the correct connectors? I'd do it if I didn't have to cut into the factory harness.

    I got a @Puppypunter t-tap for my cap's brake light.
     
    Last edited: Oct 17, 2021
    joseph_womack likes this.
  12. Oct 17, 2021 at 9:05 AM
    Danny3737

    Danny3737 New Member

    Joined:
    Feb 22, 2021
    Member:
    #59491
    Messages:
    651
    Gender:
    Male
    Vehicle:
    2012 Tundra Limited Platinum
    13FCADF5-F1F9-4B3A-8931-FE328D59F4DC.jpg Finally installed a dash cam. Wish I could have mounted it a little higher, but the tint on the top part of the windshield is a little too dark to get a clear picture. I did go with the hardwire kit instead of the cigarette lighter option. The one I installed was the NextBase 222 model.
     
    Last edited: Oct 17, 2021
  13. Oct 17, 2021 at 10:22 AM
    Blang805

    Blang805 New Member

    Joined:
    Jul 10, 2020
    Member:
    #49135
    Messages:
    382
    Gender:
    Male
    First Name:
    Brian
    Central Coast California
    Vehicle:
    2010 CrewMax Platinum 4x4
    Build in Signature
    Put some jumper cables on mine to help a fellow Tacoma owner jump his truck at the gas station.
     
  14. Oct 17, 2021 at 5:41 PM
    chaosbooboogunner

    chaosbooboogunner New Member

    Joined:
    Oct 17, 2021
    Member:
    #69479
    Messages:
    27
    Gender:
    Male
    First Name:
    Dennis
    PNW
    Vehicle:
    2012 Tundra Crewmax White
    Wired in fog lights on new bumper.
     
    WVI and joseph_womack like this.
  15. Oct 17, 2021 at 5:50 PM
    Shanet421

    Shanet421 (Semi) New Member

    Joined:
    Oct 17, 2020
    Member:
    #53708
    Messages:
    1,276
    Gender:
    Male
    San Diego,CA
    Vehicle:
    2013 CM 5.7L 4x4 SR5 Super White
    Official welcome

    And no photos…how dare you sir!
     
    joseph_womack likes this.
  16. Oct 17, 2021 at 8:41 PM
    azimuth

    azimuth New Member

    Joined:
    Jan 2, 2021
    Member:
    #57015
    Messages:
    156
    Gender:
    Male
    Vehicle:
    2010 double cab SR5
    Someone does....or rather says she does. She sells them on ebay but takes your money and doesn't deliver. Won't communicate either. I bought one of her kits. She marked it as shipped but with no tracking number. She's only one State away from me but 20 days later I received nothing. Got my money back and bought the Pop/lock kit. It's really no big deal to tap into the OE harness. I've only been set up for a day but it's really nice to be able to lock the tailgate with my fob.
     
    This site contains affiliate links for which the site may be compensated.
    Retroboy1989[QUOTED] likes this.
  17. Oct 17, 2021 at 9:07 PM
    azimuth

    azimuth New Member

    Joined:
    Jan 2, 2021
    Member:
    #57015
    Messages:
    156
    Gender:
    Male
    Vehicle:
    2010 double cab SR5
    Had some goof off time today. Weather was nice. Wife was with her sister so I fixed a couple of inconsequential but nagging things. First item was my jiggly fog lights. When I installed my Morimoto fog lights I noticed they were kind of loose in the housing. Not Morimoto's fault. It seems even OEM fogs are loose. I could see the light bouncing on reflective signs while driving on the freeway. So I decided to tighten them up somehow.

    In the pic below you can see I removed top screw in the heat sink and slipped a looped zip tie behind where the screw goes. It also helps to loosen the two bottom screws 3/4 of a turn. Once the loop was in place I re-installed the top screw and tightened the bottom screws.

    [​IMG]

    Next I threaded a longer zip tie through the adjustment housing and looped it through the first loop. Then I snugged it up just enough to put downward pressure until the looseness stopped. Cut off the excess and schwing! no more jiggly lights.

    [​IMG]

    Next I refinished the cowl piece under the wiper arms. It's that weathered looking grayish black plastic part that makes the lower windshield area look ghetto. I know, it doesn't matter. Yes I'm a pansy for letting it bug me. So sue me. Here it is below having been scrubbed with dawn and water and dried.

    [​IMG]

    Not too bad relative to my crusty tailgate with the crappy bed liner job, but it doesn't even stay this nice. It gets ugly fast. You can see I removed the skinny glass seal and fat weather seal.

    Below is the finished product. Much better.

    [​IMG]

    And here it is reassembled and installed. I painted the wiper arms too with engine ceramic satin.

    [​IMG]

    Super extra way better. lol
     
    Ohannon7, wv00097, GTABurnout and 7 others like this.
  18. Oct 17, 2021 at 9:29 PM
    joseph_womack

    joseph_womack @ 4x4bound

    Joined:
    Nov 3, 2020
    Member:
    #54467
    Messages:
    733
    Gender:
    Male
    First Name:
    Joe
    Louisiana
    Vehicle:
    2007 RCLB, 4WD, 4.7L V8
    3/1 Lift, 35s, Front Bumper, etc etc
    I actually need to paint my wiper arms, paint is all gone on the top, they just unbolt off like it looks?
     
    MTRock likes this.
  19. Oct 17, 2021 at 9:34 PM
    azimuth

    azimuth New Member

    Joined:
    Jan 2, 2021
    Member:
    #57015
    Messages:
    156
    Gender:
    Male
    Vehicle:
    2010 double cab SR5
    Yep. One 13 mm nut gets them off. They are friction bound to the stud so you'll need to rock the arm back and forth to free it from the stud. Word to the wise, mark with tape on your windshield the position of each blade so when you re-install you get them back where they belong. mis-aligning them can create poor wiping issues.
     
  20. Oct 17, 2021 at 10:34 PM
    009m

    009m New Member

    Joined:
    Jun 6, 2020
    Member:
    #47619
    Messages:
    22
    Gender:
    Male
    Vehicle:
    2010 Black Tundra Platinum
    Tuner, cold air intake, catback exhaust
    Having a Platinum with all the bells and whistles I was surprised NOT to have any under hood lighting so I added some. Just cheap (but bright) adhesive LED lights from Menards, and a weatherproof illuminated on/off switch I found on Amazon (wired to stay lit when the lights are off, and goes off when lights are turned on). All in all it was a cheap project, coming in around $20-25ish. Now that I got light, maybe an engine bay scrub is in order.

     
    Prostar 190, kparrow, WVI and 8 others like this.
  21. Oct 18, 2021 at 4:35 PM
    LATERAL G

    LATERAL G New Member

    Joined:
    Feb 17, 2018
    Member:
    #12975
    Messages:
    91
    Vehicle:
    2013 RCSB SR5 TRD Off-Road 5.7 4x4
    Finally removed the CAi that my truck came with and installed a TRD CAI. I didn't have the stock one to go back to or the bottom portion for the TRD one (so lame for the price of it, Toyota doesn't give you a new bottom air box portion).

    I was finally able to find stock air intake used for cheap- Toyota wanted about $350 just for the bottom!!

    I prefer OEM stuff hence why I did it. Sold the old CAI already so made some of my $ back!

    Cheers!
     
  22. Oct 18, 2021 at 7:11 PM
    COTundie

    COTundie Whoa Black Betty

    Joined:
    Jun 15, 2021
    Member:
    #64339
    Messages:
    964
    Gender:
    Male
    First Name:
    Trey
    Vehicle:
    Black 5.7 DC TRD 4x4
    Pretty things
    Competed the second drain and fill on the trans, which went just like the first one except the fluid drained was somewhat pinkish and not just brown!

    Leveling procedure was just as stressful waiting for the "D" to illuminate and then jumping into action.

    Also figured I would check the rear differential fluid since I was forced to service the front diff directly after installing my new, adjustable coils.. By "check" I of course mean drain out whatever (crystal clear) swill the last guy put in there and replaced with (somewhat) proper Mobil 1 synthetic 75w90.

    I still plan to complete 2 or 3 more drain and fills with Toyotas WS ATF, probably coinciding (loosely) with my oil and filter changes.

    Another good day of preventative maintenance, moving Betty one more step towards all fluids and conditions being known and refreshed. Just in time for the weather to get cold as well!
     
    Bikeric, joseph_womack and omgboost like this.
  23. Oct 18, 2021 at 7:24 PM
    kparrow

    kparrow New Member

    Joined:
    Jun 22, 2018
    Member:
    #16363
    Messages:
    957
    Gender:
    Male
    First Name:
    Kevin
    Nampa, ID
    Vehicle:
    2008 Tundra DC 4x4 5.7l V8 Blue Streak Metallic
    Goodyear UltraTerrain AT 275/70/r18, Stoptech Cryo Slotted Rotors/Hawk LTS Pads, DECKED, and lots more!
    Loncky Genuine Leather Auto Custom Steering Wheel Covers for Toyota Land Cruiser 2008-2015 / Toyota Tundra 2007 2008 2009 2010 2011 2012 2013/ Toyota https://www.amazon.com/dp/B00RXIQTBQ

    It just wraps around the existing wheel. No removal or airbag touching required. Comes with double stick tape and plenty of thread. Be prepared to take 3-4 hours. Take your time and pull tight but not too much as you don’t want to risk tearing the leather or popping a stitch. The corners in the smaller parts are hard and admittedly not 100% “together” but close enough and you can’t really tell. I’m a perfectionist and I’d say it’s 98% perfect. At the suggestion of a reviewer I did not put double stick tape under the front of the smooth leather, just the rear, as they said it could show through. Didn’t make install any more difficult. The main thing is take your time and give yourself more string than they say. I did 5x the run, they say 3. I had leftover but it makes it easier to finish and make sure you’re not going to run out and there is plenty of thread.
     
  24. Oct 19, 2021 at 12:37 AM
    duckfart

    duckfart New Member

    Joined:
    Oct 12, 2021
    Member:
    #69247
    Messages:
    4
    Gender:
    Male
    TX
    Vehicle:
    2008 Tundra Grade Double Cab Long Bed 4x4
    Hewitt tech kit is in! This stuff is out. No more limp mode!!20211019_013431.jpg
     
  25. Oct 19, 2021 at 12:59 AM
    Dr Doobie

    Dr Doobie Growing member

    Joined:
    Apr 8, 2021
    Member:
    #61538
    Messages:
    1,339
    Gender:
    Male
    First Name:
    Mike
    Talkeetna,Alaska
    Vehicle:
    '07 RCSB 5.7 SC'd 4x4 SSM
    Damn,That's lota shit! How long did it take?
    I'm sure I will have to do the same soon, my spider sense has been tingling. I'm up to 190,xxx and I hear it on cold starts, sounds like a turbo dumping boost.
     
  26. Oct 19, 2021 at 6:11 AM
    duckfart

    duckfart New Member

    Joined:
    Oct 12, 2021
    Member:
    #69247
    Messages:
    4
    Gender:
    Male
    TX
    Vehicle:
    2008 Tundra Grade Double Cab Long Bed 4x4
    Took about three hours, but I pulled the intake manifold to get to everything. That made it a lot easier. I don't know how he did the air switching valves in the video without doing it. Also, remove the front tires to install the block-off plates. The steering column is in the way on the driver side and you'll need all the room you can get.

    Yeah I had the turbo spool sound along with half a dozen codes thrown, but all gone now!

    Also, huge shout out to @hewitttech. I ordered this kit Friday afternoon and got it in Texas Monday afternoon. Amazon doesn't even get stuff here that fast. Full-color instructions included, and SWAG which my kids already knabbed.

    It was a fun little project.
     
  27. Oct 19, 2021 at 8:08 AM
    Silverghost

    Silverghost New Member

    Joined:
    Sep 26, 2019
    Member:
    #36672
    Messages:
    137
    Gender:
    Male
    First Name:
    Mike
    Vehicle:
    13 tundra 4x4
    Thanks for the jiggly fog lite lite trick. Il be doing that for sure
     
    azimuth[QUOTED] likes this.
  28. Oct 19, 2021 at 1:04 PM
    Dr Doobie

    Dr Doobie Growing member

    Joined:
    Apr 8, 2021
    Member:
    #61538
    Messages:
    1,339
    Gender:
    Male
    First Name:
    Mike
    Talkeetna,Alaska
    Vehicle:
    '07 RCSB 5.7 SC'd 4x4 SSM
    Well luckily I'm not getting any cel or trouble codes yet, just the boost dump sound on cold starts.
    Unfortunately it looks like I'll have to remove my sc which is kinda a pia, but I can service it at the same time. Hopefully it stays functioning until next summer cause I hate working on shit in the winter! Thanks for the info
     
    omgboost likes this.
  29. Oct 19, 2021 at 7:47 PM
    COTundie

    COTundie Whoa Black Betty

    Joined:
    Jun 15, 2021
    Member:
    #64339
    Messages:
    964
    Gender:
    Male
    First Name:
    Trey
    Vehicle:
    Black 5.7 DC TRD 4x4
    Pretty things
    What color you go with?

    Seems like a nice match.
     
  30. Oct 19, 2021 at 7:48 PM
    FitsofRage88

    FitsofRage88 real eyes realize real lies.

    Joined:
    May 28, 2019
    Member:
    #31116
    Messages:
    201
    Gender:
    Male
    Hill Country, Texas
    Vehicle:
    2019 FFV CM (3URFBE) 2Gen
    Blackhawk(0CU00) Working on it!
    Where did you go into techstream to change to one click?
     
    tnbndr likes this.

Products Discussed in

To Top