1. Welcome to Tundras.com!

    You are currently viewing as a guest! To get full-access, you need to register for a FREE account.

    As a registered member, you’ll be able to:
    • Participate in all Tundra discussion topics
    • Transfer over your build thread from a different forum to this one
    • Communicate privately with other Tundra owners from around the world
    • Post your own photos in our Members Gallery
    • Access all special features of the site

My Do-Everything Truck

Discussion in '2nd Gen Builds (2007-2013)' started by RepeatPete, Aug 13, 2020.

  1. May 6, 2021 at 7:37 AM
    #61
    RepeatPete

    RepeatPete [OP] New Member

    Joined:
    Aug 13, 2020
    Member:
    #50743
    Messages:
    272
    Gender:
    Male
    First Name:
    Pete
    Vehicle:
    2008 Tundra SR5
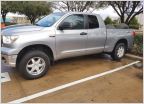
    Got out for a quick ride before work today and snapped a few pictures. I took the shell off to replace the seals and try to get ahead of the leaking problems I've been having. The shell is super useful for me, but its way easier to load bikes and looks so good without it!
    I also lowered the front coilovers 3 turns after getting the wrench from Toytec. The rake is a little exaggerated without the weight of the shell, but even still I like it much better than leveled, or the front end higher that it was.
    Without Shell 2.jpg Without Shell 1.jpg
     
    Last edited: Jan 25, 2022
    Peeeheeuuu, Chrslefty and 15whtrd like this.
  2. May 11, 2021 at 8:52 AM
    #62
    RepeatPete

    RepeatPete [OP] New Member

    Joined:
    Aug 13, 2020
    Member:
    #50743
    Messages:
    272
    Gender:
    Male
    First Name:
    Pete
    Vehicle:
    2008 Tundra SR5
    I did a few basic things that I've been meaning to do for a while. Found a worm clamp in one of my coffee cans and sleeved it with heat shrink to protect the paint of the tailgate hinge. This is less about security for me as I've pulled the tailgate out of the slot a few times. Trying to situate a large heavy, rug in the truck bed is not when I want to be struggling to put the tailgate back in as well.
    Tailgate Clamp.jpg Tailgate Clamp 2.jpg

    Also finally did the diff breather. I put the breather behind the driver's taillight and routed the line down to the axle along the ABS wire. I bought 10 ft. of 5/16" fuel line and only cut off about a foot.
    Diff Breather 1.jpg Diff Breather 2.jpg Diff Breather 3.jpg
     
    Peeeheeuuu and Toyotoholic like this.
  3. May 12, 2021 at 6:08 AM
    #63
    RepeatPete

    RepeatPete [OP] New Member

    Joined:
    Aug 13, 2020
    Member:
    #50743
    Messages:
    272
    Gender:
    Male
    First Name:
    Pete
    Vehicle:
    2008 Tundra SR5
    I removed the screen in between the throttle body and the intake to before work today. Easy, 10 minute job and the whistle is gone. I just snipped the 6 tabs holding the screen to the outer gasket edge with some wire cutters rather than buying the gasket without the screen. I had totally gotten used to the whistle and wasn't even sure that the noise I was hearing was from the intake, but it is definitely gone.
    It's crazy how much difference this made! It feels like the truck has more power and shifts smoother because the whistling highlighted the shift points.
    https://www.tundras.com/threads/diy...-adding-high-flow-air-filter.2619/#post-38681

    Intake Screen 1.jpg Intake Screen 2.jpg
     
    Last edited: May 12, 2021
  4. May 17, 2021 at 8:21 AM
    #64
    RepeatPete

    RepeatPete [OP] New Member

    Joined:
    Aug 13, 2020
    Member:
    #50743
    Messages:
    272
    Gender:
    Male
    First Name:
    Pete
    Vehicle:
    2008 Tundra SR5
    Another recent project to keep my hands busy and mind off the constant rain here - sound deadening!

    I sound deadened the entire floor and roof of my old Wagoneer, but I already had the whole interior gutted and it was more necessity than upgrade. However, on a recent trip to Dallas my daughter was in the back in her rear-facing carseat and I couldn't clearly hear her. I remembered the (oddly enjoyable) sound deadening process in the Wagon and I decided to do it again. I ordered one box of 80mil Noico off of Amazon as I was simply planning on "a little better" not audiofile-level perfection (and was in a time crunch for an upcoming road trip). With the 36 sq. ft. I did the front two doors, back wall of the cab, back floor area, and light coverage on the front floors. I had one sheet left from the last time so I covered the rear passenger's door as well.

    Driver's door before:
    Sound Deadening DF.jpg

    Driver's door after:
    Sound Deadening DF 4.jpg

    And some (bad) photos of inside the door skin:
    Sound Deadening DF 2.jpg Sound Deadening DF 3.jpg

    The rear cab wall. I believe this area made the most difference. The outermost body wall and the window system cover panel are large and relatively flat pieces that "dinged" pretty well when I knocked on them so I did closer to complete coverage.
    Sound Deadening Rear.jpg Sound Deadening Rear 2.jpg

    An in-process shot of the rear floor.
    Sound Deadening Rear Floor.jpg

    Some miscellaneous scraps on the front passenger's floorboard. The real reason to pull back the carpet was the sloped footwell which is flat and not covered by the factory deadening material. However, I did note a difference in my "knock" test when applying the Noico over the OEM Toyota sound deadening, so I don't think the double application was a waste.
    Sound Deadening PF Floor.jpg

    Overall, I believe the interior is a little quieter and the speakers sound a little better. Not as much as I was hoping for, but I knew that just one box and just one stage of three (with the closed-cell foam and mass-loaded vinyl being the second and third steps) the difference wasn't going to be drastic. I may do MLV on the floor in the future, but I doubt I'll mess with it on any of the non horizontal surfaces.

    The main thing I noticed is that the truck seems much more solid and smooth going down the road. Just like I felt there was more power on tap when I removed the intake whistle, I think there were some small squeaks and rattles that were covered up with the sound deadening.
     
    Last edited: Jan 25, 2022
  5. May 17, 2021 at 8:30 AM
    #65
    RepeatPete

    RepeatPete [OP] New Member

    Joined:
    Aug 13, 2020
    Member:
    #50743
    Messages:
    272
    Gender:
    Male
    First Name:
    Pete
    Vehicle:
    2008 Tundra SR5
    I also finally bought the rear footwell light kit from VLeds after having the front only for well over half of a year. I wasn't sure how the light strips would attach as there weren't any smooth surfaces, but they supply a small section of the hook side of Velcro which sticks to the carpet on the lower seat back.
    Rear Footwell Lights.jpg

    And an aside: I found this thread a few years ago but recently rediscovered it. https://www.garagejournal.com/forum/showthread.php?t=185104
    It's long, but a very interesting and entertaining read. The author is a motorcycle aficionado, has amazing craftsmanship skills, and is renovating a mid-century modern house. And he's a professional photographer so everything is displayed beautifully.
    Lots to aspire to!
     
  6. May 17, 2021 at 11:57 AM
    #66
    cutjob

    cutjob New Member

    Joined:
    Jul 7, 2020
    Member:
    #48959
    Messages:
    21
    Gender:
    Male
    First Name:
    Dan
    Vehicle:
    2016 TRD Off Road Tundra Crew Max Silver Sky Metallic
    Awesome truck, looks great! Hoping to find a camper shell for mine soon as it seems more practical for me.
     
    RepeatPete[OP] likes this.
  7. Jun 30, 2021 at 7:06 AM
    #67
    RepeatPete

    RepeatPete [OP] New Member

    Joined:
    Aug 13, 2020
    Member:
    #50743
    Messages:
    272
    Gender:
    Male
    First Name:
    Pete
    Vehicle:
    2008 Tundra SR5
    Changed out the rear diff fluid yesterday using the SuperTech 75W-90 from Walmart. Also got 2 12157-10010 crush washers from the dealership; 1 for the drain and 1 for the fill ports.
    The oil coming out still had a slight golden hue, so I don't think it was too old. The magnet on the drain plug had some particles, but nothing concerning. Overall, easy job and good for peace of mind.
    Rear Diff Fluid Change.jpg

    I do pretty much all my work after dark, so I've been using my new rear lights a ton. I ran a 12 gauge power and ground straight from the battery (through an inline fuse) along the frame rail and back to the rear of the bed. It runs in the same loom that has the backup camera wire, which was a pain. There are two switches on a little ABS panel; one for the hatch, and one for some bed lights down the road. The lights are the 6" exterior strip lights from Vleds. The ones on the hatch are amber to hopefully attract bugs less, and the two that will go in the bed will be white.
    I'll have to get a good output shot in the dark, but 400 lumens per bar is very bright without being blinding.

    Bed Switches.jpg Hatch Lights.jpg
     
    WVI likes this.
  8. Jul 6, 2021 at 9:19 AM
    #68
    RepeatPete

    RepeatPete [OP] New Member

    Joined:
    Aug 13, 2020
    Member:
    #50743
    Messages:
    272
    Gender:
    Male
    First Name:
    Pete
    Vehicle:
    2008 Tundra SR5
    Here are some good light output pictures:
    Bed lights - qty. 2 6" Vleds bars in 5500K white
    Rear Lights 1.jpg

    Hatch lights - qty. 2 6" Vleds bars in amber

    Rear Lights 3.jpg

    All on:

    Rear Lights 2.jpg
     
  9. Aug 6, 2021 at 7:41 AM
    #69
    RepeatPete

    RepeatPete [OP] New Member

    Joined:
    Aug 13, 2020
    Member:
    #50743
    Messages:
    272
    Gender:
    Male
    First Name:
    Pete
    Vehicle:
    2008 Tundra SR5
    Couple of updates in the past few months:
    Took a 3200 mile, week-long road trip to see some family and the Tundra did great. Hauled 4 people, 3 bikes (inside the bed) and averaged ~15 mpg.
    Did a roof rack, modeled after what @Bailey did below, except I used strut channel from Home Depot as the crossbars:
    Roof Rack 1.jpg
    Roof Rack 2.jpg
    I swapped out the stock bumpstops for some Wheeler's SuperBumps. Before:
    SuperBumps 3.jpg
    During:
    SuperBumps 2.jpg
    After:
    SuperBumps 1.jpg
    Finally, I got the ECGS bushing done at Tandem Automotive in Fort Worth. Bit of a drive for me, but they came highly recommended. They quoted 2 hrs for the bushing and an alignment and took 5, but handled the delays well and I would probably go back in the future. They had some cool rigs outside:
    Tandem 1.jpg
    Tandem 2.jpg
     
    Peeeheeuuu, WVI, 300BLK and 1 other person like this.
  10. Aug 18, 2021 at 6:27 AM
    #70
    RepeatPete

    RepeatPete [OP] New Member

    Joined:
    Aug 13, 2020
    Member:
    #50743
    Messages:
    272
    Gender:
    Male
    First Name:
    Pete
    Vehicle:
    2008 Tundra SR5
    During my last oil change I noticed that the front diff mount bushings looked a little crooked and not sitting straight in the diff mount castings. I read up on how the diff drop doesn't actually help anything, so I took it out this morning. Not a hard job, but a bit of a pain as there's not much room to maneuver a wrench up on top.
    Diff Drop Reversal 1.jpg

    Before:

    Diff Drop Reversal 2.jpg

    After:

    Diff Drop Reversal 3.jpg
     
    Blang805 likes this.
  11. Sep 17, 2021 at 8:14 PM
    #71
    RepeatPete

    RepeatPete [OP] New Member

    Joined:
    Aug 13, 2020
    Member:
    #50743
    Messages:
    272
    Gender:
    Male
    First Name:
    Pete
    Vehicle:
    2008 Tundra SR5
    Well, instead of moving out west like we were thinking, we are actually moving back to the northeast for at least a few months. The truck will be more of a grocery-getter and tool hauler than a backcountry fishing and exploring rig like I was working toward. so, I took off the spacers and lowered the coilovers quite a bit.
    2A5ABB72-CAFE-4E93-B2B7-E3B1FEF88370.jpg 0C2AD687-5D39-42CF-AD96-B4980BF3AA2E.jpg
     
    Peeeheeuuu likes this.
  12. Sep 30, 2021 at 8:40 AM
    #72
    RepeatPete

    RepeatPete [OP] New Member

    Joined:
    Aug 13, 2020
    Member:
    #50743
    Messages:
    272
    Gender:
    Male
    First Name:
    Pete
    Vehicle:
    2008 Tundra SR5
    Well, I was very close to listing the truck for sale as changing plans meant a car payment wasn't a wise idea. Then I got into a fender bender and the end result was a check for almost exactly the payoff amount. The Tundra is staying!

    Has anyone used the Harbor freight (or similar) dent puller?

    There's a dent in the front fender, and almost the whole fender is lightly creased.
    Scratch 3.jpg

    Then a scratch on the two doors:
    Scratch 4.jpg
    Scratch 1.jpg

    And a small dent and scratches on the rear corner of the cab:
    Scratch 2.jpg
     
  13. Jan 13, 2022 at 4:48 PM
    #73
    RepeatPete

    RepeatPete [OP] New Member

    Joined:
    Aug 13, 2020
    Member:
    #50743
    Messages:
    272
    Gender:
    Male
    First Name:
    Pete
    Vehicle:
    2008 Tundra SR5
    Haven’t been on here in a while, but got a TRD shift knob from @YotaBro and put it in along with some black heat shrink for the chrome shaft.
    0E427F88-DF6B-446B-B341-11E7168E427C.jpg
     
    YotaBro likes this.
  14. Jan 13, 2022 at 5:40 PM
    #74
    YotaBro

    YotaBro This forum will make me broke

    Joined:
    Sep 13, 2020
    Member:
    #52176
    Messages:
    1,257
    Gender:
    Male
    First Name:
    Calvin
    FL
    Vehicle:
    2017 Cement Grey Tundra TRD PRO
    Lots of shenanigans.
    Looks great!!
     
  15. Jan 18, 2022 at 7:40 AM
    #75
    surffj62

    surffj62 New Member

    Joined:
    Dec 25, 2019
    Member:
    #40303
    Messages:
    129
    Gender:
    Male
    Vehicle:
    2011 DBL RW
    I love my trd shifter- it’s funny how the little things make us happy.
     
    RepeatPete[OP] likes this.
  16. Apr 28, 2022 at 8:20 PM
    #76
    Hotwire

    Hotwire New Member

    Joined:
    Nov 14, 2020
    Member:
    #54894
    Messages:
    230
    Montana
    Vehicle:
    2008 Tundra SR5 double cab
    Nice truck! I’m headed to read your bumper thread now.
     
    RepeatPete[OP] likes this.
  17. May 11, 2022 at 10:25 PM
    #77
    MuddyBeaver

    MuddyBeaver New Member

    Joined:
    May 1, 2022
    Member:
    #77816
    Messages:
    6
    Gender:
    Male
    First Name:
    Ryan
    Oregon
    Vehicle:
    2012 White Tundra Rock Warrior

    I know this was 8 months ago but I had really good luck with the paintless dent repair (pdr) off Amazon. I got the $50ish dollar one that had more tools, was nice having multiple pads to fit the dents properly. I got a little scared hot gluing plastic tabs to my car but worked great, didn’t pull any paint off. Plenty of YouTube tutorials to watch.
     
  18. May 12, 2022 at 8:08 PM
    #78
    RepeatPete

    RepeatPete [OP] New Member

    Joined:
    Aug 13, 2020
    Member:
    #50743
    Messages:
    272
    Gender:
    Male
    First Name:
    Pete
    Vehicle:
    2008 Tundra SR5
    Hmmm, so far I haven’t touched anything…
    I’ll have to give those kits a look - thanks for the input!
     

Products Discussed in

To Top