-
Welcome to Tundras.com!
You are currently viewing as a guest! To get full-access, you need to register for a FREE account.
As a registered member, you’ll be able to:- Participate in all Tundra discussion topics
- Transfer over your build thread from a different forum to this one
- Communicate privately with other Tundra owners from around the world
- Post your own photos in our Members Gallery
- Access all special features of the site
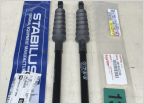 Tailgate support cylinder/drop support Part 66140-0C030 Alternative?
 Tech Stream in 2019
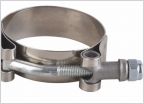 Rad hose clamps
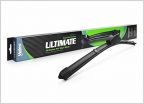 Best wiper blades?
 DupliColor Factory Match for bumper ends
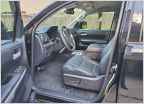 3rd Gen Leather Wrapped Steering Wheel
Cavernous Crewmax DIY underseat storage
Discussion in '2.5 Gen Tundras (2014-2021)' started by BrakeDust, Jan 31, 2021.
Page 1 of 2
Page 1 of 2