1. Welcome to Tundras.com!

    You are currently viewing as a guest! To get full-access, you need to register for a FREE account.

    As a registered member, you’ll be able to:
    • Participate in all Tundra discussion topics
    • Transfer over your build thread from a different forum to this one
    • Communicate privately with other Tundra owners from around the world
    • Post your own photos in our Members Gallery
    • Access all special features of the site

Center Console LED Light Install......A DIY.

Discussion in '2.5 Gen Tundras (2014-2021)' started by 1rebmem, Oct 29, 2020.

  1. Oct 29, 2020 at 9:00 AM
    #1
    1rebmem

    1rebmem [OP] New Member

    Joined:
    Aug 9, 2020
    Member:
    #50560
    Messages:
    66
    Gender:
    Male
    First Name:
    Jef
    TN
    Vehicle:
    2018 SR5 4x4 Inherited from my dear dad RIP 4/21/2020
    Two years old and 5200 miles when I took ownership
    I recently installed this switch actuated automatic light on my 2018 Tundra SR5 DC. Here are some nighttime pic's:

    Night Overall View.jpg

    Night Box View.jpg

    All parts were purchased from Amazon:
    The LED lamp....
    Screen Shot 2020-10-29 at 8.34.04 AM.jpg

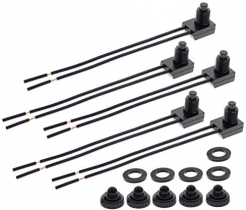
    Plunger Switch:
    Screen Shot 2020-10-29 at 8.34.34 AM.jpg

    USB fast charger:
    Screen Shot 2020-10-29 at 8.55.12 AM.jpg

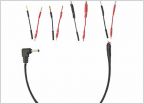
    Piggy-back crimp on terminals:
    Screen Shot 2020-10-29 at 8.33.17 AM.jpg

    I had previously replaced the cigarette lighter jack (hence no pic's) on the rear of the center console with the dual USB charger unit. This charger has 1/4" spade terminals. I cut off the original cigarette lighter jack plastic connector and crimped on the piggy-back terminals to the original wires. So the console light gets its power from these piggyback terminals. You route the +/- 12 volts up the hinge channel. I used some nice white flexible jacketed cable I had, should have colored it black (Some power adapter wire would be ideal).

    Daytime View.jpg


    Hinge Wiring.jpg

    Switch Plunger.jpg


    The wiring:
    Overview of Wiring.jpg

    Switch.jpg

    Wiring Exiting Switch.jpg

    You simply wire it up so the red +12 volts is interrupted by the plunger switch.

    Overall this setup is almost perfect.
    One negative is that because the power is from the cigarette lighter circuit, the light is only operational when the ignition key is turned on. So if you need to run out at night to grab something quick from the console, you need your keys or a flashlight.
    I chose to mount the light where I did to provide good light coverage of the entire box contents. The LED light gives the right amount of light and covers the entire box.
    The plunger switch is a bit cheap. But its size works perfect for the location. The switch hole is about 5/8" dia. It is simply a friction fit so as long as you don't over bore it........
    Also, the switch inner connection point is a weird coil spring kinda thing that I'd guess takes a male bullet type connector. I was able to easily solder to it.......so soldering is required. The light has maybe 4 inch long wires coming out the backside of it at the middle.

    Works great!
     

    Attached Files:

  2. Oct 29, 2020 at 9:09 AM
    #2
    TundraPHX

    TundraPHX Ryan started the fire.

    Joined:
    May 5, 2020
    Member:
    #45948
    Messages:
    267
    Gender:
    Male
    First Name:
    Jared
    Great write up. putting parts in cart now.
     
    1rebmem[OP] likes this.
  3. Oct 29, 2020 at 10:13 AM
    #3
    1rebmem

    1rebmem [OP] New Member

    Joined:
    Aug 9, 2020
    Member:
    #50560
    Messages:
    66
    Gender:
    Male
    First Name:
    Jef
    TN
    Vehicle:
    2018 SR5 4x4 Inherited from my dear dad RIP 4/21/2020
    Two years old and 5200 miles when I took ownership
    The same switch might work but we would have to verify there is room for the switch body "behind the scene".
    The spring tension is not very high. You can hold it depressed with your finger without any pain/difficulty.
    It certainly be handy to use the same LED light though since they are sold in pairs.
    You got me thinking......
     
    NewImprovedRon likes this.
  4. Oct 29, 2020 at 10:17 AM
    #4
    fbingha

    fbingha New Member

    Joined:
    Aug 24, 2020
    Member:
    #51270
    Messages:
    364
    Gender:
    Male
    Bakersfield, CA
    Waiting for your write up on the glove box.
     
    HulkSmurf14 likes this.
  5. Oct 29, 2020 at 10:18 AM
    #5
    1rebmem

    1rebmem [OP] New Member

    Joined:
    Aug 9, 2020
    Member:
    #50560
    Messages:
    66
    Gender:
    Male
    First Name:
    Jef
    TN
    Vehicle:
    2018 SR5 4x4 Inherited from my dear dad RIP 4/21/2020
    Two years old and 5200 miles when I took ownership
    Yea....me too.....
    I was just looking into the cabin filter removal to see what's behind in there.
     
  6. Oct 29, 2020 at 10:19 AM
    #6
    fbingha

    fbingha New Member

    Joined:
    Aug 24, 2020
    Member:
    #51270
    Messages:
    364
    Gender:
    Male
    Bakersfield, CA
    I'm sure there is real estate back there for the plunger. Now if it takes 2 days to get to it on the other hand...
     
  7. Oct 29, 2020 at 10:34 AM
    #7
    Charliebrn

    Charliebrn New Member

    Joined:
    Sep 7, 2020
    Member:
    #51912
    Messages:
    231
    Gender:
    Male
    NW Ohio
    Vehicle:
    2017 DC Limited 4x4 Tundra
    Tyger Folding Tonneau cover Polished stainless running boards LED interior lighting VLED Footwell Kit LED Bed lighting
    Yup, me too! Thank you!
     
    1rebmem[OP] likes this.
  8. Oct 29, 2020 at 11:26 AM
    #8
    1rebmem

    1rebmem [OP] New Member

    Joined:
    Aug 9, 2020
    Member:
    #50560
    Messages:
    66
    Gender:
    Male
    First Name:
    Jef
    TN
    Vehicle:
    2018 SR5 4x4 Inherited from my dear dad RIP 4/21/2020
    Two years old and 5200 miles when I took ownership
    The same switch and the extra light will work in the glove box.
    I got a peek down behind the left side of the glove box and there is room for the switch.
    The light itself would probably be mounted on the ceiling of the box. Like I did with the center console, I will jumper 12v to the light to see where and how it will look at night.
    It may be that a side mounted light will be better in the glove box, not sure yet.
     
    NewImprovedRon likes this.
  9. Oct 29, 2020 at 11:44 AM
    #9
    1rebmem

    1rebmem [OP] New Member

    Joined:
    Aug 9, 2020
    Member:
    #50560
    Messages:
    66
    Gender:
    Male
    First Name:
    Jef
    TN
    Vehicle:
    2018 SR5 4x4 Inherited from my dear dad RIP 4/21/2020
    Two years old and 5200 miles when I took ownership
    I just bought this:

    Switch.jpg
    I want to see if it's a better and cheaper option.
     
    NewImprovedRon likes this.
  10. Oct 29, 2020 at 12:52 PM
    #10
    Charliebrn

    Charliebrn New Member

    Joined:
    Sep 7, 2020
    Member:
    #51912
    Messages:
    231
    Gender:
    Male
    NW Ohio
    Vehicle:
    2017 DC Limited 4x4 Tundra
    Tyger Folding Tonneau cover Polished stainless running boards LED interior lighting VLED Footwell Kit LED Bed lighting
    Do you remember how you got into the console for the receptacle swap/electrical hookup? Do you have to remove the entire console from the floor?
     
  11. Oct 29, 2020 at 1:18 PM
    #11
    1rebmem

    1rebmem [OP] New Member

    Joined:
    Aug 9, 2020
    Member:
    #50560
    Messages:
    66
    Gender:
    Male
    First Name:
    Jef
    TN
    Vehicle:
    2018 SR5 4x4 Inherited from my dear dad RIP 4/21/2020
    Two years old and 5200 miles when I took ownership
    You don't need to remove the console. The rear end simply unsnaps. Sitting in the middle of the back seat, grab the body and snatch toward your head. Up and back. That's on my SR5 anyway which has no HVAC ducts in the ass end of the console.

    There are video's showing disassembly, watch a couple of them:
    https://www.youtube.com/watch?v=TwnuCxPjzfw
     
    Last edited: Oct 29, 2020
  12. Oct 29, 2020 at 2:33 PM
    #12
    ElNopal

    ElNopal Stay classy and be well

    Joined:
    Aug 17, 2019
    Member:
    #34762
    Messages:
    2,494
    Gender:
    Male
    First Name:
    Matt
    Willis TX
    Vehicle:
    19 Cavalry Blue CM

    Nice work OP! I had considered this pin switch when I did my glove box lighting and jump seat console lighting. I went with an OEM switch after all for both.

    FWIW, here a write up of the glove box light mod I did.
     
  13. Oct 29, 2020 at 2:54 PM
    #13
    1rebmem

    1rebmem [OP] New Member

    Joined:
    Aug 9, 2020
    Member:
    #50560
    Messages:
    66
    Gender:
    Male
    First Name:
    Jef
    TN
    Vehicle:
    2018 SR5 4x4 Inherited from my dear dad RIP 4/21/2020
    Two years old and 5200 miles when I took ownership
    Very professional work Matt!!
    I had previously watched your video on dash disassembly but I had not seen your glove box light addition so thanks!! The OEM switch is probably the best way to get a quality switch (hopefully).

    Did you add a center console box light on your truck? Link? Oops...I see you did a jump seat console light mod....Link? (I'm being lazy I know)
     
    Last edited: Oct 29, 2020
    ElNopal[QUOTED] likes this.
  14. Oct 29, 2020 at 4:53 PM
    #14
    ElNopal

    ElNopal Stay classy and be well

    Joined:
    Aug 17, 2019
    Member:
    #34762
    Messages:
    2,494
    Gender:
    Male
    First Name:
    Matt
    Willis TX
    Vehicle:
    19 Cavalry Blue CM
    Thank you sir for the kind comments!

    Pat @2020Platinum, deserves the credit for the awesome videos! I added his dash disassembly video to my glove box light write up because I think it is the best one out there.

    I didn’t do a write up on the jump seat LED’s but here is a link to what I posted.
    https://www.tundras.com/threads/wha...d-gen-tundra-today.713/page-1412#post-1854203
     
  15. Oct 29, 2020 at 5:15 PM
    #15
    Patch999

    Patch999 SSEM #17 You are what you do when it counts

    Joined:
    Jul 28, 2018
    Member:
    #17466
    Messages:
    3,415
    Gender:
    Male
    First Name:
    Kyle
    TX
    Vehicle:
    2017 Bad@$$ TRD Pro
    Nice job.
     
    1rebmem[QUOTED][OP] likes this.
  16. Oct 30, 2020 at 9:50 AM
    #16
    2020Platinum

    2020Platinum www.youtube.com/NitroZ18Fishing

    Joined:
    Oct 30, 2019
    Member:
    #38029
    Messages:
    1,276
    Gender:
    Male
    First Name:
    Patrick
    Northeast PA
    Vehicle:
    2022 TRD Pro (Lunar Rock)
    ElNopal[QUOTED] likes this.
  17. Oct 30, 2020 at 10:00 AM
    #17
    1rebmem

    1rebmem [OP] New Member

    Joined:
    Aug 9, 2020
    Member:
    #50560
    Messages:
    66
    Gender:
    Male
    First Name:
    Jef
    TN
    Vehicle:
    2018 SR5 4x4 Inherited from my dear dad RIP 4/21/2020
    Two years old and 5200 miles when I took ownership
    Matt's LED glove box light mod ^ is probably the best way given the physical layout of the glove box and the potential to have dark areas if a single light is used.
    None the less, I will be trying out a single LED light for the glove box. I have one ordered that I want to possibly fit to the right side wall inside the box.
    I love simple and cheap DIY's!
    I'm not broke or a cheap ass, I love the challenge.
    More to come........
     
    ElNopal[QUOTED] likes this.

Products Discussed in

To Top