1. Welcome to Tundras.com!

    You are currently viewing as a guest! To get full-access, you need to register for a FREE account.

    As a registered member, you’ll be able to:
    • Participate in all Tundra discussion topics
    • Transfer over your build thread from a different forum to this one
    • Communicate privately with other Tundra owners from around the world
    • Post your own photos in our Members Gallery
    • Access all special features of the site

How much time for Stereo Installation

Discussion in 'Audio & Video' started by KenKenKen, Oct 16, 2020.

?

I'm good with tools and cars. How long of a time window should I figure for installation?

  1. 1 hour

    3 vote(s)
    33.3%
  2. 3 hours

    6 vote(s)
    66.7%
  1. Oct 16, 2020 at 5:44 AM
    #1
    KenKenKen

    KenKenKen [OP] New Member

    Joined:
    Aug 10, 2020
    Member:
    #50612
    Messages:
    20
    Gender:
    Male
    First Name:
    Ken
    Vehicle:
    2017 Tundra Platinum
    ARE Toneau
    Hi,

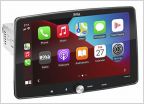
    My schedule is crazy but I really want to install my new Kenwood Excelon DMX1057XR.

    I got the Crutchfield kit.

    Poll: How long do you think it's gonna take me to install?

    I'll post pics after installation.

    Thanks!
    Ken
     
    619Tundra likes this.
  2. Oct 16, 2020 at 6:10 AM
    #2
    glowblue

    glowblue From time to time

    Joined:
    Mar 28, 2019
    Member:
    #28267
    Messages:
    1,941
    Gender:
    Male
    First Name:
    Brian
    VA
    Vehicle:
    2021 Tundra SR5 —> 2021 F-250 XLT
    Assuming it’s just the HU swap and you have the wiring ready to go shouldn’t be more than an hour. If your using the Maestro idatalink unit make sure you configure and flash it before install.
     
    KenKenKen[OP] likes this.
  3. Oct 16, 2020 at 11:17 AM
    #3
    KenKenKen

    KenKenKen [OP] New Member

    Joined:
    Aug 10, 2020
    Member:
    #50612
    Messages:
    20
    Gender:
    Male
    First Name:
    Ken
    Vehicle:
    2017 Tundra Platinum
    ARE Toneau
    Thanks for the reply and the tip about flashing the Maestro. At least I got to get a head start while hanging out with my kids. Hopefully install later today or this weekend.
     
    619Tundra likes this.
  4. Oct 16, 2020 at 11:47 AM
    #4
    AZBoatHauler

    AZBoatHauler SSEM#140/ASCM#3/2ndGenNaysayer/BAF140

    Joined:
    Aug 13, 2019
    Member:
    #34576
    Messages:
    7,036
    Gender:
    Male
    First Name:
    Adam
    So.Arizona
    Vehicle:
    2017 CrewMax 4x4, 2017 LandCruiser, 2005 Sequoia 4x4
    Demello / SOB Fab Bumpers, SuperWinch, WKOR sliders, RCI skids, Baja Designs lighting, Billy 6112 and 5160 w/ CB +2, JL Audio with Alpine HU, DD 10" Exhaust, LED headlights, Rago fab mounts, 35” BFG, HAM radio
    There are things you’ll want to take your time on (like making the harness, flashing the maestro correctly, fitting the trim kit etc) so I would be prepared to spend at least a couple hours on it. You don’t want to feel rushed.

    Make your harness as compact and tidy as possible because between the wiring, maestro unit (RCAs if you’re running an amp) and HU it can be like trying to shove 5lbs of ish in a 3lb bag.
     
    KenKenKen[OP] and glowblue like this.
  5. Oct 16, 2020 at 11:52 AM
    #5
    glowblue

    glowblue From time to time

    Joined:
    Mar 28, 2019
    Member:
    #28267
    Messages:
    1,941
    Gender:
    Male
    First Name:
    Brian
    VA
    Vehicle:
    2021 Tundra SR5 —> 2021 F-250 XLT
    ^Good advice. The Maestro is finicky in that it needs to be removed from power to flash it via USB. I tried to flash it while still connected to the power and that didn’t fly.

    Also what helped me is to remove the dash speaker grille to help pull the harnesses through from behind the stereo (I don’t have a speaker there so it was easy)
     
    KenKenKen[OP] likes this.
  6. Oct 16, 2020 at 2:45 PM
    #6
    KenKenKen

    KenKenKen [OP] New Member

    Joined:
    Aug 10, 2020
    Member:
    #50612
    Messages:
    20
    Gender:
    Male
    First Name:
    Ken
    Vehicle:
    2017 Tundra Platinum
    ARE Toneau
    Good point. With the Maestro now flashed, the wiring harness will be stage two of the project. I'll solder and heat shrink on the bench. Thanks!
     
    619Tundra likes this.
  7. Oct 16, 2020 at 2:47 PM
    #7
    KenKenKen

    KenKenKen [OP] New Member

    Joined:
    Aug 10, 2020
    Member:
    #50612
    Messages:
    20
    Gender:
    Male
    First Name:
    Ken
    Vehicle:
    2017 Tundra Platinum
    ARE Toneau
    Thanks for the tip. I will take a look at the center speaker if it becomes a hassle. I'm glad I didn't just jump in my truck at 11pm last night and start tearing into it.
     
  8. Oct 16, 2020 at 4:03 PM
    #8
    PWMDMD

    PWMDMD New Member

    Joined:
    Nov 4, 2018
    Member:
    #21332
    Messages:
    561
    Worcester, MA
    Vehicle:
    2020 Tundra Platinum
    Tundyfundy likes this.
  9. Oct 16, 2020 at 4:21 PM
    #9
    KenKenKen

    KenKenKen [OP] New Member

    Joined:
    Aug 10, 2020
    Member:
    #50612
    Messages:
    20
    Gender:
    Male
    First Name:
    Ken
    Vehicle:
    2017 Tundra Platinum
    ARE Toneau
    PWMDMD[QUOTED] likes this.
  10. Oct 16, 2020 at 6:03 PM
    #10
    MillMatter

    MillMatter New Member

    Joined:
    Sep 6, 2020
    Member:
    #51846
    Messages:
    93
    Gender:
    Male
    First Name:
    Matt
    Pensacola, FL
    Vehicle:
    2014 1794 Edition 4x4 CrewMax Super White
    6” pro comp lift, 35x12.50 Toyo R/T, 22” chrome Fuel Hostage, Magnaflow custom dual in dual out exhaust with OEM chrome tips w/ Toyota logo, tint, smooth finish color matched fender flares, color match grille surround and hood bulge, 14-17 TRD Pro grille custom painted all white (letters remain matte silver), classic Toyota tri-color logo in grille (blue color scheme), chrome step bars, Century Sillhouette tonneau, Pendaliner drop in bed liner, custom company graphics, chrome TRD decals custom painted to color match company graphics (blue), ESP under seat storage, center console organizer, BumperShellz color matched front bumper end caps. Tech12Volts/Taylor's Audio Sound System: Kenwood DMX1057XR head unit, Infinity Reference 5-ch amp, Hertz CK165L front, Hertz K170 rear, 2 JL Audio W0 10" subs in ported box behind seat, bass knob.
    On this same note...if I know NOTHING about car audio, should I even attempt this install or pay a professional? I just won the Kenwood 10" floating screen from one of JRT's Facebook raffles. I am not afraid to do it if it is not that bad, but I AM afraid to mess it up. I want all of the Maestro connections to work flawlessly so I am leaning toward having someone professional install it.
     
    619Tundra likes this.
  11. Oct 16, 2020 at 6:16 PM
    #11
    preacher35

    preacher35 RIGHTEOUS MEMBER

    Joined:
    Nov 20, 2016
    Member:
    #5284
    Messages:
    557
    Gender:
    Male
    First Name:
    Adam
    Texas
    Vehicle:
    2018 MGM Platinum Crewmax 4x4
    If you have not done this before, and have nobody on site to help you with a stereo install, have a professional do it! Not sure about what equipment that you are installing into your rig, but I'm sure it's not cheap. I've seen inexperienced guys burn out head units, amps.... and another guy with an brand new Xterra burn out his main because he had no clue what he was doing. Doing a stereo install requires experience/knowledge in electronics soldering, amperages, wire gauges, polarities and countless other items. And, for an amateur, it requires taking your time. I've seen people rush through an install and damage important vehicle components, let alone stereo equipment.
     
  12. Oct 16, 2020 at 6:19 PM
    #12
    MillMatter

    MillMatter New Member

    Joined:
    Sep 6, 2020
    Member:
    #51846
    Messages:
    93
    Gender:
    Male
    First Name:
    Matt
    Pensacola, FL
    Vehicle:
    2014 1794 Edition 4x4 CrewMax Super White
    6” pro comp lift, 35x12.50 Toyo R/T, 22” chrome Fuel Hostage, Magnaflow custom dual in dual out exhaust with OEM chrome tips w/ Toyota logo, tint, smooth finish color matched fender flares, color match grille surround and hood bulge, 14-17 TRD Pro grille custom painted all white (letters remain matte silver), classic Toyota tri-color logo in grille (blue color scheme), chrome step bars, Century Sillhouette tonneau, Pendaliner drop in bed liner, custom company graphics, chrome TRD decals custom painted to color match company graphics (blue), ESP under seat storage, center console organizer, BumperShellz color matched front bumper end caps. Tech12Volts/Taylor's Audio Sound System: Kenwood DMX1057XR head unit, Infinity Reference 5-ch amp, Hertz CK165L front, Hertz K170 rear, 2 JL Audio W0 10" subs in ported box behind seat, bass knob.
    Thanks for the feedback. I was definitely leaning toward having someone else do it. What would you say would be a reasonable price to pay someone to do the install? I know JRT sometimes does entire systems in the $500-600 range which seems cheap to me for how much work it seems to be. I would think I could do the HU only for like $200, but I really don't know.
     
  13. Oct 16, 2020 at 7:13 PM
    #13
    preacher35

    preacher35 RIGHTEOUS MEMBER

    Joined:
    Nov 20, 2016
    Member:
    #5284
    Messages:
    557
    Gender:
    Male
    First Name:
    Adam
    Texas
    Vehicle:
    2018 MGM Platinum Crewmax 4x4
    Installing just a H/U is probably not very much as it does not take much time provided you have a good wiring harness. Regardless, cost of labor depends on what all you want installed. I usually do my own installs, but with work, wife and children, I went to my local guy (whom I trust) to get a quote to install the following: H/U, two amps, two sets of 6.5 components, 2 10" subs in a Tech12volts box and an iDatalink Maestro. He quoted me about $800.00 for labor (which does NOT include sound matting) and said he could have it done in about a day and a half. That is a very reasonable quote. But, in the end, I just broke down and did it myself (I felt my $800.00 would be better put to use toward my new bumper)! I took my time (about a week), to do my install which included: sound matting all 4 doors, back wall and floor; custom amp rack under the back seat, in addition to all the equipment I listed earlier. Bottom line, I have 100% confidence in my own work, and I cut no corners. I even used 100% oxygen free copper wire for everything. And it turned out phenomenal!
     
    Last edited: Oct 17, 2020
  14. Oct 17, 2020 at 5:28 AM
    #14
    PWMDMD

    PWMDMD New Member

    Joined:
    Nov 4, 2018
    Member:
    #21332
    Messages:
    561
    Worcester, MA
    Vehicle:
    2020 Tundra Platinum
    There was nothing too difficult. You do have to splice the TO3 harness which is not difficult but I definitely did not fly through that part. I watched a bunch of Youtube videos. The second most difficult task was running the RCAs which required disassembling quite a bit of the passenger side dash. Again, not difficult but I watched a couple of Youtube videos and having not done it before it still took some time to make sure I wasn't breaking anything. Then there were the numerous times I was "done" but then say realized I didn't need half the wires in the TO3 (all the speaker wires) so I pulled the unit and removed the entire black-ended harness and taped the TO3 so it looked cleaner. Then there was the time because I did not leave myself enough length on the RCAs one pulled out as I was placing the base unit and when I thought I was done the right rear speaker didn't work. Then I ordered the wrong USB adapter so that wasted some time just figuring out it was the wrong one. If I had to it again I could easily do the HU install in 3 hours or less. It's like the door panels - the first time it took me 15 mins and now I can have a door panel off and back on in under 3 mins. It's totally doable, especially with Youtube videos. The reason I did it myself was because I was getting crazy quotes from shops on doing just the install - one wanted $1300 just to install the speakers and amp and another wanted $1000 for the HU - that was just labor.
     
  15. Oct 17, 2020 at 7:38 AM
    #15
    glowblue

    glowblue From time to time

    Joined:
    Mar 28, 2019
    Member:
    #28267
    Messages:
    1,941
    Gender:
    Male
    First Name:
    Brian
    VA
    Vehicle:
    2021 Tundra SR5 —> 2021 F-250 XLT
    619Tundra likes this.
  16. Oct 17, 2020 at 8:01 AM
    #16
    MillMatter

    MillMatter New Member

    Joined:
    Sep 6, 2020
    Member:
    #51846
    Messages:
    93
    Gender:
    Male
    First Name:
    Matt
    Pensacola, FL
    Vehicle:
    2014 1794 Edition 4x4 CrewMax Super White
    6” pro comp lift, 35x12.50 Toyo R/T, 22” chrome Fuel Hostage, Magnaflow custom dual in dual out exhaust with OEM chrome tips w/ Toyota logo, tint, smooth finish color matched fender flares, color match grille surround and hood bulge, 14-17 TRD Pro grille custom painted all white (letters remain matte silver), classic Toyota tri-color logo in grille (blue color scheme), chrome step bars, Century Sillhouette tonneau, Pendaliner drop in bed liner, custom company graphics, chrome TRD decals custom painted to color match company graphics (blue), ESP under seat storage, center console organizer, BumperShellz color matched front bumper end caps. Tech12Volts/Taylor's Audio Sound System: Kenwood DMX1057XR head unit, Infinity Reference 5-ch amp, Hertz CK165L front, Hertz K170 rear, 2 JL Audio W0 10" subs in ported box behind seat, bass knob.
    Another question. When I have someone install my new Kenwood DMX1057XR, will it be installed in a way that the HU powers the door speakers, or will he have to do anything special to make that so? I have heard that the HU powering the door speakers is a major improvement over the crappy factory amp. Wondering if doing this involves any extra steps. Excuse my ignorance.
     
    619Tundra likes this.
  17. Oct 17, 2020 at 10:48 PM
    #17
    preacher35

    preacher35 RIGHTEOUS MEMBER

    Joined:
    Nov 20, 2016
    Member:
    #5284
    Messages:
    557
    Gender:
    Male
    First Name:
    Adam
    Texas
    Vehicle:
    2018 MGM Platinum Crewmax 4x4
    No, it will not require anything "special". They will use a Toyota-compatible wiring harness that will connect your head unit, directly to your OEM amp/speaker setup. Your dash speakers will be running directly off of the H/U power (your 1794 OEM h/u is currently set up in this way, and the 4 doors and 8" sub are running off the OEM amp which is ridiculously under powered). Yes, you should hear some improvement on the audio. But, nothing that is going to knock your socks off. When all is said and done, remember, you are still running the OEM amp and speakers which are sub-par in my honest opinion.

    Are you planning on sound matting the doors? Sound matting my doors made a big improvement in the bass of the OEM system (I was careful to mat not only the sheet metal immediately under the door panel, but also the inner-backside of the door skin sheet metal; with the matting closing off all of the "holes", the door acts like a sealed speaker box).
     
    MillMatter[QUOTED] and 619Tundra like this.
  18. Oct 18, 2020 at 4:54 AM
    #18
    619Tundra

    619Tundra New Member

    Joined:
    Sep 2, 2017
    Member:
    #9393
    Messages:
    976
    Gender:
    Male
    First Name:
    George
    San Diego, Caifornia
    Vehicle:
    2017 Black Tundra Double Cab SR5
    You may need an amp and speakers for that beautiful head unit to sound just right. I have some for sale if you're interested.
     
  19. Oct 18, 2020 at 9:57 AM
    #19
    619Tundra

    619Tundra New Member

    Joined:
    Sep 2, 2017
    Member:
    #9393
    Messages:
    976
    Gender:
    Male
    First Name:
    George
    San Diego, Caifornia
    Vehicle:
    2017 Black Tundra Double Cab SR5
    Watch 5 star car stereo on YouTube. They have several videos on this unit. They have a bonus video for this unit on Tundra posted 2 days ago.
     
    PWMDMD likes this.
  20. Oct 27, 2020 at 9:36 PM
    #20
    jwatt

    jwatt I heart men

    Joined:
    Jan 10, 2020
    Member:
    #40985
    Messages:
    1,301
    Gender:
    Male
    First Name:
    Jack
    Oregon
    Vehicle:
    Salsa Red 2007 Tundra DC @91k.
    7" BDS Coilover Suspension Lift/BDS UCAs/XB LED Headlights/Nitto trail Grappler tires on Black Rhyno Armory wheels
    I can attest to that. I m going on 2+ years, and I m still not done.:anonymous:
     
    619Tundra likes this.

Products Discussed in

To Top