1. Welcome to Tundras.com!

    You are currently viewing as a guest! To get full-access, you need to register for a FREE account.

    As a registered member, you’ll be able to:
    • Participate in all Tundra discussion topics
    • Transfer over your build thread from a different forum to this one
    • Communicate privately with other Tundra owners from around the world
    • Post your own photos in our Members Gallery
    • Access all special features of the site

Headlight restoration

Discussion in 'Detailing' started by Bust, Sep 28, 2020.

  1. Sep 28, 2020 at 8:12 PM
    #1
    Bust

    Bust [OP] New Member

    Joined:
    Jul 14, 2019
    Member:
    #33224
    Messages:
    288
    Gender:
    Male
    First Name:
    Shean
    Vehicle:
    2013 Black Toyota Tundra Rock Warrior
    I'm looking for some tips and tricks on headlight restoration. I picked up the sylvania kit, worked well until I got to the coating part, didn't realize it flashed so quickly and missed a few spots and your natural instinct is to go over it. Not what you do... Left streaks that you can get out. Now I have to re-sand them and coat. I picked up the megs spray clear coat this time. The sylvania kit came with 1k and 2k sand paper, I have plenty of that, even 3k. Should I go as fine as 3k? And I'm curious once you apply the clear, once it cures, if you can apply a ceramic or graphene coating to it for prolonged longevity?
     
  2. Sep 28, 2020 at 8:25 PM
    #2
    Tundra234

    Tundra234 New Member

    Joined:
    Nov 30, 2018
    Member:
    #22402
    Messages:
    16,133
    Gender:
    Male
    First Name:
    George
    Florida
    Vehicle:
    2020 Tundra DC SR5 Barcelona
    Alot of them
    Yes, 3k will be even better. Headlight rsroraisnt hard...just takes time and patience.
     
  3. Sep 29, 2020 at 10:22 AM
    #3
    War Machine

    War Machine SSEM # 5 3MW

    Joined:
    Aug 7, 2017
    Member:
    #8939
    Messages:
    16,933
    Gender:
    Male
    First Name:
    Jason
    Texas
    I believe I used up to 3k when I did it a couple of years ago. Finished off with an all in one compound and a DA.
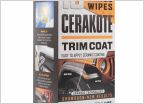
    By the way, Cerakote has a headlight coating that I’d like to see in action. Their trim restorer is amazing, so I bet this is good stuff as well.

    https://www.amazon.com/dp/B084RQKLV8/ref=cm_sw_em_r_mt_dp_f02CFbJZ514P6
     
    Randy Morton and ToyoMafia like this.
  4. Sep 29, 2020 at 11:41 AM
    #4
    Pudge

    Pudge Super Secret Elite Member #7

    Joined:
    Nov 8, 2016
    Member:
    #5136
    Messages:
    9,498
    Gender:
    Male
    First Name:
    Sean
    CT
    Vehicle:
    2015 Blue Ribbon Platinum
    TRD PRO grille, OCD consol organizers, DIY wireless phone charger, 33" Michelin Defender LTX MS, Bak revolver X2 tonneau, weathertech liners, 20% tints. DIY pop n lock, 2018 LED headlights, morimoto fogs, TRD shift knob, DirtyDeeds 8"BAM exhaust, kenwood HU,JL amp, Tech12volts Tundra full speaker upgrade w/sub, Swing case, and lots of fluid film
    I think I'll be doing my buddies headlights on his G37 with this kit in a week or so. I'll keep you posted.
     
  5. Sep 29, 2020 at 12:05 PM
    #5
    djhase

    djhase New Member

    Joined:
    Apr 30, 2019
    Member:
    #29875
    Messages:
    189
    I used the Sylvania system and it worked great. Your right about the clear though. You get one shot at getting it coated fully with swiping the cloth across the headlight. Luckily I missed only a little spot and was able to go over it with minimal streaking.

    I would just sand it again with the 2k and try the clear coat again. Mine looks brand new now and has been that way for months.
     
    War Machine likes this.
  6. Sep 29, 2020 at 12:09 PM
    #6
    djhase

    djhase New Member

    Joined:
    Apr 30, 2019
    Member:
    #29875
    Messages:
    189
    Project farm you tube channel has a video comparing and testing trim restorers. Cerakote won hands down. It made the trim look brand new and held up to his tests. Plan to get some soon.
     
  7. Sep 29, 2020 at 1:09 PM
    #7
    BravoDeltaRomeo

    BravoDeltaRomeo Old Man Little Blue Finger

    Joined:
    Sep 3, 2019
    Member:
    #35569
    Messages:
    3,683
    Gender:
    Male
    First Name:
    Bruce
    MB Canada
    Vehicle:
    2019 Cavalry Blue Tundra CM
    I used white toothpaste on my old Sienna....but I'm cheap. :rolleyes:
     
    FlyingWolfe likes this.
  8. Sep 29, 2020 at 1:41 PM
    #8
    ToyoMafia

    ToyoMafia SSEM #15-3MW-RGBA#?-@toyomafiaworld Vendor

    Joined:
    Nov 8, 2019
    Member:
    #38453
    Messages:
    11,631
    Gender:
    Male
    Vehicle:
    Magic carpet.
    Cool slaps and plastiDip
    Ordered
     
    War Machine[QUOTED] likes this.
  9. Sep 29, 2020 at 7:09 PM
    #9
    alpinepro4

    alpinepro4 What is your MPG Today!

    Joined:
    Dec 29, 2017
    Member:
    #11829
    Messages:
    1,219
    Gender:
    Male
    First Name:
    Pat
    Vehicle:
    2017 TRD Pro Cement DC
    Baja Designs Squadron Sport Fog lights, ARE CX Series Topper, Alcan Springs , DAP Tune, Coach Builder +1 Shackles, Headlight Revolution Supernova V.4 LED bulbs, HR LED interior bulbs. General Grabber ATX 275/70/R18
    I’ve had fantastic results with 3M kit. Follow the instructions take your time and you will get amazing results.
    Before Restoration
    E4E25770-4677-4D7C-9A15-F2F61BF6163D.jpg
    After, turned out sweet!
    D261A704-27AD-4867-9860-CE09F3B50CFA.jpg
    CFBE6035-728B-4675-B58F-BCB8219CC3ED.jpg
     
    Last edited: Sep 29, 2020
    GarTX526, War Machine and WFD473 like this.
  10. Apr 11, 2021 at 3:55 PM
    #10
    JMB

    JMB Not new, just a little old.

    Joined:
    Jan 20, 2014
    Member:
    #156
    Messages:
    6,632
    Gender:
    Male
    First Name:
    John
    Chesapeake, VA
    Vehicle:
    2013 Super White Tundra DC
    5100s all around, 295-70-18 Defenders, 1.25 Spidertrax spacers, BD reverse lights, de-badged, interior LEDs, footwell LEDs, reverse LEDs, ARE cap, front receiver hitch for cooler holder, cooler holder/rod rack, backup camera, Kenwood HU, Westin nerf bars, Husky floor liners, folding rear seats, remote battery posts, plastidip grill chrome, Powder coat bumpers.
    Finally got the right conditions to use the Cerakote today. Not too hard, I have a slight bit of carpal tunnel so the sanding kind of sucked. Good results, I'll report back in a lifetime as to their guarantee. No before pics.
    20210411_181624.jpg 20210411_181613.jpg
     
    Runway and WFD473 like this.
  11. Apr 23, 2021 at 8:24 AM
    #11
    BlackSheep

    BlackSheep caffeinated member

    Joined:
    Aug 21, 2018
    Member:
    #18406
    Messages:
    1,163
    Gender:
    Male
    First Name:
    Scott
    Kansas City, MO
    Vehicle:
    2010 Black DC 5.7L 4x4
    held together by duct tape and baling wire
    Did this go as planned? Just bought the kit and will be doing my own light housings soon
     
  12. Apr 23, 2021 at 8:29 AM
    #12
    Warreng

    Warreng New Member

    Joined:
    Feb 23, 2017
    Member:
    #6495
    Messages:
    1,007
    Gender:
    Male
    i used a 15yr old tin of aluminum polish and a princess auto orbital polisher. I am cheap as well:).
     
  13. Apr 24, 2021 at 1:18 PM
    #13
    BlackSheep

    BlackSheep caffeinated member

    Joined:
    Aug 21, 2018
    Member:
    #18406
    Messages:
    1,163
    Gender:
    Male
    First Name:
    Scott
    Kansas City, MO
    Vehicle:
    2010 Black DC 5.7L 4x4
    held together by duct tape and baling wire
    Well, couldn’t wait for the restore kit to arrive lol. I spent an hour this morning with a cloth and a bottle of Meguiar’s PlasticX making little circle motions on my headlights. Here are the results.
    8A7BDCCA-0196-455E-8134-35572A40B349.jpg 349DB657-4550-4A22-B76D-EB9B6D7CF3A9.jpg
     
    Rocko9999 likes this.
  14. Apr 24, 2021 at 1:28 PM
    #14
    15whtrd

    15whtrd Mr. Blonde

    Joined:
    Sep 20, 2015
    Member:
    #1829
    Messages:
    9,387
    Gender:
    Male
    First Name:
    Sean
    SoCal
    Vehicle:
    White 2015 Tundra DC SR5 TRD 4x4 5.7L, White 2003 Sequoia 2WD
    TRD Pro suspension, +2 Coachbuilder shackles, 2015 TRD Pro headlights, 20% ceramic tinted windows, clear ceramic tinted front windshield, aFe drop in pro s dry air filter, TRD airflow accelerator, TRD oil fill cap, TRD 18 psi radiator cap, BDX Bullydog tuner, Weathertech floor mats front and rear, rear seat fold down mod, DNA hard trifold tonneau cover, Linex with uv protection, TRD rear swaybar, TRD center caps, TRD Pro grille insert with color matching surround and bulge, TRD PRO headlights, aluminum oil filter canister, Real truck tailgate seal, Pop-n-lock tailgate lock actuator, rear diff breather relocate, RCI front skid plate. 275/70 R18 BFG KO2s
    I’ve done the clearcoat method after wet sanding and just wasn’t that impressed with my work LOL. Haven’t tried the Sylvania kit. I just spend some quality time with different grits of sandpaper and polishes of different stages. I’m sure clearcoat helps keep them shiny for a longer period of time, but eventually you will have to sand that off and clear them again. So for now, every time I wash my vehicles I hit them with Maguires plastiX and it always brings them back, as long as you have a fairly decent headlight to begin with. Just some minor yellowing in between washes. That’s my method to my madness.
     
    BlackSheep likes this.
  15. Apr 24, 2021 at 2:52 PM
    #15
    BlackSheep

    BlackSheep caffeinated member

    Joined:
    Aug 21, 2018
    Member:
    #18406
    Messages:
    1,163
    Gender:
    Male
    First Name:
    Scott
    Kansas City, MO
    Vehicle:
    2010 Black DC 5.7L 4x4
    held together by duct tape and baling wire
    I probably should have sanded mine. I have multiple sheets of 1000-2500 grit from another recent project that would probably do better than just the polish. Maybe next time I’m bored I’ll tackle that, but for now, my lenses are clearer than they have been since before I purchased the truck, and I’m happy with that
     
    15whtrd likes this.

Products Discussed in

To Top