1. Welcome to Tundras.com!

    You are currently viewing as a guest! To get full-access, you need to register for a FREE account.

    As a registered member, you’ll be able to:
    • Participate in all Tundra discussion topics
    • Transfer over your build thread from a different forum to this one
    • Communicate privately with other Tundra owners from around the world
    • Post your own photos in our Members Gallery
    • Access all special features of the site

What have you done to your 1st gen Tundra today?

Discussion in '1st Gen Tundras (2000-2006)' started by T-Rex266, Sep 7, 2015.

  1. Aug 2, 2020 at 11:04 AM
    shifty`

    shifty` Our private little trip to hell

    Joined:
    Jun 20, 2020
    Member:
    #48239
    Messages:
    19,742
    ATL
    Vehicle:
    '06 AC Limited V8/4WD
    (see signature for truck info)
    I got full-on wood today. OEM full wood outfitting is complete.

    So, here's the skinny: This was easy UNTIL I got to the dash piece, which I saved for last due to lack of part. In all seriousness, I wouldn't wish a dash console face swap on my worst enemy. I didn't realize each button is individually capped. You literally need to uncap every single switch and hope you don't crack anything.

    General process, if interesting and sorry no pics: Cupholder is easiest. Plug and play, lift center console door, lift out old cupholder, push in the new (1 minute). Door control plates required limited work. Pop up each control plate, unplug the harnesses, then either snap out or unscrew the control pieces, snap-in or screw them into the new plates, reinstall (5-10 minutes). I think one side was a couple snaps, other was a couple screws. Dash surround... Took 45 minutes. I need a new paragraph for that one. Due to how hard the buttons are, I recommend getting one from a junkyard, something that already has the buttons and stuff installed.

    For the dash surround, pull it out, unhook the harnesses, then carry it and the new faceplate to a new area. Take pics of the front and rear of the panel for reference - trust me. Start by laying the panel face-down. Pop off the vent tubes using two small flatheads, wedge in, pop out one side, repeat on the other. I found it easiest to pop the side closest to the stereo opening first. DO NOT install those onto your new panel yet, you need to remove the movable vent pieces over first. To pop out those, from the back side, squeeze its housing in on the side farthest from the stereo hole, then slide out. Note: Look closely, a tiny pivot piece will remain attached to the nub closest to the stereo hole - look at the position, move it to the new panel in the same position. Install the vent pieces, test function, install the vent tubes if OK

    Now for the fun part. Remove the 6 screws holding the white panel over the guts and buttons, then pop it off. Remove the last two screws on the outer PCBs, then lift off the PCB assembly and set gently aside. Remove the clear plastic light distribution piece by popping it off the three black clips holding it in. Then ... ugh. The buttons. I have no good way to explain how to do this. Three difficulties: The buttons are snap-on, during assembly at the factory, they slid the button housing up thru the face, then snapped the button on top of it. Unfortunately, there's no easy way to get around the button housing, nor to get around the button face. It took me about 30 minutes of careful finagling, working from back and front, to pop the buttons free without damaging the buttons, the housing, or the clear plastic pieces used to send light to the buttons for cargo light, A/C, AC recirc and the 4WD buttons if you have them. After removing each button, keep them sitting assembled but not snapped together and set to the side so you don't forget what goes together and how, and in what position. The "blank" button was the most difficult and you must remember the correct position.

    Something to note about button reinstall: Reference the photo you took at the beginning so you know which button to install where. Start by installing the "blank" button, making sure you install the button cap so it's angled the correct direction. Then I recommend doing the SHIFT L, Hazard buttons, and the button above the blank. Do any other button with no light. 4WD buttons were next for me - the light tube on the button didn't come out like the A/C buttons. Finally, A/C buttons - those have a clear post which sends light to the button. Slide the button housing in from behind. Install the clear post from the front, this way you can clearly see how it fits in. Then cap the button.

    For the PCB reinstall, I recommend installing the smaller wired daughterboard for the seat belt and cargo light first, screw in its one screw, then test the button function. First button you may hear a loud snap sound on each - I found this was normal. Next, install the rest of the board, I started with the HVAC buttons first, it took a minute to get it just right, be careful, don't force anything, when its lined up it'll drop in. Once in place, install the single screw for the far left side of the PCB. Hold the center part in place, then test the function of each button, noting the Only buttons that push-and-hold-in are 4WD, the two A/C buttons, Hazard. If all is OK, put the white shroud in place and screw it in.

    Don't forget to transfer over the two yellow snap-tabs in the rear/center of the panel, pull them apart like a wishbone from a turkey and they'll slip off. Install by sliding on. You may want to clean your panel now. Then reinstall in the truck, crank it up, turn on headlights and make sure the assembly lights. Test each button functions and lights as expected, including 4LO and SHIFT L. I checked to make sure hazards were cool, seat belt unlock/relock worked, clock could be set, A/C and recirc worked, and the Cargo lamp both lit up and was lighting up the cargo lamp. Everything is working for me.

    Hopefully I didn't miss anything up there.

    Part numbers for my truck (specifically) are here, yours will potentially use different dash parts if it's 2WD or different door parts if it's a double cabb, or even if it's an earlier model? My truck is an '06 Access Cab 4WD w/no VSC. All parts came from Cool Springs Toyota - big thanks to @Roman for helping make this a reality. Parts I bought have the price next to them.

    55905-0C010 => Climate control knobs, I bought 3 new ones ($8.12/ea)
    84013-0C310 => Wood dash center piece with 3 climate control knobs, 4WD ($176.43)
    84013-0C350 => Wood dash center piece with 3 climate control knobs, 4WD and an extra VSC button
    74202-0C020 => Driver's front wood grain control bezel ($43.59)
    74201-0C020 => Passenger's wood grain control bezel ($43.59)
    58804-0C040 => Wood grain center console cup holder, complete assembly with OEM foams ($136.31)

    Total upgrade cost minus shipping: ~$425 + 90 minutes. I probably would've paid 1/2 as much and 3/4 less install time had I sourced from a junkyard, but I was having a hell of a time finding one that would send me good pics, and find the correct model.


    IMG_2025.jpg

    IMG_2026.jpg
     
    BluegrapeVr6, bokch0y, 912 and 7 others like this.
  2. Aug 2, 2020 at 11:10 AM
    empty_lord

    empty_lord They see me rollin'

    Joined:
    Feb 1, 2019
    Member:
    #25441
    Messages:
    10,033
    Gender:
    Male
    First Name:
    Dan
    Indiana, Chicagoland
    Vehicle:
    05 rollover special
    custom body work, Billies with taco ARB springs, Icon AAL, TRD FJ trail team wheels, 2019 Toyota 86 radio, Blacked out interior, Added factory power everything, heater mirrors, ETC
    Man. I like how my blacks looking in the tundra. But I’d love to find the dark charcoal interior and swap it all in
     
    lamboboy732, bokch0y, Tundra2 and 3 others like this.
  3. Aug 2, 2020 at 11:19 AM
    shifty`

    shifty` Our private little trip to hell

    Joined:
    Jun 20, 2020
    Member:
    #48239
    Messages:
    19,742
    ATL
    Vehicle:
    '06 AC Limited V8/4WD
    (see signature for truck info)
    I love it, especially with the white exterior. I think I'd like it even more with your truck color! And it doesn't get as hot as black.

    That said, I would literally give my left testicle to find OEM replacement driver's side seat leathers in dark grey that's under $500. :(

    My driver's side bolster is slowly but surely coming apart and the armrest is cracking, all other seats are in virtually-unused state. Not much I can do to repair the driver's seat that'll last, so I'd love to slap a new OEM skin on it.

    I checked at The Seat Shop, who makes - hands-down, not even a question - the best OEM-matched seat covers on the market. I've had some craptastic experiences with Auto Seat Covers and one of the other shops on eBay. I don't like the way Katzkin products look, so that's a no-go.
     
    Last edited: Aug 2, 2020
    This site contains affiliate links for which the site may be compensated.
    Tundra2 likes this.
  4. Aug 2, 2020 at 11:36 AM
    lsaami

    lsaami Let ‘er buck

    Joined:
    Oct 3, 2018
    Member:
    #20129
    Messages:
    1,758
    Gender:
    Male
    Minnesota
    Vehicle:
    2000 Tundra 4x4 "$1100 Build"
    3/2" lift, visor, 33s, eibach pro-truck, Cvj axles BFF Bumper 4.56 Tacoma Diffs
    New steering rack, check.

    my steering got quite a bit heavier though. Maybe the air is still purging out.

    A0899955-3A4C-4F53-9FD6-70A855F9FA2F.jpg 10F084C3-9088-4B52-8FEB-2CA4013CDF89.jpg
     
  5. Aug 2, 2020 at 11:56 AM
    Tundra2

    Tundra2 Zoinked

    Joined:
    Feb 10, 2019
    Member:
    #25875
    Messages:
    11,824
    Gender:
    Male
    First Name:
    Noah
    Western Kentucky
    Vehicle:
    '00 Tundra V8 SR5 '03 Corolla Virus
    I don't know about the new heavy steering. Maybe the internals aren't broken in yet? I'm not sure how any of that works yet.

    Noticing the angle of your outer tie rods looks about the same as mine which is something I've been wondering since my lift.

    I'm guessing yours is lifted as well?

    Taking another guess, and saying that the angle is "ok?"
     
    lsaami[QUOTED] likes this.
  6. Aug 2, 2020 at 12:46 PM
    Professional Hand Model

    Professional Hand Model A.K.A ‘Golden Hands’

    Joined:
    Apr 29, 2018
    Member:
    #14878
    Messages:
    15,007
    Gender:
    Male
    First Name:
    Fred
    ‘Somewhere’... a State of Mind
    Vehicle:
    2002 Tundra SR5 4WD 4.7L AC Silver Metallica
    Hand Protectors
    You have a parts check list for us?
     
  7. Aug 2, 2020 at 3:04 PM
    lsaami

    lsaami Let ‘er buck

    Joined:
    Oct 3, 2018
    Member:
    #20129
    Messages:
    1,758
    Gender:
    Male
    Minnesota
    Vehicle:
    2000 Tundra 4x4 "$1100 Build"
    3/2" lift, visor, 33s, eibach pro-truck, Cvj axles BFF Bumper 4.56 Tacoma Diffs
    What do you mean? For the rack replacement?

    steering rack
    Ps lines
    Tie rod ends
    ATF
     
    Darkness and Tundra2 like this.
  8. Aug 2, 2020 at 3:10 PM
    lsaami

    lsaami Let ‘er buck

    Joined:
    Oct 3, 2018
    Member:
    #20129
    Messages:
    1,758
    Gender:
    Male
    Minnesota
    Vehicle:
    2000 Tundra 4x4 "$1100 Build"
    3/2" lift, visor, 33s, eibach pro-truck, Cvj axles BFF Bumper 4.56 Tacoma Diffs
    yes, I’m lifted roughly 3”. I’ve never heard of anyone having tie rod issues with a lifted truck.
     
    Tundra2[QUOTED] likes this.
  9. Aug 2, 2020 at 3:38 PM
    Trailscape

    Trailscape Zip Tie Wizard

    Joined:
    Dec 19, 2018
    Member:
    #23221
    Messages:
    323
    Gender:
    Male
    Alabama
    Vehicle:
    2006 Tundra SR5
    You guys with your fancy wood trim..

    Painted mine in a metallic silver and then 2k clear. It's crazy reflective.

    IMG_1291.jpg
     
    Darkness, bmf4069, Filthyphil and 3 others like this.
  10. Aug 2, 2020 at 3:40 PM
    Trailscape

    Trailscape Zip Tie Wizard

    Joined:
    Dec 19, 2018
    Member:
    #23221
    Messages:
    323
    Gender:
    Male
    Alabama
    Vehicle:
    2006 Tundra SR5
    Anyone have a picture of the brackets used in the rear of the double cab center console?
     
  11. Aug 2, 2020 at 3:40 PM
    Professional Hand Model

    Professional Hand Model A.K.A ‘Golden Hands’

    Joined:
    Apr 29, 2018
    Member:
    #14878
    Messages:
    15,007
    Gender:
    Male
    First Name:
    Fred
    ‘Somewhere’... a State of Mind
    Vehicle:
    2002 Tundra SR5 4WD 4.7L AC Silver Metallica
    Hand Protectors
    New OEM Rack?
     
  12. Aug 2, 2020 at 3:44 PM
    lsaami

    lsaami Let ‘er buck

    Joined:
    Oct 3, 2018
    Member:
    #20129
    Messages:
    1,758
    Gender:
    Male
    Minnesota
    Vehicle:
    2000 Tundra 4x4 "$1100 Build"
    3/2" lift, visor, 33s, eibach pro-truck, Cvj axles BFF Bumper 4.56 Tacoma Diffs
    Detroit axle. Detroit axle tie rods as well.

    eBay cheapo hard lines
     
    This site contains affiliate links for which the site may be compensated.
  13. Aug 2, 2020 at 4:49 PM
    2truckornot2truck

    2truckornot2truck Aspiring Truck Guy

    Joined:
    Jul 14, 2020
    Member:
    #49320
    Messages:
    81
    Gender:
    Male
    First Name:
    Felix
    TX
    Vehicle:
    2006 Tundra DC SR5 V8
    None yet! Does steering wheel cover count? :)

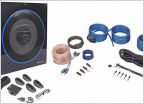
    Hi. How is your under seat Rockville working out? Can you tell me if you got the blue one like this or the black one? Very glad to hear it fit. I've been trying to figure out if I could fit either one, with a preference towards the blue one which according to specs is 2.7" vs. 2.8" for the black one. Must have been a very snug fit! I cut a box to size to try to see if it would go. Did you screw it in or are you just letting gravity and the seat keep it in place?
     
  14. Aug 2, 2020 at 5:42 PM
    Surf_spear_Mex

    Surf_spear_Mex New Member

    Joined:
    Jun 10, 2020
    Member:
    #47776
    Messages:
    217
    Gender:
    Male
    First Name:
    Patrick
    Vehicle:
    05 tundra ac
    Overlander kit coming together well

    20200802_191916.jpg
    20200802_191119.jpg
     
    Darkness, oscardog86, bmf4069 and 3 others like this.
  15. Aug 2, 2020 at 5:48 PM
    shifty`

    shifty` Our private little trip to hell

    Joined:
    Jun 20, 2020
    Member:
    #48239
    Messages:
    19,742
    ATL
    Vehicle:
    '06 AC Limited V8/4WD
    (see signature for truck info)
    When I was digging through the parts catalog, it looked like Toyota made something in "brushed metal" or something for our trucks in the later years. I would've preferred to go that way, but with the wood kit in our Highlander on a black/dark grey mix and how well that works, I thought the gunmetal it might get muddied up. The gunmetal-ish look is what my Camry had, near-black interior, and I thought it looked awesome.

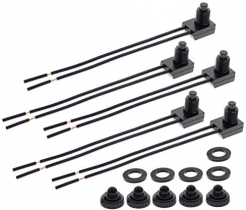
    But here's the real question: What's the story on the button cluster down below in the center of the dash? Can you link me to where you've posted info on it already, or give more details here? Looks interesting, and nearly OEM in appearance.
     
    Tundra2 likes this.
  16. Aug 2, 2020 at 6:17 PM
    Tundra2

    Tundra2 Zoinked

    Joined:
    Feb 10, 2019
    Member:
    #25875
    Messages:
    11,824
    Gender:
    Male
    First Name:
    Noah
    Western Kentucky
    Vehicle:
    '00 Tundra V8 SR5 '03 Corolla Virus
  17. Aug 2, 2020 at 6:20 PM
    shifty`

    shifty` Our private little trip to hell

    Joined:
    Jun 20, 2020
    Member:
    #48239
    Messages:
    19,742
    ATL
    Vehicle:
    '06 AC Limited V8/4WD
    (see signature for truck info)
    I feel like I should be walking up to the bumper and asking for a drink.

    Cool mod! It's great as long as you don't need to do some task where removing the battery cable is required.

    Did you happen to setup a side charging site, where maybe you could attach a 9V battery to it to power in case of emergency?
     
    Darkness and NUDRAT like this.
  18. Aug 2, 2020 at 6:22 PM
    Tundra2

    Tundra2 Zoinked

    Joined:
    Feb 10, 2019
    Member:
    #25875
    Messages:
    11,824
    Gender:
    Male
    First Name:
    Noah
    Western Kentucky
    Vehicle:
    '00 Tundra V8 SR5 '03 Corolla Virus
    You walk up to the bumper, and I pull a frosty drink of your choice from the engine bay using Noel magicka arm technique.
     
    Darkness and shifty`[QUOTED] like this.
  19. Aug 2, 2020 at 6:26 PM
    Tundra2

    Tundra2 Zoinked

    Joined:
    Feb 10, 2019
    Member:
    #25875
    Messages:
    11,824
    Gender:
    Male
    First Name:
    Noah
    Western Kentucky
    Vehicle:
    '00 Tundra V8 SR5 '03 Corolla Virus
    Didn't think about that. I almost always carry an m18, and m12 battery with me. I suppose I could make jumpers using the connectors already on the wiring specifically for the m12 battery, and keep that kit in the truck.

    Wouldn't be that difficult, and would work in a pinch. How I was testing in the house was just touching off test jumpers I soldered on to make sure each addition worked.
     
  20. Aug 2, 2020 at 6:30 PM
    shifty`

    shifty` Our private little trip to hell

    Joined:
    Jun 20, 2020
    Member:
    #48239
    Messages:
    19,742
    ATL
    Vehicle:
    '06 AC Limited V8/4WD
    (see signature for truck info)
    Yep that's basically what I was thinking. You could easily make a mini 18v cell by running a pair of standard 9v batteries together. You'd just need a way to tie into the circuit in a way that's isolated from the battery.

    Anyway, it's just a thought. But when I saw it I instantly thought of my previous car audio/tint/alarm shop days when people came in wanting us to wire solenoids up for shaved door handles. We always installed a jumper in an inconspicuous location so you could tap a 9v battery on it to pop one of the solenoids in the event the battery was dead or detached.
     
    NUDRAT and Tundra2[QUOTED] like this.
  21. Aug 2, 2020 at 7:41 PM
    empty_lord

    empty_lord They see me rollin'

    Joined:
    Feb 1, 2019
    Member:
    #25441
    Messages:
    10,033
    Gender:
    Male
    First Name:
    Dan
    Indiana, Chicagoland
    Vehicle:
    05 rollover special
    custom body work, Billies with taco ARB springs, Icon AAL, TRD FJ trail team wheels, 2019 Toyota 86 radio, Blacked out interior, Added factory power everything, heater mirrors, ETC
    Honestly it would not be hard to make that thing work off a seperate power sport battery that stays topped off when the engines running. Kind of a emergency backup battery for lights where you’d need them
     
    Tundra2[QUOTED] likes this.
  22. Aug 2, 2020 at 7:43 PM
    Tundra2

    Tundra2 Zoinked

    Joined:
    Feb 10, 2019
    Member:
    #25875
    Messages:
    11,824
    Gender:
    Male
    First Name:
    Noah
    Western Kentucky
    Vehicle:
    '00 Tundra V8 SR5 '03 Corolla Virus
    Oooh, I like this idea. I'm just confused by this.

    Power sport?
     
  23. Aug 2, 2020 at 7:48 PM
    empty_lord

    empty_lord They see me rollin'

    Joined:
    Feb 1, 2019
    Member:
    #25441
    Messages:
    10,033
    Gender:
    Male
    First Name:
    Dan
    Indiana, Chicagoland
    Vehicle:
    05 rollover special
    custom body work, Billies with taco ARB springs, Icon AAL, TRD FJ trail team wheels, 2019 Toyota 86 radio, Blacked out interior, Added factory power everything, heater mirrors, ETC
    Like atv or motorcycle. A tiny 12v battery

    easy to mount somewhere
     
    Tundra2[QUOTED] likes this.
  24. Aug 2, 2020 at 7:59 PM
    Tundra2

    Tundra2 Zoinked

    Joined:
    Feb 10, 2019
    Member:
    #25875
    Messages:
    11,824
    Gender:
    Male
    First Name:
    Noah
    Western Kentucky
    Vehicle:
    '00 Tundra V8 SR5 '03 Corolla Virus
    Oh! I gotcha.

    I may be from the sticks but I've never been on a atv, or on a dirt bike much. Got my old 1980 Honda XL80S running a few months ago, and putted around the yard with it.

    I'm a little big for that bike...
     
    NUDRAT likes this.
  25. Aug 2, 2020 at 8:27 PM
    Trailscape

    Trailscape Zip Tie Wizard

    Joined:
    Dec 19, 2018
    Member:
    #23221
    Messages:
    323
    Gender:
    Male
    Alabama
    Vehicle:
    2006 Tundra SR5
    I think the brushed metal look was offered in the T3 package. I also did the trim inside the gauge cluster in silver.

    As for the switch panel. It's in the works with my Sequoia console swap, but I just made a template out of Kydex and put a Blue Sea 6-Position switch panel in it.
     
    shifty`[QUOTED] likes this.
  26. Aug 2, 2020 at 8:38 PM
    cartroub

    cartroub New Member

    Joined:
    May 14, 2020
    Member:
    #46558
    Messages:
    15
    Gender:
    Male
    Laramie, WY
    Vehicle:
    06 Tundra DC Limited
    Got a new toy...err tool:
    [​IMG]

    So I figured I should try it out by taking off the runnning boards...
    [​IMG]

    and installing front and oil pan skids
    [​IMG]

    I'm loving the M12 ratchet though. Where have you been all my life?
     
    Darkness, NUDRAT, oscardog86 and 3 others like this.
  27. Aug 2, 2020 at 8:40 PM
    empty_lord

    empty_lord They see me rollin'

    Joined:
    Feb 1, 2019
    Member:
    #25441
    Messages:
    10,033
    Gender:
    Male
    First Name:
    Dan
    Indiana, Chicagoland
    Vehicle:
    05 rollover special
    custom body work, Billies with taco ARB springs, Icon AAL, TRD FJ trail team wheels, 2019 Toyota 86 radio, Blacked out interior, Added factory power everything, heater mirrors, ETC
    You have the t3 grille too?
     
  28. Aug 2, 2020 at 9:12 PM
    Tundra2

    Tundra2 Zoinked

    Joined:
    Feb 10, 2019
    Member:
    #25875
    Messages:
    11,824
    Gender:
    Male
    First Name:
    Noah
    Western Kentucky
    Vehicle:
    '00 Tundra V8 SR5 '03 Corolla Virus
    I want a review of this tool in a few jobs time. Been thinking about getting one to keep in the truck in an "oh shit" bag.
     
  29. Aug 2, 2020 at 9:26 PM
    Trailscape

    Trailscape Zip Tie Wizard

    Joined:
    Dec 19, 2018
    Member:
    #23221
    Messages:
    323
    Gender:
    Male
    Alabama
    Vehicle:
    2006 Tundra SR5
    Nah, mine's a custom chop job.
     
    empty_lord[QUOTED] likes this.
  30. Aug 2, 2020 at 10:21 PM
    Tundra2

    Tundra2 Zoinked

    Joined:
    Feb 10, 2019
    Member:
    #25875
    Messages:
    11,824
    Gender:
    Male
    First Name:
    Noah
    Western Kentucky
    Vehicle:
    '00 Tundra V8 SR5 '03 Corolla Virus
    Darkness, MNtundra, bmf4069 and 2 others like this.

Products Discussed in

To Top