1. Welcome to Tundras.com!

    You are currently viewing as a guest! To get full-access, you need to register for a FREE account.

    As a registered member, you’ll be able to:
    • Participate in all Tundra discussion topics
    • Transfer over your build thread from a different forum to this one
    • Communicate privately with other Tundra owners from around the world
    • Post your own photos in our Members Gallery
    • Access all special features of the site

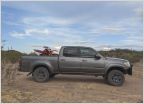
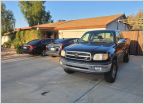
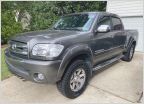
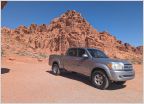
Phantom Gray on 35s

Discussion in '1st Gen Builds (2000-2006)' started by alee891, Jul 29, 2020.

  1. Jul 29, 2020 at 8:50 AM
    #1
    alee891

    alee891 [OP] Rather Be Dead

    Joined:
    Aug 8, 2017
    Member:
    #8954
    Messages:
    583
    Gender:
    Male
    Now/here
    Vehicle:
    Shitbox
    I've gotten to the point where enough mods have occurred to justify starting a build thread for the Tundra.

    I purchased this 2004 1st gen in 2017 after parting ways with my well-built 1st gen Tacoma on 35s to pay for an unexpected surgery and get a more reliable vehicle for my wife (girlfriend at the time). It had 240k on the dash, recently flushed fluids, timing belt and water pump replacement, and was in pretty good shape despite the high miles. Normally people would steer clear of anything over 200k, but after some research it seems like these 2UZs can run forever so long as you keep up with regular maintenance.

    I do not have photos from immediate time of purchase, but I bought it out right from a guy locally and drove it near stock for 6 months or so. The oldest photo I have shows some 80 series wheels and BFG mudders I slapped on it.

    870E2372-AC7D-4907-822B-0A8D182011FE.jpg

    **I'll insert a recent photo as mods continue and the truck changes, but this is reference to status as of 7/2020:


    MODS

    Engine / Drivetrain / Steering
    • Elite 4.88 gearing
    • Powertrax Lock Right rear
    • Energy Suspension steering rack bushings
    • Undercover "snorkel"
    Suspension and Tires
    • SPC upper control arms
    • Toytec progressive 3-pack aal w/ overload in
    • Bilstien 5100s in rear
    • OME nitrochargers w/ 885 springs in front
    • 80 Series wheels wrapped in 315/75r16 Toyo MTs
    • Spidertrax 1.50" wheel spacers
    Armor

    Interior

    Exterior

    Performance
    • None
    To Do's / Needs
    • LBJs and inner/outer tie rods
    • Winch
    • Spindle Gussets
    • Build skids
    • Manual J-Shift transfer case and Front Range Offroadh twin stick
    • New windshield
    • Light bar for front bumper
    • Build retrofit headlights
    • Hi-lift
    • Paint wheels
    • Archive Garage hammer hangers
    • Alcan Springs
     
    Last edited: Feb 24, 2021
  2. Jul 29, 2020 at 8:50 AM
    #2
    alee891

    alee891 [OP] Rather Be Dead

    Joined:
    Aug 8, 2017
    Member:
    #8954
    Messages:
    583
    Gender:
    Male
    Now/here
    Vehicle:
    Shitbox
    The first item(s) I did to the truck were suspension related. The PO had installed Hellwig spring helpers and a spacer lift in the front, and it rode a bit harsh for my liking. Over the course of a few years and a couple mobile devices I've lost all photos of install, but the effort included:
    • Front and rear sway-bar removals;
    • Hellwig spring helper removal;
    • SPC upper control arm install;
    • Toytec progressive AAL (3-pack) install;
    • New u-bolts.
    Drove it around as such for a few months then decided I wanted to build a rear bumper myself. I did not have my own tools at the time, and fabrication experience was minimal, but I went for it anyway.

    Started by mocking up the mounts with by buddy Alex. We used angle iron from the mounts as well as the main support for the bumper. After measuring and cutting I burned a few additional pieces of steel to the structure to give it shape:

    IMG_2319.jpg
    IMG_2323.jpg
    IMG_2563.jpg
    IMG_2564.jpg

    Once everything was welded up I went to town with the angle grinder to smooth things out. I'm by no means a great welder, so the angle grinder came in clutch to clean up my work.

    IMG_2567.jpg

    Bedsides cut, tube burned on and bumper installed.
    IMG_2599.jpg
    IMG_2654.jpg
    IMG_2656.jpg

    And a softopper install at some point along the way, which I installed lights in that were controlled by a switch in the bed of the truck.
    IMG_2743.jpg
    20190224_182030.jpg


    After the bumper build I really didn't do anything to the truck for a year or so. I was busy working midstream / pipeline six - seven days a week and trying to hunt in the fall when I could sneak away for a few days.

    A couple of photos from a last minute OTC elk hunt that resulted in tag soup. This trip helped breathe a little optimism into keeping the truck / showed what it was capable of with just some mudders and motivation:

    20181024_181401.jpg
    20181024_125653.jpg

    Got my first bow kill during my first season out. At this point I wasn't hunting for anything other than meat, and I ended up with a double-lung and heart shot at 25yds for my first take - and so began my addiction to archery hunting.

    IMG_3596.jpg
    IMG_3564.jpg
     
    Last edited: May 14, 2022
  3. Jul 29, 2020 at 8:52 AM
    #3
    alee891

    alee891 [OP] Rather Be Dead

    Joined:
    Aug 8, 2017
    Member:
    #8954
    Messages:
    583
    Gender:
    Male
    Now/here
    Vehicle:
    Shitbox
    Found myself in a mod-slump again for a while and didn't really mess with the Tundra for another 6mo or so. Then one day I started chatting with my buddy Alex in GJ about purchasing a couple Coastal Offroad DIY front bumpers and building them out over the weekend. Discussion became swipe of the credit cards, and I was on my way to his place (actually, on my way to the Timberleaf Trailers shop where he owns / operates with his dad) to get to welding.

    We started by mocking everything up and tacking it together to ensure things were straight. Once tacked, we burned the shit out of everything, ended up with some not so straight lines, but it came out perfect for my needs. Welding took a full day effort from Alex and myself while also working on his 4Runner bumper simultaneously.
    20190329_100807.jpg
    20190329_130747.jpg
    20190329_130752.jpg

    The second day consisted of solely grinding and paint. I think I spent 1/2 the day grinding everything into defined lines, and finally getting to paint late afternoon / early evening as we were worn out and ready to be done.
    20190330_134850.jpg
    20190330_134853.jpg
    20190330_174453.jpg
    20190330_174458.jpg

    Everything wrapped up and installed. At this time I also picked up some 295/75r16 Toyo Open Country AT2s on American Racing Mojave 2's from Alex. I wanted to step up slightly in tire size at that time and this was the easiest option - so I said goodbye to the 80 series wheels (temporarily).
    20190330_185637.jpg
    20190330_185644.jpg
    20190330_185659.jpg

    Took out our rigs to test things out and enjoy not working for a day. Alex sold this 4Runner shortly after the trip and picked up a GX470. We both miss that 4Runner dearly haha.
    20190331_115712.jpg
    20190331_124215.jpg
     
    Last edited: Jul 29, 2020
  4. Jul 29, 2020 at 9:20 AM
    #4
    alee891

    alee891 [OP] Rather Be Dead

    Joined:
    Aug 8, 2017
    Member:
    #8954
    Messages:
    583
    Gender:
    Male
    Now/here
    Vehicle:
    Shitbox
    Another ~6 months goes by where I don't do anything to the truck. Work had completely engulfed my life by this point and I had recently moved from the Denver area to Northern Colorado. I picked up a BedRug at some point in this journey, but can't reference a time. In the meantime I picked up a Triumph Street Triple R to commute during the warm months and have fun in the canyons. This photo is from the day I took her home, safety gloves and all :rofl:

    Attach19550_20190527_111515.jpg

    I came across an A.R.E. fiberglass shell for only $100 while messing around on Craigslist one evening, and convinced myself I needed it and wanted to sleep in the truck bed on hunting trips.

    20190804_075006.jpg

    I was determined to color match the shell myself, and so began the journey of failing miserably and bed lining it. I took all windows out and and sanded the entire shell down to prep for paint. The topper had numerous leaks when I picked it up so removing the windows allowed for me to reseal / gasket everything to make it water tight. In the meantime I purchased about 10 cans of color matched paint from AutomotiveTouchup. The color of the paint was spot-on, but I believe there was a problem with the cans due to change in elevation from Louisiana to Colorado, or they just charged them poorly, but half of my cans did not spray at all and AT wouldn't return my calls or voicemails. So I said fuck it and sprayed bed liner on it. The end result wasn't as bad as I was expecting, but there are definitely inconsistencies in cover - I hope to roll on bed line it at some point.

    20190817_104139.jpg
    20190817_115245.jpg
    20190817_173845.jpg
    20190905_210320.jpg
    20190907_090935.jpg
    20190907_090943.jpg
    20190907_090959.jpg

    I built some reflectix window covers to use while camping.
    20190921_103413.jpg

    And had to wire up a strip of LEDs. If you look closely you can see the switch on the left side of the tailgate.
    20191020_185609.jpg

    Shortly after this effort I got married. My wife and I returned from our wedding and took the truck out for a shakedown / to sleep in the bed for a couple nights. Sleeping in a truck is not the same as sleeping in a tent, and we froze our assess off while surrounded by a giant metal structure. We woke up to frost on the windows and the dogs shivering. After that trip we purchased insulated sleeping pads, which have made a huge difference in comfort sleeping back there.

    20190921_155015.jpg
    20190921_155050.jpg
     
    Last edited: Jul 29, 2020
  5. Jul 29, 2020 at 10:10 AM
    #5
    alee891

    alee891 [OP] Rather Be Dead

    Joined:
    Aug 8, 2017
    Member:
    #8954
    Messages:
    583
    Gender:
    Male
    Now/here
    Vehicle:
    Shitbox
    Installed a switch panel in the overhead storage and wired up a fuse block in the engine bay. I do not have photos of the wiring process, but a loom runs from the switches, through the headliner, down the driver side A-pillar, through the fire wall and into the engine bay. Made use of an old license plate to serve as a fuse block tray and called it good.

    I did end up modifying the switch panel a bit at some point. It stuck out too much due to wiring (hence the Aliengear holster spacers upon initial install) so I had to modify wiring in order for everything to lay flat. It is now flush with the overhead storage and doesn't stick out like it did in at this time.

    20191003_190648.jpg
    20191003_191752.jpg
    20191003_191801.jpg
    20191004_182801.jpg

    Made use of an old license plate to serve as a fuse block tray and called it good.
    20190918_124422.jpg
    20190918_124426.jpg

    I then installed some rock lights (or camping lights as I like to call them).

    20191020_185533.jpg
    20191020_185631.jpg
     
    Last edited: Jul 29, 2020
  6. Jul 29, 2020 at 10:12 AM
    #6
    alee891

    alee891 [OP] Rather Be Dead

    Joined:
    Aug 8, 2017
    Member:
    #8954
    Messages:
    583
    Gender:
    Male
    Now/here
    Vehicle:
    Shitbox
    Eventually purchased OME struts locally from a guy who ran them all of 100 miles, and got into some well needed maintenance including CV reboot and replacement, and wheel bearings.

    Struts going in and UCA angle for reference. The OMEs picked the front up quite a bit from the worn out 5100s.
    20191017_183027.jpg
    20191017_183843.jpg
    20191017_183824.jpg

    After breaking a CV on an earlier hunting trip, I ended up purchasing new NAPA CVs and CVJ high angle boots. Tore the CVs down and rebooted, then installed. The CVs work fine for my needs. My only complaint is that the paint on them is trash and they rusted within a month. I hit them with some flat black paint for aesthetics, but when the time comes to replace I'll likely just go with CVJ remans.
    20191027_114819.jpg
    20191102_102933.jpg
    20191024_075031.jpg


    Then came wheel bearings. The old ones were likely originals and completely shot. Pressed the new ones in and she's good for another 250k.

    Then she sat as-is for a bit again. Took the truck back to SoDak for Christmas at the cabin and grabbed a poser shot.

    20191130_111654.jpg
     
    Last edited: May 14, 2022
    TheBeast, Brown Bear and Mountains49 like this.
  7. Jul 29, 2020 at 10:27 AM
    #7
    alee891

    alee891 [OP] Rather Be Dead

    Joined:
    Aug 8, 2017
    Member:
    #8954
    Messages:
    583
    Gender:
    Male
    Now/here
    Vehicle:
    Shitbox
    In Spring of 2020 I got bored with the truck and decided I needed to start cutting shit. So fenders were the first to be had.

    I believe I cut ~2" on both the front and rear - below is the only reference photo I have of the front.
    20200509_161958.jpg

    Sliders came next. A couple of buddies run a small-scale fab shop local to the Denver area, and produce some quality sliders w/ kick outs. I drove down to their shop to get them burned on then headed home for paint and primer. This was the first / last piece of armor I'll ever paint while on a vehicle. The primer alone was dense enough to float from beneath the truck and cling to the sides of the body. A pressure washer took care of the issue, but it was a pain in the ass nonetheless. While I made my way to their shop for the sliders I picked up a x5 set of 80 series wheels in great shape for dirt cheap. These would get wrapped in some old (but nearly all tread) Toyo MTs I also picked up for a steal. Thus began the process for 315's.

    20200718_102559.jpg
    20200719_102224.jpg
    20200719_110826.jpg
    20200719_115500.jpg
    20200718_110858.jpg
    20200720_145741.jpg
    20200720_145831.jpg
     
    Last edited: Aug 3, 2020
  8. Jul 29, 2020 at 10:39 AM
    #8
    alee891

    alee891 [OP] Rather Be Dead

    Joined:
    Aug 8, 2017
    Member:
    #8954
    Messages:
    583
    Gender:
    Male
    Now/here
    Vehicle:
    Shitbox
    Met up with a guy local to my area and swapped out the factory captain seats for a bench seat straight up. Personally I like bench seats and this provided an option to allow my son to sit in the middle with the wife and I on road trips, while also keeping the dogs contained to the back seat area. I also carpeted a piece of plywood and tossed it in the back so the dogs had a solid place to hangout and sleep during commutes. Don't have any photos of the swap or install, but it's a straightforward process and took maybe an hour to complete. The only thing I will mention is that there are holes in the center floorboard used for the original center console that will be exposed once the swap is made. I just took a piece of speaker carpet and a rubber floor mat and placed over the top of the area. I may actually try to stitch carpet in at some point, but I also intend to install a manual T-Case and Front Range Offroad twin sticks, so it'll likely get cleaned up once that install happens.

    20200708_100148.jpg
    20200708_192550.jpg
    20200708_210106.jpg
    20200708_210101.jpg
     
    Last edited: Jul 29, 2020
  9. Jul 29, 2020 at 10:48 AM
    #9
    alee891

    alee891 [OP] Rather Be Dead

    Joined:
    Aug 8, 2017
    Member:
    #8954
    Messages:
    583
    Gender:
    Male
    Now/here
    Vehicle:
    Shitbox
    Tub'd the firewall to fit 315's. I tub'd my Tacoma as well when I owned it, but running solo in a driveway for the Tundra was a bit more hassle than having the luxury of a shop and helping hands. I picked up some 18ga sheet metal to serve as the patches, pulled the struts to allow for the suspension to cycle and marked up where I was going to begin cutting. An angle grinder and cut-off discs are all I used for this project. I will say I ended up cutting quite a bit more than anticipated.

    To this point I hadn't welded anything for about a year. That said, my welds aren't pretty but certainly hold up. My goal was to have as much metal behind each bead as possible, thus reasoning for the chosen locations of my patches. 3M seam sealer (a ton) as well as 3M rubberized undercoating were applied to the interior and exterior after everything was burned in to make things as water tight as possible and keep water away from the electronics. I was paranoid on sealing everything up, as I had encountered water in the cab of my Tacoma which led to replacing the Cruise Control ECU, so I went overkill on the effort.

    Passenger side for reference:

    20200721_181757.jpg
    20200721_183237.jpg
    20200723_104634.jpg
    20200722_191109.jpg
    20200723_184217.jpg
    20200723_202617.jpg
    20200724_130518.jpg
    20200724_130527.jpg
    20200725_201003.jpg
    20200725_201014.jpg
    20200726_093539.jpg
    20200726_093548.jpg


    And driver. I attempted to cut and re-weld some of the factory sheet metal towards the top of the wheel well on the driver side to eliminate the amount of patches I would need to burn in. This was a poor choice and resulted in more work in the long run due to how thin the factory metal truly is / me just burning holes the entire time. I did not need to take out as much metal on the driver side, but once things were tacked in I did have to hammer back my patches a bit more to clear at full stuff and lock:

    20200724_162906.jpg
    20200724_162910.jpg
    20200724_165139.jpg
    20200725_140209.jpg
    20200725_200955.jpg
    20200725_201054.jpg
    20200726_093531.jpg
    20200726_093601.jpg

    A handful of cab fires later, cut-off discs used beyond their life and plenty of rubber undercoat inhaled into my lungs, she was done.

    20200725_151335.jpg
    20200725_151352.jpg
    20200725_151408.jpg
    20200725_151343.jpg
     
    Last edited: Jul 29, 2020
  10. Jul 29, 2020 at 10:53 AM
    #10
    alee891

    alee891 [OP] Rather Be Dead

    Joined:
    Aug 8, 2017
    Member:
    #8954
    Messages:
    583
    Gender:
    Male
    Now/here
    Vehicle:
    Shitbox
  11. Jul 29, 2020 at 11:01 AM
    #11
    alee891

    alee891 [OP] Rather Be Dead

    Joined:
    Aug 8, 2017
    Member:
    #8954
    Messages:
    583
    Gender:
    Male
    Now/here
    Vehicle:
    Shitbox
  12. Jul 29, 2020 at 11:09 AM
    #12
    alee891

    alee891 [OP] Rather Be Dead

    Joined:
    Aug 8, 2017
    Member:
    #8954
    Messages:
    583
    Gender:
    Male
    Now/here
    Vehicle:
    Shitbox
  13. Jul 29, 2020 at 11:42 AM
    #13
    Mountains49

    Mountains49 New Member

    Joined:
    Dec 7, 2017
    Member:
    #11400
    Messages:
    136
    Vehicle:
    2018 White Platinum
    Strong work! Makes me want to get another 1st gen.
    I had an '04 too. Loved and miss that truck. Will definitely be following along.
     
    imDementeD and alee891[OP] like this.
  14. Jul 29, 2020 at 12:32 PM
    #14
    alee891

    alee891 [OP] Rather Be Dead

    Joined:
    Aug 8, 2017
    Member:
    #8954
    Messages:
    583
    Gender:
    Male
    Now/here
    Vehicle:
    Shitbox
    Thanks buddy :thumbsup:
     
  15. Jul 30, 2020 at 9:49 AM
    #15
    imDementeD

    imDementeD New Member

    Joined:
    May 30, 2019
    Member:
    #31182
    Messages:
    694
    Gender:
    Male
    Vehicle:
    2003 Tundra Limited 4x4 Trd Supercharger
    awesome work. Truck looks great!
     
    alee891[OP] likes this.
  16. Jul 30, 2020 at 10:41 AM
    #16
    TheBeast

    TheBeast The Beach

    Joined:
    Apr 27, 2016
    Member:
    #3246
    Messages:
    12,521
    Gender:
    Male
    SoCal
    Vehicle:
    2012
    great build thread ! looks good !
     
    alee891[OP] likes this.
  17. Jul 30, 2020 at 12:36 PM
    #17
    Kimosabe

    Kimosabe Slacker

    Joined:
    Jul 28, 2020
    Member:
    #50004
    Messages:
    708
    Gender:
    Male
    First Name:
    Chris
    Sun Valley, Idaho
    Vehicle:
    03 Tundra AC TRD
    Great work. That's quite a bit of work. Did those LC wheels work without any spacers? I have some I want to throw on, but thought they didn't work with the larger brakes.
     
  18. Jul 30, 2020 at 1:58 PM
    #18
    alee891

    alee891 [OP] Rather Be Dead

    Joined:
    Aug 8, 2017
    Member:
    #8954
    Messages:
    583
    Gender:
    Male
    Now/here
    Vehicle:
    Shitbox
    I cannot say I've ever tried to mount without spacers, but I'm not aware of the issue with clearing the calipers. Sorry I'm not much help on that one.
     
    Kimosabe[QUOTED] likes this.
  19. Aug 2, 2020 at 6:45 AM
    #19
    fighthedude

    fighthedude New Member

    Joined:
    Nov 15, 2019
    Member:
    #38697
    Messages:
    206
    Gender:
    Male
    Sweet. Thanks for taking time to write and detail so much. Cheers. Throw up some hunting photos this fall with that thing!
     
    alee891[OP] likes this.
  20. Aug 10, 2020 at 8:14 PM
    #20
    alee891

    alee891 [OP] Rather Be Dead

    Joined:
    Aug 8, 2017
    Member:
    #8954
    Messages:
    583
    Gender:
    Male
    Now/here
    Vehicle:
    Shitbox
    Last edited: Aug 11, 2020
  21. Aug 11, 2020 at 10:55 AM
    #21
    alee891

    alee891 [OP] Rather Be Dead

    Joined:
    Aug 8, 2017
    Member:
    #8954
    Messages:
    583
    Gender:
    Male
    Now/here
    Vehicle:
    Shitbox
    Also got some edge trim on the cut fenders. I was hoping this would hide the not-so-perfect cut lines, but they seem to be just as visible as without, with the bonus that the paint is protected and won't chip away.

    This stuff is a solid product. It has internal aluminum metal clips and a gripping tongue on the inside. Doesn't require glue, stays on tight yet can easily be removed if needed. The metal clips are spaced every 1/8" or so, so cutting it is easy.

    Trim-lok Edge Trim

    20200811_114820.jpg
    20200811_114849.jpg
    20200811_114858.jpg
    20200811_114815.jpg
     
  22. Sep 18, 2020 at 12:30 AM
    #22
    912

    912 @best_gen_tundra

    Joined:
    Feb 15, 2017
    Member:
    #6393
    Messages:
    447
    Gender:
    Male
    First Name:
    Brian
    SWFL
    sweet truck man!
     
    alee891[OP] likes this.
  23. Sep 20, 2020 at 6:35 PM
    #23
    Blueranger501

    Blueranger501 New Member

    Joined:
    Feb 23, 2020
    Member:
    #43069
    Messages:
    110
    Solid build. You convinced me that I need to get a good light installed. How did you wore it? And more details in “camping” lights? Are they on a separate switch? Would cool to have them independent on off and also an option to come on when you open the door.

    how are you liking the 35s with stock gears? Mine was a dog until I did 4.88s. Still wondering if I should have done 456.

    excited to see the twin stick work!!!
     
    alee891[OP] likes this.
  24. Sep 24, 2020 at 1:19 PM
    #24
    alee891

    alee891 [OP] Rather Be Dead

    Joined:
    Aug 8, 2017
    Member:
    #8954
    Messages:
    583
    Gender:
    Male
    Now/here
    Vehicle:
    Shitbox
    Appreciate it! Sorry for the late reply, haven't been on the forum for a minute
     
    912[QUOTED] likes this.
  25. Sep 24, 2020 at 1:30 PM
    #25
    alee891

    alee891 [OP] Rather Be Dead

    Joined:
    Aug 8, 2017
    Member:
    #8954
    Messages:
    583
    Gender:
    Male
    Now/here
    Vehicle:
    Shitbox
    Thanks buddy. The hood light is wired pretty simply. Wire runs through the body of the hood, comes out near the strut, the +/- wired up at the battery. There is a pin switch which turns the light on/off when you open or close it (something like this).

    upload_2020-9-24_14-24-5.jpg

    Install for the rock lights wasn't pretty / more of a pain in the ass than I'd like to admit. But I used these eagle eye LEDs / installed x2 at each rear wheel (front and back), x1 in the front wheel wells, and x1 at each sway bar connect (open whole since I removed the sway bar many moons ago). They're cheap, some of the covers have fallen off, but oddly none have shit the bed yet. If you want wiring details I can grab some photos at a later time, but again, its not an install I'm proud off.

    35s on stock gears is manageable on the road. Off road it's an absolute dog, even in 4Lo/Lo. I was actually on my way to my spot last weekend and thought I was going to chug out and roll backwards up a hill while still in 4H/Lo... literally pedal to the floor and moving at a snails pace. I've been pretty tied up with hunting this entire month, so mods and priorities have shifted away from the truck, but I plan to go 4.88s when the time comes.
     
  26. Sep 24, 2020 at 1:37 PM
    #26
    alee891

    alee891 [OP] Rather Be Dead

    Joined:
    Aug 8, 2017
    Member:
    #8954
    Messages:
    583
    Gender:
    Male
    Now/here
    Vehicle:
    Shitbox
    Haven't done a thing to the truck for a bit. Been striking out on this year's archery mule deer season. The fires here in Northern Colorado have really put a wrench in plans and closed off quite a bit of country huntable with my tag (at least 80% I'd say). Have had a handful of stalks on smaller bucks but haven't been able to draw or let one fly yet. Hoping to seal the deal this weekend before the season wraps up at the end of the month. The Tundra has been a workhorse and carried camp to/from up some rocky skid trails but nothing crazy. Slept in the back a few nights as well on my quick trips.

    20200905_182259.jpg
    20200906_155154.jpg
    20200901_145033.jpg
    20200829_094550.jpg
    20200919_151744.jpg
     
    nowayout and 912 like this.
  27. Oct 19, 2020 at 9:14 AM
    #27
    alee891

    alee891 [OP] Rather Be Dead

    Joined:
    Aug 8, 2017
    Member:
    #8954
    Messages:
    583
    Gender:
    Male
    Now/here
    Vehicle:
    Shitbox
    Another non-tundra related post, but punched my bull and cow elk tags this past week in Colorado. Feels good to finally down some stuff after a not-so-eventful archery season. Got an anterless whitetail tag to fill in my home state of South Dakota this fall/winter, otherwise onto birds.

    20201016_121025.jpg
     
    Last edited: Nov 10, 2021
    fighthedude likes this.
  28. Nov 7, 2020 at 4:46 PM
    #28
    alee891

    alee891 [OP] Rather Be Dead

    Joined:
    Aug 8, 2017
    Member:
    #8954
    Messages:
    583
    Gender:
    Male
    Now/here
    Vehicle:
    Shitbox
    Finally built a hidden "snorkel" today. Intent was to reroute the giant hole straight to the airbox left after pulling the fender liner for 35s, and to gain some height with the new pipe installation. I figure if I have water over my hood, I'm in more trouble than I need to be.

    Started by tearing the fender off and airbox out. No matter how many times I've pulled these fenders, they are still a bitch everytime. I pulled the factory intake tube and measured out a piece of 3" PVC to replace it.

    20201107_115244.jpg
    20201107_115248.jpg
    20201107_115453.jpg
    20201107_120640.jpg
    20201107_120648.jpg

    After measuring out the new intake I mocked it up in the engine bay and made sure everything was flush. I've seen guys use an angle grinder or hole saw for their new pipe, but I found tin snips to be very useful for this project.

    20201107_120818.jpg
    20201107_120842.jpg

    Went to town with epoxy to make things water tight, then started cutting a giant hole for the pipe to terminate under the windshield cowl.

    20201107_122453.jpg
    20201107_131339.jpg
    20201107_131335.jpg

    PVC glued everything together, sprayed flex seal on all seams for piece of mind, then put the fender back on. I did end up painting everything black to better conceal under the fender before I glued the last piece together. The 45s I used were just a tad too big, and a tiny dent was made in my fender after pushing things to align. Had I cut a larger hole at the airbox to allow for the first elbow to slip past metal, the dent could have been avoided. But this thing has dents and scratches all over it so I don't care.

    20201107_133325.jpg
    20201107_144948.jpg
    20201107_145052.jpg

    Currently working on a new wiper fluid reservoir, as I removed the factory one to get rid of tire rub. Kind of excited to let the glue dry and get it installed tomorrow.

    Also pulled apart the steering rack to replace bushings tonight. The previous owner installed Dormans and they are kicking my ass right now. Will finish that up tomorrow and also hope to get the stainless brake lines on.
     
    Last edited: May 14, 2022
  29. Nov 8, 2020 at 12:42 PM
    #29
    alee891

    alee891 [OP] Rather Be Dead

    Joined:
    Aug 8, 2017
    Member:
    #8954
    Messages:
    583
    Gender:
    Male
    Now/here
    Vehicle:
    Shitbox
    Got the steering rack bushings replaced and mini wiper fluid reservoir temporarily installed with zip ties for now. I'm not getting fluid to pull from the bottle to the sprayers so need to track that down. Also installed Power Stop stainless brake lines. Been a productive weekend on the beater.

    20201107_162139.jpg
    20201108_112025.jpg
    20201107_152050.jpg
    20201107_154342.jpg
    20201107_161716.jpg
     
  30. Nov 13, 2020 at 8:19 AM
    #30
    FirstGenVol

    FirstGenVol Brake Czar

    Joined:
    Dec 13, 2018
    Member:
    #22934
    Messages:
    13,048
    East TN
    Vehicle:
    2002 AC
    Very creative problem solving here. I love the water bottle turned wiper fluid reservoir. These trucks look so damn good on 35's. I just wish it didn't require so much cutting.
     
To Top