1. Welcome to Tundras.com!

    You are currently viewing as a guest! To get full-access, you need to register for a FREE account.

    As a registered member, you’ll be able to:
    • Participate in all Tundra discussion topics
    • Transfer over your build thread from a different forum to this one
    • Communicate privately with other Tundra owners from around the world
    • Post your own photos in our Members Gallery
    • Access all special features of the site

The Wallygator Chronicles

Discussion in '2.5 Gen Builds (2014-2021)' started by Wallygator, Apr 11, 2020.

  1. Apr 11, 2020 at 12:34 AM
    #1
    Wallygator

    Wallygator [OP] Well Zippedy Da Do!

    Joined:
    Apr 7, 2020
    Member:
    #44761
    Messages:
    2,551
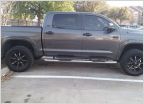
    IMG_20200406_171225687_HDR.jpg Don't usually do build threads but thought this would be a good thing to do on this one to chronicle the progression of the truck for my needs, trip reports, maintenance done, etc...

    Truck is a 2020 Toyota Tundra SR5 4x4 5.7 liter...more to come.

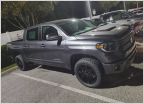
    IMG_20200410_093826071_HDR.jpg
    Make chrome great again!!!
     
    Last edited: Apr 11, 2020
  2. Apr 11, 2020 at 3:23 PM
    #2
    Wallygator

    Wallygator [OP] Well Zippedy Da Do!

    Joined:
    Apr 7, 2020
    Member:
    #44761
    Messages:
    2,551
    Debadge complete. I love this color!

    IMG_20200411_134154042_HDR.jpg
     
  3. Apr 11, 2020 at 3:27 PM
    #3
    Lovetrucks

    Lovetrucks Member

    Joined:
    Feb 28, 2020
    Member:
    #43266
    Messages:
    1,318
    Gender:
    Male
    First Name:
    Bryan
    Vehicle:
    2019 Ram Rebel
    Looks good !
     
    Tundyfundy and Wallygator[OP] like this.
  4. Apr 13, 2020 at 11:48 AM
    #4
    Wallygator

    Wallygator [OP] Well Zippedy Da Do!

    Joined:
    Apr 7, 2020
    Member:
    #44761
    Messages:
    2,551
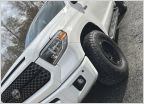
    With 153 miles on the clock the stock radiator already had a couple rock hits. Had to try and rectify this so I went to the depot and picked up a few of these, gutter guards. Ended up needing only two.
    IMG_20200413_140940323_HDR.jpg

    There was no way to screw them in so I cut about 1.5 inches off of one, cut out the hole for the sensor, and zip tied them together. Then zip tied to the grill. Is it perfect? No, but it should do the job and you have to be looking for the ties to really notice them. Hopefully they hold.

    IMG_20200413_141005557.jpg

    IMG_20200413_141000851.jpg
    IMG_20200413_141537738_HDR.jpg

    Cut the zip tie leads, reinstalled the grill, and opened a beer. I feel better now :cheers:
     
    Last edited: Apr 13, 2020
  5. Apr 13, 2020 at 1:42 PM
    #5
    TokerJoker

    TokerJoker ΜΟΛΩΝ ΛΑΒΕ

    Joined:
    Sep 12, 2018
    Member:
    #19328
    Messages:
    2,223
    Gender:
    Male
    First Name:
    Travis
    Nowhere, Specific
    Vehicle:
    2014 Black SR5 4.6 Dbl Cab
    None.....yet
    Howdy from DFW and nice truck :thumbsup:
     
    Wallygator[OP] likes this.
  6. Apr 13, 2020 at 1:52 PM
    #6
    Wallygator

    Wallygator [OP] Well Zippedy Da Do!

    Joined:
    Apr 7, 2020
    Member:
    #44761
    Messages:
    2,551
    Thanks!
     
  7. Apr 21, 2020 at 1:06 PM
    #7
    Wallygator

    Wallygator [OP] Well Zippedy Da Do!

    Joined:
    Apr 7, 2020
    Member:
    #44761
    Messages:
    2,551
    Have 263 miles on it. Loving this thing. Bought a screen protector for the radio from NuShield. The 2020 SR5"s have an 8" screen. Here is the part number...

    IMG_20200421_155850424.jpg

    Of course I managed to get a couple bubbles behind it. :thumbsup:

    IMG_20200421_154823167_HDR.jpg
     

    Attached Files:

    bulldog93 and TokerJoker like this.
  8. Apr 21, 2020 at 1:13 PM
    #8
    Wallygator

    Wallygator [OP] Well Zippedy Da Do!

    Joined:
    Apr 7, 2020
    Member:
    #44761
    Messages:
    2,551
    Also got the drivers side grab handle from Roman today. Notched out the "new" one like all the writeups say to do and threw it on the truck. I will use this mod daily.
    (The one pictured on the bottom is for sale if anyone is interested o_O )

    IMG_20200421_153407577.jpg
    IMG_20200421_154814982_HDR.jpg
     
  9. Apr 21, 2020 at 4:32 PM
    #9
    TokerJoker

    TokerJoker ΜΟΛΩΝ ΛΑΒΕ

    Joined:
    Sep 12, 2018
    Member:
    #19328
    Messages:
    2,223
    Gender:
    Male
    First Name:
    Travis
    Nowhere, Specific
    Vehicle:
    2014 Black SR5 4.6 Dbl Cab
    None.....yet
    I so want to add the handle to ours!! Just procrastinating like I always do.....

    Very nice OP!:thumbsup:
     
  10. Apr 21, 2020 at 5:29 PM
    #10
    Wallygator

    Wallygator [OP] Well Zippedy Da Do!

    Joined:
    Apr 7, 2020
    Member:
    #44761
    Messages:
    2,551
    Hey thanks! You have plenty of time to spend money:D. It's not exactly a cheap mod for what it is but is very useful IMO.
     
    TokerJoker[QUOTED] likes this.
  11. Apr 22, 2020 at 4:05 AM
    #11
    TokerJoker

    TokerJoker ΜΟΛΩΝ ΛΑΒΕ

    Joined:
    Sep 12, 2018
    Member:
    #19328
    Messages:
    2,223
    Gender:
    Male
    First Name:
    Travis
    Nowhere, Specific
    Vehicle:
    2014 Black SR5 4.6 Dbl Cab
    None.....yet
    Indeed very useful!! No money to spend at the moment. Between bills and food and less hours at work, thankful to still be working!!
     
  12. Apr 22, 2020 at 4:16 AM
    #12
    10TundraSR5

    10TundraSR5 Happy Tundra owner

    Joined:
    Oct 22, 2018
    Member:
    #20824
    Messages:
    861
    Gender:
    Male
    Tennessee
    Vehicle:
    2010 Black Tundra SR5
    Curse you Perry the Platypus!
    Smart idea about the grill guard. Looks good.
     
    Tundyfundy and Wallygator[OP] like this.
  13. Apr 22, 2020 at 6:38 AM
    #13
    Wallygator

    Wallygator [OP] Well Zippedy Da Do!

    Joined:
    Apr 7, 2020
    Member:
    #44761
    Messages:
    2,551
    Yes happy to still be working. Never thought I would say that. ;) Many more important things to spend money on than mods for sure. I probably would have not bought it so soon if not for the stimulus. Hopefully things get back to normal soon.
     
    TokerJoker[QUOTED] likes this.
  14. Apr 22, 2020 at 6:41 AM
    #14
    Wallygator

    Wallygator [OP] Well Zippedy Da Do!

    Joined:
    Apr 7, 2020
    Member:
    #44761
    Messages:
    2,551
    Hey thanks! But I can't take credit for it. I did a tundras.com radiator guard search on google to see if there was such a thing in the aftermarket. Found others on here made their own so I used their ideas. Then the search began for the materials needed. It worked out well and should last a long time.
     
    Last edited: Apr 22, 2020
  15. Apr 22, 2020 at 8:23 AM
    #15
    10TundraSR5

    10TundraSR5 Happy Tundra owner

    Joined:
    Oct 22, 2018
    Member:
    #20824
    Messages:
    861
    Gender:
    Male
    Tennessee
    Vehicle:
    2010 Black Tundra SR5
    Curse you Perry the Platypus!
    I've used those gutter guards on my gutters and they are a good quality. Whoever came up with the idea of using them to protect the radiator dun good.
     
  16. May 3, 2020 at 2:09 PM
    #16
    Wallygator

    Wallygator [OP] Well Zippedy Da Do!

    Joined:
    Apr 7, 2020
    Member:
    #44761
    Messages:
    2,551
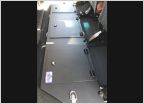
    Starting to figure the fridge install out. Ended up using both brackets off the salvaged seat. Had to cut off a large chunk of the right bracket so the fridge platform can go over it. So the money I spent on the salvaged seat ended up working out cuz I was not gonna hack up the original seat bracket.

    IMG_20200503_155105013.jpg

    Filed the edges, painted them black, and installed back into the truck

    IMG_20200503_160026662.jpg

    Then started working on a wood plate for the back wall. This will be used for a solar controller and fuse block. Was going to drill two more mounting holes in the bottom but the one on the top combined with the slot to accommodate the bracket, have it sitting pretty solid. May put some foam over the bracket bolts cuz it may potentially rattle. Now to finish this back plate up and figure out the fridge base...

    IMG_20200503_165128130.jpg
     
    bulldog93, smslavin and TokerJoker like this.
  17. May 8, 2020 at 12:31 PM
    #17
    Wallygator

    Wallygator [OP] Well Zippedy Da Do!

    Joined:
    Apr 7, 2020
    Member:
    #44761
    Messages:
    2,551
    The passenger rated tires were not going to cut it with how I use this truck. Went back and forth on staying stock or going up one size. Was concerned about going up cuz that meant an E rated tire. Glad I went up now and finally decided on 275/70/18 Falken Wildpeak AT3W's.

    The tuck actually rides better with these tires. This is how it should have came from the factory. These seem to handle bumps and pavement abnormalities way better than the passenger tires that were very jarring. This was a great upgrade at 595 miles. Also replaced the spare with a cheaper tire.

    IMG_20200508_093448514.jpg

    IMG_20200508_100219519_HDR.jpg
     
  18. May 12, 2020 at 10:51 AM
    #18
    Wallygator

    Wallygator [OP] Well Zippedy Da Do!

    Joined:
    Apr 7, 2020
    Member:
    #44761
    Messages:
    2,551
    Today was pretty productive. Had to take the truck back to Discount Tire to get the tires road force balanced. One tire was way off and was causing a vibration from 50 mph on up. It was also very noisy. All of that is now gone and it's smooth as silk.

    Then proceeded to get the fridge mounted after receiving some tie downs I bought from E-Trailer. Drilled a couple of holes into the salvaged seat brackets and mounted the back tie downs.

    IMG_20200512_123308482.jpg

    Then made some brackets for the front tie downs to mount to. Used the passenger seat rear bolts to mount the brackets. Then mounted the tie downs to the brackets. Turned out ok.

    IMG_20200512_125815826_HDR.jpg

    IMG_20200512_130816264.jpg

    Then placed the platform I made into the truck. It just rests on the seat brackets and storage bin. It's held down by the fridge tie downs. An finally, the fridge is in place.

    IMG_20200512_132940545_HDR.jpg

    IMG_20200512_133101293.jpg

    IMG_20200512_133208474.jpg


    Was gonna paint all the wood black but honestly don't really care for now.
    Really need the RCI bed rack to get here so I can start on the solar setup.;)
     
  19. May 12, 2020 at 11:15 AM
    #19
    Billy I

    Billy I AKA Storm Shadow

    Joined:
    Oct 26, 2018
    Member:
    #20978
    Messages:
    136
    Gender:
    Male
    Vehicle:
    2013 Tundra TRD Off Road White
    Nice build thread. I also need my RCI rack to get here as it has finally stopped snowing in Upstate NY!
     
    Wallygator[OP] likes this.
  20. May 12, 2020 at 4:30 PM
    #20
    Wallygator

    Wallygator [OP] Well Zippedy Da Do!

    Joined:
    Apr 7, 2020
    Member:
    #44761
    Messages:
    2,551
    Thank you! So I ordered the rack on April 12th. I wonder if I should contact them? Anyway, glad your weather is improving, summer is approaching.
     
  21. May 13, 2020 at 11:51 AM
    #21
    Billy I

    Billy I AKA Storm Shadow

    Joined:
    Oct 26, 2018
    Member:
    #20978
    Messages:
    136
    Gender:
    Male
    Vehicle:
    2013 Tundra TRD Off Road White
    I ordered my rack on April 26th. With a 3-4 week lead time listed on their site I think yours may be right around the corner. And I spoke too soon - snowing last night on my way home. Sometimes it feels to me as though the world is just stuck in a phase it cannot move out of.
     
    Wallygator[OP] likes this.
  22. May 13, 2020 at 3:18 PM
    #22
    Wilbur

    Wilbur New Member

    Joined:
    Sep 25, 2015
    Member:
    #1857
    Messages:
    352
    Gender:
    Male
    Savannah, GA
    Vehicle:
    2014 MGM
    mgm is the best color hands down
     
    Wallygator[OP] likes this.
  23. May 19, 2020 at 3:29 PM
    #23
    Wallygator

    Wallygator [OP] Well Zippedy Da Do!

    Joined:
    Apr 7, 2020
    Member:
    #44761
    Messages:
    2,551
    IMG_20200518_150746998_HDR.jpg

    Ok got the RCI bed rack in place and all buttoned up in between rain sessions today. Unfortunately it looks like I am going to have to drill into it in order for my tent to work with it. Not happy about that but no choice really.

    IMG_20200519_181802467_HDR.jpg

    This rack is very high quality and went together very easily. The only issue was the hardware didn't show up for the bed rail brackets. Bought stainless hardware to complete it.

    IMG_20200519_181923870.jpg
     
    Last edited: May 20, 2020
    bulldog93 and Billy I like this.
  24. May 19, 2020 at 4:28 PM
    #24
    Wilbur

    Wilbur New Member

    Joined:
    Sep 25, 2015
    Member:
    #1857
    Messages:
    352
    Gender:
    Male
    Savannah, GA
    Vehicle:
    2014 MGM
    hmmm this reminds me of someone IMG_2383.jpg
     
  25. May 20, 2020 at 1:08 AM
    #25
    Wallygator

    Wallygator [OP] Well Zippedy Da Do!

    Joined:
    Apr 7, 2020
    Member:
    #44761
    Messages:
    2,551
    Very nice! Great setup you have there. When the rain stops I will be mounting my tent. I have decided I am going to drill holes in the rack to do so. Do not want to but my tent mounting rails do not line up with the RCI openings on the top of the rack. Four mounting rails and not one lines up...:frusty:
     
    Last edited: May 20, 2020
  26. May 20, 2020 at 10:11 AM
    #26
    Wilbur

    Wilbur New Member

    Joined:
    Sep 25, 2015
    Member:
    #1857
    Messages:
    352
    Gender:
    Male
    Savannah, GA
    Vehicle:
    2014 MGM
    you tried sliding the top two pieces side to side, right?
     
  27. May 20, 2020 at 3:24 PM
    #27
    Wallygator

    Wallygator [OP] Well Zippedy Da Do!

    Joined:
    Apr 7, 2020
    Member:
    #44761
    Messages:
    2,551
    I centered everything and....Well come to find out my friend who has the tent stored at his house gave me the wrong measurements on the tent rails. He remeasured today and it looks like the inside rails are going to just line up with the slots in the rack. So hope to have the tent on the truck tomorrow, weather permitting. :yes:
     
  28. May 29, 2020 at 12:34 PM
    #28
    Wallygator

    Wallygator [OP] Well Zippedy Da Do!

    Joined:
    Apr 7, 2020
    Member:
    #44761
    Messages:
    2,551
    First camping trip complete an already feel the need to spend more money on suspension. Have about 25 pieces of wood and all my camping gear loaded up here. (See pic). I think the bike is the main issue but it's not crazy heavy at around 280 lbs. It's ok, I knew going in the suspension was the weak point since this has rang true on every Toyota I have ever owned.

    IMG_20200524_094131112_HDR.jpg

    The leaf springs are negative arched and there is about an 1"more travel before the bump stops are touching the frame.

    IMG_20200524_094231393.jpg

    Transmission temps in the mountains with this load were getting up to temps I am not used to. Not sure which direction I am going to take with this situation as I'm still researching and logging temps. I did buy some Amsoil trans fluid and will drain and fill at oil change intervals.

    IMG_20200524_100527874.jpg

    We camped in some private land and this was the initial set up...

    IMG_20200524_201225314.jpg

    A couple issues....the canopy off the back will flap in the wind, shake the truck, and keep you awake half the night. Cannot wait for the awning I ordered to come in....next, the solar could not keep up with how much energy the fridge was using. My theory is because the windows had to stay up due to frequent rain, it got very hot in the cab, and the fridge was working overtime. Also probably did not help I used the radio for a few hours playing bluegrass on the sat radio while we had refreshments around the fire.

    IMG_20200524_211603245_BURST020.jpg

    Got rid of the canopy for the second night and much better sleep happened. Had a blast on this trip dual sporting in the mountains. First trip of the year is unfortunately over. So fun.

    IMG_20200526_065528341.jpg

    IMG_20200524_211237463.jpg
     
    Last edited: May 29, 2020
  29. Jun 5, 2020 at 2:58 PM
    #29
    300BLK

    300BLK New Member

    Joined:
    Aug 1, 2019
    Member:
    #34022
    Messages:
    806
    Vehicle:
    2014 Tundra SR5 - Black
    I really like your setup. Very utilitarian and functional. What suspension setups are you looking at?
     
    Wallygator[OP] likes this.
  30. Jun 5, 2020 at 3:26 PM
    #30
    Wallygator

    Wallygator [OP] Well Zippedy Da Do!

    Joined:
    Apr 7, 2020
    Member:
    #44761
    Messages:
    2,551
    Hey Thanks! I am leaning towards the Ironman4x4 PRO kit. This suspension is used by the US military and looks to be very robust. I do tend to lean towards function, low maintenance, and reliability so the suspension I choose will be either the Ironman PRO or something from OME. I have had suspension from both of these companies on other builds and they are perfect for this build and how I will use the truck. Upper control arms will be from JBA. Not sure when this will happen due to available funds.

    https://ironman4x4america.com/toyota-tundra-2007-foam-cell-pro-3-suspension-lift-kit/
     
    bulldog93 and 300BLK[QUOTED] like this.

Products Discussed in

To Top