-
Welcome to Tundras.com!
You are currently viewing as a guest! To get full-access, you need to register for a FREE account.
As a registered member, you’ll be able to:- Participate in all Tundra discussion topics
- Transfer over your build thread from a different forum to this one
- Communicate privately with other Tundra owners from around the world
- Post your own photos in our Members Gallery
- Access all special features of the site
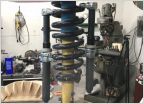 Shankly HD Spring Compressors
 Buiding a New Suspension. Please pick it apart.
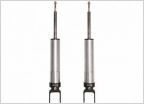 Cheap alternative for Icon delay
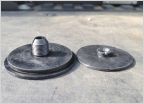 Icon RXT Leaf pack driving me mad
 Don't be (very) afraid to build Bilstein 6112
 Handling issues 2015 platinum.
5100 install
Discussion in 'Suspension' started by Ol' Salty Dawg, Nov 18, 2019.
Page 1 of 2
Page 1 of 2