1. Welcome to Tundras.com!

    You are currently viewing as a guest! To get full-access, you need to register for a FREE account.

    As a registered member, you’ll be able to:
    • Participate in all Tundra discussion topics
    • Transfer over your build thread from a different forum to this one
    • Communicate privately with other Tundra owners from around the world
    • Post your own photos in our Members Gallery
    • Access all special features of the site

Gen2 Strut Removal?

Discussion in 'Suspension' started by badsector, Nov 22, 2016.

  1. Nov 22, 2016 at 7:42 AM
    #1
    badsector

    badsector [OP] New Member

    Joined:
    Jul 20, 2016
    Member:
    #3930
    Messages:
    49
    Richmond, VA
    Vehicle:
    2010 Black Rock Warrior DC
    Expedition One Front Bumper w/Warn 10-S winch TRD Dual Exhaust ARE CX Camper Shell OME 613 Full suspension kit with Dakar rear springs.
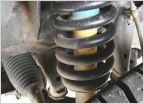
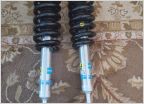
    I ordered an OME full suspension kit from toyteclifts, it's supposed to arrive today. I paid toyteclifts to assemble the strut assembly. I'm looking around on youtube and seeing what appears to be two different approaches for removing the old struts...

    One video is a little lacking in detail, but looks like it shows that they disconnect the bolt on the UAC and knuckle, loosen the alignment bolts on the LCA and everything drops down allowing them to remove the old strut and insert the new one.

    I saw another method in which they removed the bottom two bolts of the lower control arm bracket that attaches to the bottom of the knuckle, loosened the LCA alignment bolts and dropped out the strut.

    Is either method preferable, or is there yet another way I should go about it? Any and all install advice is highly welcome for both the front struts and rear dakar springs.
     
  2. Nov 22, 2016 at 7:47 AM
    #2
    Black Wolf

    Black Wolf Bigfoot Hunter, Sasquatch too, but not Yeti

    Joined:
    Apr 20, 2014
    Member:
    #378
    Messages:
    40,144
    Gender:
    Male
    First Name:
    Matt
    Aurora CO
    Vehicle:
    2022 Nissan Frontier SV 4X4
    TuwaPro rack, Z1 Offroad stuff, NISMO suspension stuff, FlowmasterFX Extreme exhaust, AIS, OVS, J&L can, other goodies on the way
    When I installed my OME struts I disconnected the bolt on the UCA and knuckle and also removed the sway bar bracket bolts on each side which allowed enough play to remove the old struts. Remember to disconnect speed sensor brackets so you don't damage (stretch) the speed sensor cable. Don't ask how I know about damaging the speed sensor. (oops).
     
    Last edited: Nov 23, 2016
  3. Nov 22, 2016 at 7:55 AM
    #3
    badsector

    badsector [OP] New Member

    Joined:
    Jul 20, 2016
    Member:
    #3930
    Messages:
    49
    Richmond, VA
    Vehicle:
    2010 Black Rock Warrior DC
    Expedition One Front Bumper w/Warn 10-S winch TRD Dual Exhaust ARE CX Camper Shell OME 613 Full suspension kit with Dakar rear springs.
    Good tip... I'll put that on my checklist.
     
  4. Nov 22, 2016 at 7:59 AM
    #4
    Law323

    Law323 it’s only weird if you make it weird

    Joined:
    Apr 7, 2016
    Member:
    #3081
    Messages:
    9,842
    Gender:
    Male
    First Name:
    Law
    Baton Rouge, La
    Vehicle:
    2012 4.6 L MGM DC
    Toytec BOSS suspension lift @ 3" (front) Toytec BOSS remote resi's (back) 1" Toytec block (rear) 275/70r18 Toyo AT2 Info system mod 3D MAXpider Kagu floor mats LED interior lights 50% ceramic tint front windows 35% ceramic tint windshield brow Bed mounted YETI bottle opener Paracord wrapped oh Sh!t bars 3" stubby antennae TRD sway bar Upcoming: LED backup lights OEM Backup camera Iron Cross Patriot step bars Trifold or roll up tonneau cover
    Loosened the LCA and took off the knuckle. Hell of a lot easier to work the strut in that way. You'll need an extra jack to lift up the LCA to height so you can bolt it back on LOL and I had trouble getting the front sway bar back in correctly where it attaches near the LCA, just loosen the bolt nearest the front and bolt in the LCA then Tighten front bolt.

    Put aside a whole day to do it, Murphy's law always shows its ugly rear on projects like this!!
     
    NewImprovedRon likes this.
  5. Nov 22, 2016 at 9:42 AM
    #5
    equin

    equin Texarican Tundra

    Joined:
    Dec 11, 2015
    Member:
    #2230
    Messages:
    1,875
    Gender:
    Male
    First Name:
    Ed
    DFW, TX
    Vehicle:
    2015 Silver Sky DC SR5 5.7L 4x4 TSS Package
    TRD Rear Anti-sway bar, TRD Pro skid plate, Bedrug bed mat, 17" Icon Rebounds, 315/70/17 BFG AT/K02, Bilstein 6112s front (for now), Fox 2.5 Remote Reservoirs rear, Diamondback SE, Dirtydeeds Industries 8" stainless BAMuffler, aFe dry air filter, TRD air intake accelerator
    The more I read about front strut/coilover installs, the more I realize how much different it is from a 1st gen Taco install. With the Taco, there was no LCA disconnect. I would just pry down on the entire control arm assembly with a crowbar and remove and reinstall everything like that. But it sounds like with the Tundra you have to disconnect the LCA from the knuckle to pry it down or move it down enough out of the way?
     
  6. Nov 22, 2016 at 10:51 AM
    #6
    Law323

    Law323 it’s only weird if you make it weird

    Joined:
    Apr 7, 2016
    Member:
    #3081
    Messages:
    9,842
    Gender:
    Male
    First Name:
    Law
    Baton Rouge, La
    Vehicle:
    2012 4.6 L MGM DC
    Toytec BOSS suspension lift @ 3" (front) Toytec BOSS remote resi's (back) 1" Toytec block (rear) 275/70r18 Toyo AT2 Info system mod 3D MAXpider Kagu floor mats LED interior lights 50% ceramic tint front windows 35% ceramic tint windshield brow Bed mounted YETI bottle opener Paracord wrapped oh Sh!t bars 3" stubby antennae TRD sway bar Upcoming: LED backup lights OEM Backup camera Iron Cross Patriot step bars Trifold or roll up tonneau cover
    Gotta use a cheat bar for that one huh? LOL
     
    NewImprovedRon likes this.
  7. Nov 22, 2016 at 10:56 AM
    #7
    cdkenne

    cdkenne Toyota Master Technician

    Joined:
    Nov 16, 2016
    Member:
    #5236
    Messages:
    189
    Gender:
    Male
    First Name:
    Corey
    KS
    Vehicle:
    2002 Tundra SR5 TRD Offroad
    285/70R17, '15 4Run Trail Wheels, Westin Shopping Cart Basher, SnapOn license plate cover that adds >50 HP
    I guess I don't realize how spoiled I am sometimes... I've got a 52" SnapOn pry bar and a Blue point control arm tool. I use one or the other depending on the job but I don't unbolt anything but the strut itself. That is with the truck about 4' off the floor though...
     
    NewRider and NewImprovedRon like this.
  8. Nov 22, 2016 at 11:00 AM
    #8
    Law323

    Law323 it’s only weird if you make it weird

    Joined:
    Apr 7, 2016
    Member:
    #3081
    Messages:
    9,842
    Gender:
    Male
    First Name:
    Law
    Baton Rouge, La
    Vehicle:
    2012 4.6 L MGM DC
    Toytec BOSS suspension lift @ 3" (front) Toytec BOSS remote resi's (back) 1" Toytec block (rear) 275/70r18 Toyo AT2 Info system mod 3D MAXpider Kagu floor mats LED interior lights 50% ceramic tint front windows 35% ceramic tint windshield brow Bed mounted YETI bottle opener Paracord wrapped oh Sh!t bars 3" stubby antennae TRD sway bar Upcoming: LED backup lights OEM Backup camera Iron Cross Patriot step bars Trifold or roll up tonneau cover
    LOL and I don't have enough ass end period!
     
    NewImprovedRon likes this.
  9. Nov 22, 2016 at 11:08 AM
    #9
    joonbug

    joonbug °°°°°°°°°°

    Joined:
    Oct 13, 2015
    Member:
    #1948
    Messages:
    16,688
    Gender:
    Male
    First Name:
    Joon
    NorCal - Dublin
    Vehicle:
    2020 Long Travel DC
    No ass is better than front ass...
    Your-ass-is-on-backwards.jpg
     
  10. Nov 22, 2016 at 11:39 AM
    #10
    badsector

    badsector [OP] New Member

    Joined:
    Jul 20, 2016
    Member:
    #3930
    Messages:
    49
    Richmond, VA
    Vehicle:
    2010 Black Rock Warrior DC
    Expedition One Front Bumper w/Warn 10-S winch TRD Dual Exhaust ARE CX Camper Shell OME 613 Full suspension kit with Dakar rear springs.
    So in your case, you didn't have to unbolt any suspension components? Just let it to full droop, remove top hat bolts and bottom strut bolt... and then muscle the entire suspension as low as needed to remove the strut assembly?
     
  11. Nov 22, 2016 at 12:18 PM
    #11
    Law323

    Law323 it’s only weird if you make it weird

    Joined:
    Apr 7, 2016
    Member:
    #3081
    Messages:
    9,842
    Gender:
    Male
    First Name:
    Law
    Baton Rouge, La
    Vehicle:
    2012 4.6 L MGM DC
    Toytec BOSS suspension lift @ 3" (front) Toytec BOSS remote resi's (back) 1" Toytec block (rear) 275/70r18 Toyo AT2 Info system mod 3D MAXpider Kagu floor mats LED interior lights 50% ceramic tint front windows 35% ceramic tint windshield brow Bed mounted YETI bottle opener Paracord wrapped oh Sh!t bars 3" stubby antennae TRD sway bar Upcoming: LED backup lights OEM Backup camera Iron Cross Patriot step bars Trifold or roll up tonneau cover
    wifey still wants more!! LOL
     
    NewImprovedRon likes this.
  12. Nov 22, 2016 at 2:53 PM
    #12
    Law323

    Law323 it’s only weird if you make it weird

    Joined:
    Apr 7, 2016
    Member:
    #3081
    Messages:
    9,842
    Gender:
    Male
    First Name:
    Law
    Baton Rouge, La
    Vehicle:
    2012 4.6 L MGM DC
    Toytec BOSS suspension lift @ 3" (front) Toytec BOSS remote resi's (back) 1" Toytec block (rear) 275/70r18 Toyo AT2 Info system mod 3D MAXpider Kagu floor mats LED interior lights 50% ceramic tint front windows 35% ceramic tint windshield brow Bed mounted YETI bottle opener Paracord wrapped oh Sh!t bars 3" stubby antennae TRD sway bar Upcoming: LED backup lights OEM Backup camera Iron Cross Patriot step bars Trifold or roll up tonneau cover
    It's back breaking work buddy!! LOL
     
    NewImprovedRon likes this.
  13. Nov 22, 2016 at 7:23 PM
    #13
    equin

    equin Texarican Tundra

    Joined:
    Dec 11, 2015
    Member:
    #2230
    Messages:
    1,875
    Gender:
    Male
    First Name:
    Ed
    DFW, TX
    Vehicle:
    2015 Silver Sky DC SR5 5.7L 4x4 TSS Package
    TRD Rear Anti-sway bar, TRD Pro skid plate, Bedrug bed mat, 17" Icon Rebounds, 315/70/17 BFG AT/K02, Bilstein 6112s front (for now), Fox 2.5 Remote Reservoirs rear, Diamondback SE, Dirtydeeds Industries 8" stainless BAMuffler, aFe dry air filter, TRD air intake accelerator
    I have a fairly long pry bar, maybe 48"? GNTundra's method is exactly how I remember doing a few 1st Gen Tacomas, with the exception of having to disconnect the sway bar and only jacking the front end maybe 2 feet or so. But 1st Gen Tacoma control arm assemblies are smaller and presumably lighter, and probably easier to lower with a pry bar (I used a smaller one). So if this method can be used on the Tundra without having to touch the control arms that would be a bit easier.
     
  14. Nov 23, 2016 at 5:39 AM
    #14
    Black Wolf

    Black Wolf Bigfoot Hunter, Sasquatch too, but not Yeti

    Joined:
    Apr 20, 2014
    Member:
    #378
    Messages:
    40,144
    Gender:
    Male
    First Name:
    Matt
    Aurora CO
    Vehicle:
    2022 Nissan Frontier SV 4X4
    TuwaPro rack, Z1 Offroad stuff, NISMO suspension stuff, FlowmasterFX Extreme exhaust, AIS, OVS, J&L can, other goodies on the way
    After you jack up the front end, and when you disconnect the UCA from the knuckle and disconnect the sway bar bolts it's fairly easy to pry down the LCA for more than enough clearance to remove the OEM strut and install the longer OME struts. Was fairly easy although I had a second set of hands to help. The second side went in fairly quick once we figured out what we were doing.
     
  15. Nov 23, 2016 at 6:10 AM
    #15
    cdkenne

    cdkenne Toyota Master Technician

    Joined:
    Nov 16, 2016
    Member:
    #5236
    Messages:
    189
    Gender:
    Male
    First Name:
    Corey
    KS
    Vehicle:
    2002 Tundra SR5 TRD Offroad
    285/70R17, '15 4Run Trail Wheels, Westin Shopping Cart Basher, SnapOn license plate cover that adds >50 HP
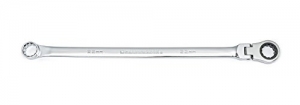
    This is what I use. I basically sit on it and use my ass to wiggle the arm up and down to get the strut in whatever position I need to sneak it out. Keep in mind, you'll need at least 3' clearance to the ground or it will hit the ground. $_1.jpg $_1-1.jpg
     
    equin and Black Wolf like this.
  16. Nov 23, 2016 at 6:12 AM
    #16
    Black Wolf

    Black Wolf Bigfoot Hunter, Sasquatch too, but not Yeti

    Joined:
    Apr 20, 2014
    Member:
    #378
    Messages:
    40,144
    Gender:
    Male
    First Name:
    Matt
    Aurora CO
    Vehicle:
    2022 Nissan Frontier SV 4X4
    TuwaPro rack, Z1 Offroad stuff, NISMO suspension stuff, FlowmasterFX Extreme exhaust, AIS, OVS, J&L can, other goodies on the way
    Ditto^^^^ That LCA tool would have been a lot more helpful than the crow bar we used for sure.
     
  17. Nov 23, 2016 at 11:53 AM
    #17
    csuviper

    csuviper Moderator Staff Member

    Joined:
    Jan 6, 2014
    Member:
    #38
    Messages:
    17,283
    Gender:
    Male
    First Name:
    Brian
    Broomfield, CO
    Vehicle:
    2019 TRD Sport CM 5.7L 4X4
    Some Mods :) See build thread for details
    I followed the Toytec directions which unbolts the two bottom bolts on the lca brackets.
     
  18. Nov 24, 2016 at 2:48 PM
    #18
    badsector

    badsector [OP] New Member

    Joined:
    Jul 20, 2016
    Member:
    #3930
    Messages:
    49
    Richmond, VA
    Vehicle:
    2010 Black Rock Warrior DC
    Expedition One Front Bumper w/Warn 10-S winch TRD Dual Exhaust ARE CX Camper Shell OME 613 Full suspension kit with Dakar rear springs.
    Just finished the job. The easiest way was to loosen the LCA alignment bolts which released tension on the lca... and I removed the two bottom lca bolts that hold the lca to the steering knuckle. Without disconnecting the lca and steering knuckle, there just wasn't enough room to get the longer OME struts in place around the tie rod and axle.

    I'm a little surprised at the initial lift I'm seeing.. I went from 37" drivers side, to 41.5"(ground to top of wheel well)... and passenger side went from 37.5" to 42". I read it gave more than advertised 2.5" lift, but did not expect nearly 5" out if it. I'm hoping that it comes down some more after the rear dakar pack is installed tomorrow, otherwise I might have to buy some aftermarket UCA's which I hoped to avoid. We'll see what the alignment shop can do with it next week.

    I took a short test drive... I read alot of reports of this kit being "super stiff", it really wasn't much different from the TRD struts that were on before, maybe just slightly more. Can't wait to get off road after the alignment and get a real feel for it.

    Now... time to eat some turkey!!! Happy Thanksgiving everyone!
     
    Last edited: Nov 24, 2016
    cdkenne and equin like this.
  19. Dec 18, 2016 at 11:12 AM
    #19
    badsector

    badsector [OP] New Member

    Joined:
    Jul 20, 2016
    Member:
    #3930
    Messages:
    49
    Richmond, VA
    Vehicle:
    2010 Black Rock Warrior DC
    Expedition One Front Bumper w/Warn 10-S winch TRD Dual Exhaust ARE CX Camper Shell OME 613 Full suspension kit with Dakar rear springs.
    So The new lift has been installed, and now I'm getting a loud "clunk" sound coming from the suspension whenever I go over a speed bump or there is a sudden drop in the road. It only happens when the suspension is unloading suddenly. Speed bump is the best example.. when going "up" on the speed bump, no problems... as soon as I crest the bump and the suspension has to sudden unload, there is a loud "clunk".

    Anyone else with OME613's have this issue? I checked the top bolts, they are all torqued to spec, nothing loose, but it sounds like the strut is suddenly hitting it's maximum extension when coming off the bump. I have noticed that there is hardly any suspension droop when I jack the truck up by the frame, makes me think the sound is coming from the strut suddenly maxing out.

    Any thoughts?
     
  20. Dec 18, 2016 at 11:57 AM
    #20
    TheBeast

    TheBeast The Beach

    Joined:
    Apr 27, 2016
    Member:
    #3246
    Messages:
    12,521
    Gender:
    Male
    SoCal
    Vehicle:
    2012
    LCAs torqued to spec? that's what I have been reading when people mention a "clunk" noise after working on front suspension.
     
  21. Dec 18, 2016 at 12:10 PM
    #21
    badsector

    badsector [OP] New Member

    Joined:
    Jul 20, 2016
    Member:
    #3930
    Messages:
    49
    Richmond, VA
    Vehicle:
    2010 Black Rock Warrior DC
    Expedition One Front Bumper w/Warn 10-S winch TRD Dual Exhaust ARE CX Camper Shell OME 613 Full suspension kit with Dakar rear springs.
    They should be, it's been to the alignment shop, twice since the install, once after the install which showed I needed UCAs.. and again after UCAs were installed. I've been reading some other threads suggesting a possible sway bar issue, if nothing else comes up, I'll pull the sway bar off and see if the "clunk" still happens.
     
    TheBeast likes this.
  22. Dec 18, 2016 at 12:25 PM
    #22
    TheBeast

    TheBeast The Beach

    Joined:
    Apr 27, 2016
    Member:
    #3246
    Messages:
    12,521
    Gender:
    Male
    SoCal
    Vehicle:
    2012
    keep us posted.
     
  23. Dec 18, 2016 at 2:05 PM
    #23
    badsector

    badsector [OP] New Member

    Joined:
    Jul 20, 2016
    Member:
    #3930
    Messages:
    49
    Richmond, VA
    Vehicle:
    2010 Black Rock Warrior DC
    Expedition One Front Bumper w/Warn 10-S winch TRD Dual Exhaust ARE CX Camper Shell OME 613 Full suspension kit with Dakar rear springs.
    So I just noticed power coating had been chipped off the bottom of the sway bar, looks like it was hitting the end edges of the skid plate. I bent the edges of the plate downward and that seems to have improved it a lot. There is still a harshness when coming off a speed bump, but I think that's a result of the 613 springs not compressing enough under normal truck weight, resulting in not much downward droop capability of the strut. The clunk noise has lessened quite a bit now w/o the skid plate hitting the sway bar, but not completely gone... I'll live with it for now. I'm considering ordering the 612 springs which are 2 cm shorter... might allow the strut to compress more and provide more droop.
     
    TheBeast likes this.
  24. Dec 19, 2016 at 10:25 PM
    #24
    equin

    equin Texarican Tundra

    Joined:
    Dec 11, 2015
    Member:
    #2230
    Messages:
    1,875
    Gender:
    Male
    First Name:
    Ed
    DFW, TX
    Vehicle:
    2015 Silver Sky DC SR5 5.7L 4x4 TSS Package
    TRD Rear Anti-sway bar, TRD Pro skid plate, Bedrug bed mat, 17" Icon Rebounds, 315/70/17 BFG AT/K02, Bilstein 6112s front (for now), Fox 2.5 Remote Reservoirs rear, Diamondback SE, Dirtydeeds Industries 8" stainless BAMuffler, aFe dry air filter, TRD air intake accelerator
    I was going to suggest to check the sway bar links and make sure they're tight. But maybe you did that already when you noticed the skid plate issue. Have you tried driving without the skid to see if the noise/clunking stops completely?

    Another possibility could be the upper ball joint hitting the coil spring on downtravel if it's over-extended.
     

Products Discussed in

To Top