-
Welcome to Tundras.com!
You are currently viewing as a guest! To get full-access, you need to register for a FREE account.
As a registered member, you’ll be able to:- Participate in all Tundra discussion topics
- Transfer over your build thread from a different forum to this one
- Communicate privately with other Tundra owners from around the world
- Post your own photos in our Members Gallery
- Access all special features of the site
 Cornering lights
 OEM tailgate
 PLOW LIGHTING FOR 2021 TUNDRA TRD
 Front Top Grill Removal
 Installing Matt Gecko’s LED lights
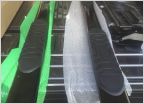 5" oval powder coated side steps
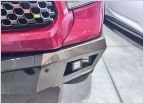
How to remove front and rear bumper caps 2017 and reinstall
Discussion in '2.5 Gen Tundras (2014-2021)' started by da_jeep_luva, Jan 13, 2017.
Page 2 of 3
Page 2 of 3