1. Welcome to Tundras.com!

    You are currently viewing as a guest! To get full-access, you need to register for a FREE account.

    As a registered member, you’ll be able to:
    • Participate in all Tundra discussion topics
    • Transfer over your build thread from a different forum to this one
    • Communicate privately with other Tundra owners from around the world
    • Post your own photos in our Members Gallery
    • Access all special features of the site

Coilover Install Lessons Learned?

Discussion in 'Suspension' started by BlackSheep, Apr 5, 2019.

  1. Apr 5, 2019 at 6:24 AM
    #1
    BlackSheep

    BlackSheep [OP] caffeinated member

    Joined:
    Aug 21, 2018
    Member:
    #18406
    Messages:
    1,163
    Gender:
    Male
    First Name:
    Scott
    Kansas City, MO
    Vehicle:
    2010 Black DC 5.7L 4x4
    held together by duct tape and baling wire
    Edit to summarize my own lessons learned instead of just asking for advice.

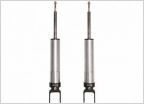
    First, from reading the instructions, only a few tools are "required" to install your new coilovers. This is vastly oversimplified. Make sure you have an assortment of clamps, wrenches, punches, prying tools, hammering tools, an extra jack, etc. available, because you will definitely need them. When the instructions say "move this" or "fit this into place" just know that the fitment of the new components is very tight and there is very little room in the working area to put your hands, get leverage, pry, or pound.

    Second, I'm sure that none of the nuts and bolts on my truck's suspension had been touched in nine years, and we have plenty of salt on the roads in Missouri through the winter, so I was prepared for a fight to remove the old coilovers and rear leaf shackles. I was pleasantly surprised that everything came off the truck very easily. I mean super easy, almost no straining to loosen. The only thing I broke was one bump stop, but that was my fault because I tried to remove it before spraying it with PB. I had sprayed everything down several times for a couple weeks leading up to the install, so maybe that had something to do with it.

    Third, I didn't have to remove the tie rod end for either side. This, along with leaving the UCA and spindle attached, ensures that there is no way you can accidentally remove the CV half shaft from its socket. Unless you're installing larger diameter coils, you probably don't need to remove the TRE, either.

    Fourth, my new coilovers were 1" longer than my old ones when they were lying side by side on the ground. That meant I had to pry the LCA down an inch further to get the new ones in than I did to get the old ones out. This is no easy task. I didn't touch my adjustment cam bolts on my LCAs, so maybe that's why it was so hard, but i figured they're meant to have some movement when fully tightened, so I could manually move them enough to get the job done. I found after much struggling that wedging a 5' long 2x4 in the curve of the LCA between the cam bolts and having a 200lb man stand on it was just enough leverage to get the longer coilover in. However, there isn't much to pry against on the passenger side for this method. I ended up angling the wood to rest on the differential bracket right next to the bolt you remove in the diff drop portion of this process, but I do not feel confident in recommending that as a prying point. A very low profile jack against the bump stops would probably be a better method, but I didn't have one.

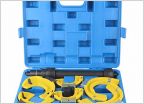
    Fifth, the Radflo 2.5 coilovers available from Boss4x4s and Toytec WILL require grinding on the mount where the coilover connects to the LCA if your mounts look anything like mine did. See pictures in post #61 of this thread for where I had to trim mine. These are beefy coilover stems, and the rounded corners of the mounting bracket won't allow them to fit. Also, the back side of the mount will contact the coilover stem when the LCA is at full droop, so about 1/8" of that side has to go, too. Getting the bottom of the coilover in place was undoubtedly the hardest part of the front install. I found on both sides that getting the bushing on the side of the coilover closest to the actual LCA angled in first was the only way to get the coilover to fit in the bracket. The side away from the LCA has a little bit of give in it that will allow you to maneuver the thing in place with much difficulty. Here is where I unfortunately had to do a lot of pounding and prying on the new coilover. A large C clamp , like 6" or bigger, or a big bar clamp would have probably done the job, but I didn't have one available, and there is no room to pound on the coilover with the hub assembly in the way, so this part was difficult.

    Sixth, keep your buddy helping you around long enough to reattach the two LCA bolts to the steering knuckle. Mine had to leave after getting the coilovers in, and I had to do an acrobatic maneuver that consisted of lying on my back using my foot to pry down the UCA to get the knuckle low enough to use both hands to line up and start the bolts.

    Seventh, throughout this process, the hub assembly is in the way. It constantly wants to slide forward, which is unfortunately where you have to be to do the work. Find a way to keep it out of the way. I never did, except with my knee. Not ideal.

    Eighth, don't let the simplicity of the diff drop fool you. It did me. Two bolts and spacers? How hard can that be? The short answer is very. The passenger side is cake. The driver's side is anything but. There is absolutely nowhere to fit your hand to thread the nut on the new bolt unless you have Deadpool's adolescent hand from the movie. Three times I lost the nut behind where the bolt end was and thought I'd never get it back out. the whole process took an hour. For two bolts. I did have to stop and rest my neck several times and give myself more than a few pep talks.

    Ninth, the bump stops and carrier bearing drop are a nice, low stress, interlude between doing the coilovers and rear shackles. Enjoy this time.

    Tenth, if you thought you could get the old spring bushings out of the rear leafs without completely removing the leaf pack from the truck, you are high AF. I dicked around with it for three hours before giving in and taking the leafs off. Then I beat on/torched/drilled/pressed and screamed at that damn bushing for another four hours before I finally found a method that extracted it in mutilated form. Unfortunately, in the process of removing the other spring bushing, my vise broke and I was up a creek. I'm not sure how vises are sized or rated, but this one is at least 50 years old and weighs about 60 pounds. My mechanic grandfather gave it to me. It has performed countless tasks admirably over the decades, and I broke it not once, but twice. I twisted the threaded rod inside it in half, then removed the broken piece and reassembled it, tried to use smaller spacers on my leaf pack to account for the shorter rod, and twisted it in half again. A 1" steel rod, twisted right off. After this, I finally broke down and took it to a shop and paid $50 for them to do in 20 minutes what took me all of Palm Sunday. I am keeping that cursed bushing as a paperweight to remind myself that the next time I put a lift on a ten year old truck I'm just taking the leafs to a shop and paying the hour of labor to have them swap out the bushings.

    11th, after suffering through this over a four day period, getting to stare at and driving this truck from now on, I conclude that it was all worth it.

    IMG_0245.jpg IMG_0249.jpg

    End edit.

    Just purchased new Radflo 2.5" coilovers as part of a 3/1 level kit. Will be installing next week. I've been saturating all the bolts that'll need removed every few days with PB for a couple weeks in the hopes that helps them come out without requiring cutting. Do any of you have pearls of wisdom or other pro tips that could help me avoid any pitfalls during install? From other threads, I know about protecting the CV axle from coming out of its socket, and the instructions seem pretty straightforward, but I'd rather not be caught off guard be any preventable mishaps. Will certainly post pics after the install!
     
    Last edited: Apr 16, 2019
    Brocksw, Bearcat and equin like this.
  2. Apr 5, 2019 at 7:24 PM
    #2
    equin

    equin Texarican Tundra

    Joined:
    Dec 11, 2015
    Member:
    #2230
    Messages:
    1,875
    Gender:
    Male
    First Name:
    Ed
    DFW, TX
    Vehicle:
    2015 Silver Sky DC SR5 5.7L 4x4 TSS Package
    TRD Rear Anti-sway bar, TRD Pro skid plate, Bedrug bed mat, 17" Icon Rebounds, 315/70/17 BFG AT/K02, Bilstein 6112s front (for now), Fox 2.5 Remote Reservoirs rear, Diamondback SE, Dirtydeeds Industries 8" stainless BAMuffler, aFe dry air filter, TRD air intake accelerator
    Get a cheater bar to fit over a breaker bar to loosen the lower control arm nuts. They’re on there really tight, and I needed all the leverage I could get.

    It helps to have an extra pair of hands to snake the new coilovers through and into place upon install. I did mine on my own. I’m not the strongest guy and struggled trying to manhandle those heavy coilovers with one hand while guiding the top plate into place and threading that first top nut. It would’ve been easier if I had some extra help during that part.

    When rejoining the lower ball joint assembly with the hub, I used an extra floor jack, a long screwdriver and lots of patience to align everything perfectly in order to rethread the bolts back on. I read how some guys used ratcheting straps with great success, but I wasn’t smart enough to figure out how to do that.

    Otherwise, it’s fairly straightforward. A few youtube how-to videos helped immensely. Good luck and post pics when done!
     
    Last edited: Apr 5, 2019
  3. Apr 5, 2019 at 7:35 PM
    #3
    Black Wolf

    Black Wolf Bigfoot Hunter, Sasquatch too, but not Yeti

    Joined:
    Apr 20, 2014
    Member:
    #378
    Messages:
    40,148
    Gender:
    Male
    First Name:
    Matt
    Aurora CO
    Vehicle:
    2022 Nissan Frontier SV 4X4
    TuwaPro rack, Z1 Offroad stuff, NISMO suspension stuff, FlowmasterFX Extreme exhaust, AIS, OVS, J&L can, other goodies on the way
    Not bad Ed!:thumbsup:
     
    equin[QUOTED] likes this.
  4. Apr 5, 2019 at 7:37 PM
    #4
    equin

    equin Texarican Tundra

    Joined:
    Dec 11, 2015
    Member:
    #2230
    Messages:
    1,875
    Gender:
    Male
    First Name:
    Ed
    DFW, TX
    Vehicle:
    2015 Silver Sky DC SR5 5.7L 4x4 TSS Package
    TRD Rear Anti-sway bar, TRD Pro skid plate, Bedrug bed mat, 17" Icon Rebounds, 315/70/17 BFG AT/K02, Bilstein 6112s front (for now), Fox 2.5 Remote Reservoirs rear, Diamondback SE, Dirtydeeds Industries 8" stainless BAMuffler, aFe dry air filter, TRD air intake accelerator
    Thanks! Hope it helps the OP and other folks willing to tackle this on their own.
     
    Black Wolf likes this.
  5. Apr 5, 2019 at 7:39 PM
    #5
    Black Wolf

    Black Wolf Bigfoot Hunter, Sasquatch too, but not Yeti

    Joined:
    Apr 20, 2014
    Member:
    #378
    Messages:
    40,148
    Gender:
    Male
    First Name:
    Matt
    Aurora CO
    Vehicle:
    2022 Nissan Frontier SV 4X4
    TuwaPro rack, Z1 Offroad stuff, NISMO suspension stuff, FlowmasterFX Extreme exhaust, AIS, OVS, J&L can, other goodies on the way
    I'd add...disconnect the speed sensors on both sides first...just in case you dont me so one up...don't ask...heh...heh..
     
    Law323 and equin[QUOTED] like this.
  6. Apr 5, 2019 at 7:52 PM
    #6
    Sas

    Sas Humor is everywhere

    Joined:
    Jul 16, 2018
    Member:
    #17087
    Messages:
    4,410
    Gender:
    Male
    First Name:
    Jason
    OKC, OK
    Vehicle:
    '17 SR5 CM TSS 4WD MGM 5.7 FF
    Lost track after #1.
    Might find some helpful tips in my build thread. I detailed the install and some of the pitfalls I ran into.
     
    Law323 and equin like this.
  7. Apr 5, 2019 at 8:04 PM
    #7
    xtyfighterx

    xtyfighterx New Member

    Joined:
    Aug 28, 2016
    Member:
    #4360
    Messages:
    2,357
    Gender:
    Male
    First Name:
    Ty
    North Idaho
    Vehicle:
    2015 Black Crewmax Mid Travel
    Mid travel fox 2.5 coilovers 2.0 real shocks shims 295 70 18 trail grapplers pro accessories 32in light bar blacked out bed cover sway bar Moto metal 970 18x9
    Use air tools....its a pretty easy task. Do measurements before so you know your exact lift.
     
    Tundradrenalin, monaco730 and equin like this.
  8. Apr 6, 2019 at 2:45 PM
    #8
    oneup

    oneup New Member

    Joined:
    Mar 4, 2019
    Member:
    #27074
    Messages:
    54
    Gender:
    Male
    Cincinnati
    Vehicle:
    17 cm
    It’s pretty straightforward as far as process goes. I had hard time loosen LCA nuts(not the bottom of knuckles) one for alignment. Angle kind of sucks and wish I had air tool or lift so I can get some room to get some leverage on. Cheater bar is a must. I used floor jack to re-attaching knuckles back together. It’s not bad of job. Maybe half day if you take some time.

    Oh and it’s good time to check for cam tower leak while you are there since it’ll be right in front of ya.
     
    Last edited: Apr 6, 2019
  9. Apr 6, 2019 at 6:57 PM
    #9
    CyberViking

    CyberViking New Member

    Joined:
    Feb 2, 2019
    Member:
    #25450
    Messages:
    268
    Gender:
    Male
    The Ozarks
    Vehicle:
    2018 MGM Tundra TRD Sport
    I see everyone removing the 2 bolts on the bottom of spindle but rarely see anyone remove the 1 bolt at the top of the knuckle where it connects to the UCA. Removing the castle nut is way easier . Hit it with a hammer until it pops (leave the nut threaded a bit on there) then just bungie it out if the way, remove sway bar link, push down on LCA to give room, then uninstall/install coil-over. There's no need to try to loosen control arm bolts and screw up your alignment.
     
    Nm6300'asl likes this.
  10. Apr 6, 2019 at 7:45 PM
    #10
    monaco730

    monaco730 New Member

    Joined:
    Apr 24, 2017
    Member:
    #7382
    Messages:
    951
    Gender:
    Male
    First Name:
    Mike
    Vehicle:
    16 Inferno Tundra
    Fox shocks, TRD Exhaust, TRD grill, TRD shift knob, weathertech floor/bed liners, ARE topper, FrontRunnerOutfitters cargo rack, Relentless cargo bars, color matched front bumper/side mirrors, fuel wheels, nitto RGs, K&N intake
    Impact wrench.

    Make sure the set screw in the collar is loosened a little if not facing out so when the coilover is installed, you can rotate the collar androgen tighten the set screw. If you put the coilover on and the set screw is in the back, it's very difficult to get to.

    Mark the alignment positions on the LCA before loosening.

    Extra jack for reattaching LCA.
     
    BlackSheep[OP] likes this.
  11. Apr 8, 2019 at 4:51 AM
    #11
    BlackSheep

    BlackSheep [OP] caffeinated member

    Joined:
    Aug 21, 2018
    Member:
    #18406
    Messages:
    1,163
    Gender:
    Male
    First Name:
    Scott
    Kansas City, MO
    Vehicle:
    2010 Black DC 5.7L 4x4
    held together by duct tape and baling wire
    Thanks everyone for chiming in! I'll update after the install is finished, unless I run into something and need to ask a question.
     
  12. Apr 8, 2019 at 4:53 AM
    #12
    BlackSheep

    BlackSheep [OP] caffeinated member

    Joined:
    Aug 21, 2018
    Member:
    #18406
    Messages:
    1,163
    Gender:
    Male
    First Name:
    Scott
    Kansas City, MO
    Vehicle:
    2010 Black DC 5.7L 4x4
    held together by duct tape and baling wire
    Holy crap. Read your whole thread. Your truck looks fantastic! But now I'm terrified to start taking things apart lol.
     
    Sas[QUOTED] likes this.
  13. Apr 8, 2019 at 6:26 AM
    #13
    Sas

    Sas Humor is everywhere

    Joined:
    Jul 16, 2018
    Member:
    #17087
    Messages:
    4,410
    Gender:
    Male
    First Name:
    Jason
    OKC, OK
    Vehicle:
    '17 SR5 CM TSS 4WD MGM 5.7 FF
    Lost track after #1.
    Thanks! As long as you're a little mechanically inclined you should be just fine tackling a coilover swap.
     
  14. Apr 8, 2019 at 7:48 AM
    #14
    Bearcat

    Bearcat New Member

    Joined:
    May 13, 2018
    Member:
    #15291
    Messages:
    49
    Gender:
    Male
    First Name:
    Nikolaus
    Vehicle:
    2018 MGM SR5 CM
    Your posts on your install were the motivation I needed for today. I started prepping to install my Icon coilovers yesterday. The driver coil is ready to slide out. I just have to get the right leverage on it to get the LCA out of the way. I am flying solo on this install right now so it is good to see that it can be done with one person. Got to finish this coffee and walk the dogs, then I am back at it!
     
    Keisuketak, equin and Sas[QUOTED] like this.
  15. Apr 8, 2019 at 7:51 AM
    #15
    Sas

    Sas Humor is everywhere

    Joined:
    Jul 16, 2018
    Member:
    #17087
    Messages:
    4,410
    Gender:
    Male
    First Name:
    Jason
    OKC, OK
    Vehicle:
    '17 SR5 CM TSS 4WD MGM 5.7 FF
    Lost track after #1.
    You got this, good luck man!
     
  16. Apr 8, 2019 at 7:56 AM
    #16
    equin

    equin Texarican Tundra

    Joined:
    Dec 11, 2015
    Member:
    #2230
    Messages:
    1,875
    Gender:
    Male
    First Name:
    Ed
    DFW, TX
    Vehicle:
    2015 Silver Sky DC SR5 5.7L 4x4 TSS Package
    TRD Rear Anti-sway bar, TRD Pro skid plate, Bedrug bed mat, 17" Icon Rebounds, 315/70/17 BFG AT/K02, Bilstein 6112s front (for now), Fox 2.5 Remote Reservoirs rear, Diamondback SE, Dirtydeeds Industries 8" stainless BAMuffler, aFe dry air filter, TRD air intake accelerator
    I'm a wannabe shade-tree mechanic, which means I'm a pro at rounding out bolt heads, stripping threads, and breaking tools. So if a clumsy guy like me can install coilovers, anyone can.

    Watch as many youtube videos as you can and take your time. My very first coilover install on a relatively easy 1st gen Tacoma took me an entire weekend to do. This was after everyone else claimed it only took them a couple hours. That was almost 20 years ago. I've gotten better since then, but I noticed that when I rush things, I almost always mess something up.

    Also, having the right tools within easy reach and adequate space helps a lot. i did mine in my apartment complex's parking lot. Not the ideal spot to tackle this. I had to lug all my tools, jacks and jack stands out to the parking lot, and in the middle of everything I had to run to Autozone to buy a couple six-point sockets after apparently losing the ones I thought I had.
     
    Sas likes this.
  17. Apr 8, 2019 at 8:40 AM
    #17
    dumbassdave

    dumbassdave Member

    Joined:
    Jun 3, 2016
    Member:
    #3517
    Messages:
    333
    Gender:
    Male
    First Name:
    Dave
    Vehicle:
    2016 Crewmax Limited
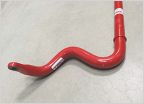
    Getting the bolts back in for the sway bar was a PITA as they really don't want to line up. Taking off the mounts on the frame to align made a big difference as they are easier to align than the ones holding the sway bar onto the LCA.
     
    Law323 and equin like this.
  18. Apr 8, 2019 at 8:45 AM
    #18
    Sas

    Sas Humor is everywhere

    Joined:
    Jul 16, 2018
    Member:
    #17087
    Messages:
    4,410
    Gender:
    Male
    First Name:
    Jason
    OKC, OK
    Vehicle:
    '17 SR5 CM TSS 4WD MGM 5.7 FF
    Lost track after #1.
    Amen to that. Apparently some people haven't had an issue (not sure how), but I just left mine off b'c I got sick of dicking with it. I don't regret leaving it off at all.
     
    dumbassdave[QUOTED] likes this.
  19. Apr 8, 2019 at 8:51 AM
    #19
    conlons26

    conlons26 High speed dirt mobile

    Joined:
    Jan 6, 2019
    Member:
    #24040
    Messages:
    230
    Gender:
    Male
    Raleighwood, NC
    Vehicle:
    2018 Quiksand Limited CM
    King 2.5's, Toytec shackles, FN BFD 18", 295/70r18 NItto Ridge Grapplers, Dirty Deeds 8" SS, no more chrome, 17' pro grill, Husky mats, TRD Pro shifter + 15hp...
    You can do this just be careful and support it well, this is how you can pull the CV spindle out. Personally i think its easier to disconnect the LCA and swing it all the way down out of the way. As far as alignment goes if you are going taller with new components you are going to have to get it aligned anyway. Take a picture of the cam bolts from the front before you loosen them, you can at least get it back to how it was before you started, it will be easier for the shop doing the alignment if its in the ball park.
     
    Brocksw likes this.
  20. Apr 8, 2019 at 8:52 AM
    #20
    conlons26

    conlons26 High speed dirt mobile

    Joined:
    Jan 6, 2019
    Member:
    #24040
    Messages:
    230
    Gender:
    Male
    Raleighwood, NC
    Vehicle:
    2018 Quiksand Limited CM
    King 2.5's, Toytec shackles, FN BFD 18", 295/70r18 NItto Ridge Grapplers, Dirty Deeds 8" SS, no more chrome, 17' pro grill, Husky mats, TRD Pro shifter + 15hp...
    double pain in the ass...ratchet strap to the closest immovable object helps with this.
     
  21. Apr 8, 2019 at 8:53 AM
    #21
    dumbassdave

    dumbassdave Member

    Joined:
    Jun 3, 2016
    Member:
    #3517
    Messages:
    333
    Gender:
    Male
    First Name:
    Dave
    Vehicle:
    2016 Crewmax Limited
    Mine was really close to not going back on. Had I known how crappy it was going to be to get my rear shocks off, sway bar would have stayed on the floor.
     
  22. Apr 8, 2019 at 8:55 AM
    #22
    dumbassdave

    dumbassdave Member

    Joined:
    Jun 3, 2016
    Member:
    #3517
    Messages:
    333
    Gender:
    Male
    First Name:
    Dave
    Vehicle:
    2016 Crewmax Limited
    Luckily I did my lift on a 4 post lift. Used ratchet straps to get the LCA down enough to get the bottom of the shock in there. Thanks Toyota for making that such a huge lip to get over! Bolt could fall out and the the shock would stay in place!
     
  23. Apr 8, 2019 at 9:08 AM
    #23
    conlons26

    conlons26 High speed dirt mobile

    Joined:
    Jan 6, 2019
    Member:
    #24040
    Messages:
    230
    Gender:
    Male
    Raleighwood, NC
    Vehicle:
    2018 Quiksand Limited CM
    King 2.5's, Toytec shackles, FN BFD 18", 295/70r18 NItto Ridge Grapplers, Dirty Deeds 8" SS, no more chrome, 17' pro grill, Husky mats, TRD Pro shifter + 15hp...
    one more thing of great importance, not sure if you are or not but if you are swapping out your UCA's you will find out quickly that the long bolts that hold them in place are also a PITA to get out, if you move anything (air lines) to get them out make sure to put them back the way you found them...if you forget because its Friday night at 11pm and you have a 10 week old and you are exhausted and you manage kink them up, the next day your truck no workey and you will have a panic attack and limp your truck to the closest dealer and pay them $75 just to make you feel like a dummy...ask me how i know.
     
    Sas and equin like this.
  24. Apr 8, 2019 at 9:19 AM
    #24
    BlackSheep

    BlackSheep [OP] caffeinated member

    Joined:
    Aug 21, 2018
    Member:
    #18406
    Messages:
    1,163
    Gender:
    Male
    First Name:
    Scott
    Kansas City, MO
    Vehicle:
    2010 Black DC 5.7L 4x4
    held together by duct tape and baling wire
    Haha, thanks for the tip. No UCAs for me at this time, spent too much on the coilovers as it is.
     
  25. Apr 8, 2019 at 9:22 AM
    #25
    BlackSheep

    BlackSheep [OP] caffeinated member

    Joined:
    Aug 21, 2018
    Member:
    #18406
    Messages:
    1,163
    Gender:
    Male
    First Name:
    Scott
    Kansas City, MO
    Vehicle:
    2010 Black DC 5.7L 4x4
    held together by duct tape and baling wire
    I feel like I'm pretty resourceful and should be ok as long as i don't round or twist off a bolt head. :fingerscrossed:
     
    Sas[QUOTED] likes this.
  26. Apr 8, 2019 at 9:44 AM
    #26
    equin

    equin Texarican Tundra

    Joined:
    Dec 11, 2015
    Member:
    #2230
    Messages:
    1,875
    Gender:
    Male
    First Name:
    Ed
    DFW, TX
    Vehicle:
    2015 Silver Sky DC SR5 5.7L 4x4 TSS Package
    TRD Rear Anti-sway bar, TRD Pro skid plate, Bedrug bed mat, 17" Icon Rebounds, 315/70/17 BFG AT/K02, Bilstein 6112s front (for now), Fox 2.5 Remote Reservoirs rear, Diamondback SE, Dirtydeeds Industries 8" stainless BAMuffler, aFe dry air filter, TRD air intake accelerator
    Yep, loosening or removing the frame mounts also helped me realign the sway bar links.
     
  27. Apr 8, 2019 at 9:49 AM
    #27
    equin

    equin Texarican Tundra

    Joined:
    Dec 11, 2015
    Member:
    #2230
    Messages:
    1,875
    Gender:
    Male
    First Name:
    Ed
    DFW, TX
    Vehicle:
    2015 Silver Sky DC SR5 5.7L 4x4 TSS Package
    TRD Rear Anti-sway bar, TRD Pro skid plate, Bedrug bed mat, 17" Icon Rebounds, 315/70/17 BFG AT/K02, Bilstein 6112s front (for now), Fox 2.5 Remote Reservoirs rear, Diamondback SE, Dirtydeeds Industries 8" stainless BAMuffler, aFe dry air filter, TRD air intake accelerator
    Another thing I just remembered is the hub getting in the way during install. After separating the lower control arm from the ball joint/hub assembly, the hub assembly would move forward and get right in the way of where I was trying to maneuver the coilover in for install. I supposed I could've tried a strap or something else to tie it a bit out of the way (without separating the CV axle), but I wasn't thinking at the time and instead just used my knee to push it out of the way while I re-routed the coilover into place. Just another minor thing or tip in case it helps.
     
    monaco730 likes this.
  28. Apr 8, 2019 at 9:53 AM
    #28
    Law323

    Law323 it’s only weird if you make it weird

    Joined:
    Apr 7, 2016
    Member:
    #3081
    Messages:
    9,842
    Gender:
    Male
    First Name:
    Law
    Baton Rouge, La
    Vehicle:
    2012 4.6 L MGM DC
    Toytec BOSS suspension lift @ 3" (front) Toytec BOSS remote resi's (back) 1" Toytec block (rear) 275/70r18 Toyo AT2 Info system mod 3D MAXpider Kagu floor mats LED interior lights 50% ceramic tint front windows 35% ceramic tint windshield brow Bed mounted YETI bottle opener Paracord wrapped oh Sh!t bars 3" stubby antennae TRD sway bar Upcoming: LED backup lights OEM Backup camera Iron Cross Patriot step bars Trifold or roll up tonneau cover
    I second this as much as anyone can second anything.

    Got one side squared away but couldn’t get the other in to save my life! Brought it to a mechanic for alignment and told him my problem.......bastard fixed it in 2 minutes by loosening the frame mounts, pushed in the bolt on the LCA, and tightened back the frame mounts, turned his head and smiled. (Dudes a buddy of mine so we show each other up (and relentlessly rub it in) as often as we can
     
    Sas likes this.
  29. Apr 8, 2019 at 9:58 AM
    #29
    Law323

    Law323 it’s only weird if you make it weird

    Joined:
    Apr 7, 2016
    Member:
    #3081
    Messages:
    9,842
    Gender:
    Male
    First Name:
    Law
    Baton Rouge, La
    Vehicle:
    2012 4.6 L MGM DC
    Toytec BOSS suspension lift @ 3" (front) Toytec BOSS remote resi's (back) 1" Toytec block (rear) 275/70r18 Toyo AT2 Info system mod 3D MAXpider Kagu floor mats LED interior lights 50% ceramic tint front windows 35% ceramic tint windshield brow Bed mounted YETI bottle opener Paracord wrapped oh Sh!t bars 3" stubby antennae TRD sway bar Upcoming: LED backup lights OEM Backup camera Iron Cross Patriot step bars Trifold or roll up tonneau cover
    Also, jack stands are a MUST!

    Your bottle jack won’t do jack shit (hehehe) except push up the LCA after c/o install to line up holes, so use a 2-3 ton floor jack to do the main lifting.

    I was nervous as hell at first, it helps to just jump in and once you’ve gotten through about a third of the process on the first side, “get it done” mentality kicks in. Of course a beer every hour helps LOL

    First side will take longer than the second, so take your time and enjoy it!
     
    Sas likes this.
  30. Apr 8, 2019 at 1:58 PM
    #30
    lamikela1

    lamikela1 New Member

    Joined:
    Oct 9, 2018
    Member:
    #20345
    Messages:
    162
    Gender:
    Male
    First Name:
    Michael
    Vehicle:
    2019 Silver Sky Platinum Tundra 4X4
    Revolver X4 cover, Bedrug, Pocket Flares. Previously owned... '86 Hilux, '94 4-Runner '95 Taco, '05 Taco
    Trust me when I say you do not want to pull the CV joint out. Don't ask me how I know this... Unless you want to buy me a beer!!!:cheers:
     
    conlons26[QUOTED] likes this.

Products Discussed in

To Top