1. Welcome to Tundras.com!

    You are currently viewing as a guest! To get full-access, you need to register for a FREE account.

    As a registered member, you’ll be able to:
    • Participate in all Tundra discussion topics
    • Transfer over your build thread from a different forum to this one
    • Communicate privately with other Tundra owners from around the world
    • Post your own photos in our Members Gallery
    • Access all special features of the site

Rear dash cam installation

Discussion in 'Audio & Video' started by Netmonkey, Mar 9, 2019.

  1. Mar 9, 2019 at 12:21 PM
    #1
    Netmonkey

    Netmonkey [OP] Don't be a Dumbass

    Joined:
    Mar 21, 2016
    Member:
    #2971
    Messages:
    1,483
    Gender:
    Male
    Georgetown, TX
    Vehicle:
    2016 Texas Edition, 5.7, CM, MGM
    Icon stage 2 lift, 295 60 20 nitto ridge grapplers, fuel kranks, TRD dual exhaust, TRD rear sway bar
    I installed an old dash cam a couple of years ago:
    https://www.tundras.com/threads/dash-cam-genius-dvr-fhd590-installation-and-review.12759/

    but it was very old and had dated features. Recently, I upgraded the front camera to the Garmin 55 (which I highly recommend) and I have been wanting to add that same camera to the rear. I have been thinking about this installation for a while now, but I just wasn't sure about how to install it (since the window on the crewmax rolls down). A couple of options that I thought about were attaching a bracket to the rear seat head rests or maybe drilling a bracket into the interior trim around the rear seat belt. The Garmin 55 doesn't use a traditional suction cup. Instead, it has a magnetic disc that adheres to the glass. It is also not compatible with all the camera mounting armatures (like the GroPro uses) so I would have to fabricate some sort of mount.

    Anyway, here is what I came up with:

    To start, I ran a wire from the add-a-fuse (that I used for the front camera) down behind the driver's side kick panel and down along the front and rear door sills along the driver's side of the truck to the back wall. I tucked the wire behind the panel on the rear wall and up to the rear window. I mated that wire up to a 12-volt accessory plug and plugged the dash cam into that. I tucked the dash cam wire up along the interior trim (near the rear seat belt) and along the head liner to the center of the truck.

    I rolled the rear window down and then measured and added a piece of blue painters tape along the center line of the truck (the left edge of the tape is the center of the truck). This would give me a guide so I could center the dash cam. I didn't want to mess with removing or damaging the head liner, so I used some plastic prying tools to feel around underneath the headliner near the brake light.
    [​IMG]

    I figured that I would create a mount using metal sheets. I felt around for anything that I could stick a metal sheet on to or perhaps a crevice that the sheet could be wedged into.
    [​IMG]

    I bought a 12x24, 26 gauge metal sheet. I figured that was enough material for some trial and error :)
    [​IMG]

    The camera mount is 1 inch wide, so I started by cutting a 1 inch x 3 inch piece.
    [​IMG]

    [​IMG]

    I played around with that piece under the head liner for a while; trying different positions and thinking about different angles that could be wedged up there. Nothing made sense until I removed the pry tool. Once the pry tool was removed, the metal piece was wedged in there tight. Since the camera has a magnetic mount, I was able to attach it to the metal piece and play around with positioning. I determined that the metal needed to be bent down a little so that the rear window would clear when closed.
    [​IMG]

    For good measure, I used some double sided foam tape on the back of the metal piece.
    [​IMG]

    [​IMG]

    I inserted the metal piece under the headliner and attached the camera's magnetic disc mount to the metal. With the tension from the head liner and with the surfaces that the tape caught on, the metal piece is firmly in place.
    [​IMG]

    I attached the camera and plugged it in.
    [​IMG]

    I made sure that the camera lens is between the window heater elements.
    [​IMG]

    The camera hangs down about 2 inches from the headliner, but I don't see it while looking in the rear view mirror from the diver's seat.
    [​IMG]

    [​IMG]

    [​IMG]

    While driving, I don't see the camera, but here it is from the rear view mirror.
    [​IMG]

    I suppose I could have positioned it over the passenger side head rest. It might have been less obvious there.
    [​IMG]

    [​IMG]

    Somewhat visible from outside. BTW, the camera is centered to the truck, but the lens is not centered on the camera; nor is the mount centered on the camera.
    [​IMG]

    Thanks for looking :)
     
    TreeCat, Anomalos7, GODZILLA and 15 others like this.
  2. Mar 9, 2019 at 12:59 PM
    #2
    Jim LE 1301

    Jim LE 1301 Camaro Lover, SSEM # 11,TTC#179

    Joined:
    Apr 29, 2018
    Member:
    #14884
    Messages:
    27,869
    Gender:
    Male
    First Name:
    Jim
    Hudson Valley, New York
    Vehicle:
    2018 MGM Tundra TRD Sport Double Cab
    Very nice. Now I know how I'm going to mount mine.
    Soon as the weather warms up here, I'll be going to Home Depot.
    Thanks for sharing. :thumbsup:
     
    Netmonkey[OP] and porkitt like this.
  3. Mar 9, 2019 at 1:48 PM
    #3
    TundraTSS19

    TundraTSS19 New Member

    Joined:
    Dec 5, 2018
    Member:
    #22626
    Messages:
    332
    San Antonio, TX
    Vehicle:
    2020 Tundra TSS SR5 Crewmax 5.7L
    LED step bar light strips
    I'd recommend tinting the rear window so nobody can see it. It won't affect the view of the camera either. I have a Blackvue DR590 2ch system and it works great.
     
  4. May 3, 2019 at 10:35 AM
    #4
    boneless

    boneless New Member

    Joined:
    May 3, 2019
    Member:
    #30024
    Messages:
    13
    Gender:
    Male
    Vehicle:
    2016 Black Tundra Platinum
    Looks good! Just got a new camera, and it has a rear facing camera as well.

    Just wondering, how did you run the cable exactly? Through the headliner?
     
  5. May 3, 2019 at 11:27 AM
    #5
    Netmonkey

    Netmonkey [OP] Don't be a Dumbass

    Joined:
    Mar 21, 2016
    Member:
    #2971
    Messages:
    1,483
    Gender:
    Male
    Georgetown, TX
    Vehicle:
    2016 Texas Edition, 5.7, CM, MGM
    Icon stage 2 lift, 295 60 20 nitto ridge grapplers, fuel kranks, TRD dual exhaust, TRD rear sway bar
    :D
     
    NewImprovedRon likes this.
  6. May 3, 2019 at 11:30 AM
    #6
    boneless

    boneless New Member

    Joined:
    May 3, 2019
    Member:
    #30024
    Messages:
    13
    Gender:
    Male
    Vehicle:
    2016 Black Tundra Platinum
    So far for comprehensive reading... I have an excuse, I am a foreigner... :)
     
  7. May 8, 2019 at 12:49 PM
    #7
    plumber802

    plumber802 New Member

    Joined:
    Apr 13, 2018
    Member:
    #14412
    Messages:
    909
    Gender:
    Male
    First Name:
    Andy
    Vermont
    Vehicle:
    2018 White Platinum CM
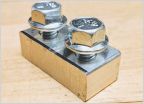
    I used a pair of rectangular magnets to secure the rear cam of my Thinkware F800. Works great!!!F9009629-52C6-41B1-B8BA-EBF259E495F8.jpg760B351D-98D7-4962-96F8-1475D11E74B9.jpg
     
  8. May 8, 2019 at 1:55 PM
    #8
    plumber802

    plumber802 New Member

    Joined:
    Apr 13, 2018
    Member:
    #14412
    Messages:
    909
    Gender:
    Male
    First Name:
    Andy
    Vermont
    Vehicle:
    2018 White Platinum CM
    Ace Hardware $3:99 5DB3EFA0-341B-4AAE-8B32-D568AA618054.jpg
     
    D4x4TRD and Ostrich like this.
  9. May 8, 2019 at 1:57 PM
    #9
    Ostrich

    Ostrich One bit me once.

    Joined:
    Sep 25, 2018
    Member:
    #19807
    Messages:
    684
    Gender:
    Female
    First Name:
    Nikki
    Marion, Texas
    Vehicle:
    2014 MGM Crewmax SR5 4x4
    3/1 level, black leather, raptor style grille
    How sturdy are they? Does the rear cam shake much?
     
  10. May 8, 2019 at 2:06 PM
    #10
    plumber802

    plumber802 New Member

    Joined:
    Apr 13, 2018
    Member:
    #14412
    Messages:
    909
    Gender:
    Male
    First Name:
    Andy
    Vermont
    Vehicle:
    2018 White Platinum CM
    I drove around on our pot hole cratered streets for a while and checked the rear cam footage and it seems pretty stable. The good thing about the magnets is that they have a low profile that keeps the camera close to the headliner which has a fair amount of rigidity along that seam/edge.
     
    porkitt and Ostrich[QUOTED] like this.
  11. May 8, 2019 at 2:24 PM
    #11
    Ostrich

    Ostrich One bit me once.

    Joined:
    Sep 25, 2018
    Member:
    #19807
    Messages:
    684
    Gender:
    Female
    First Name:
    Nikki
    Marion, Texas
    Vehicle:
    2014 MGM Crewmax SR5 4x4
    3/1 level, black leather, raptor style grille
    That's good to know, thanks. I'm getting a cam this week so I'll try that out.
     
  12. May 8, 2019 at 2:27 PM
    #12
    TokerJoker

    TokerJoker ΜΟΛΩΝ ΛΑΒΕ

    Joined:
    Sep 12, 2018
    Member:
    #19328
    Messages:
    2,223
    Gender:
    Male
    First Name:
    Travis
    Nowhere, Specific
    Vehicle:
    2014 Black SR5 4.6 Dbl Cab
    None.....yet
  13. May 12, 2019 at 7:10 AM
    #13
    osucowboy96

    osucowboy96 New Member

    Joined:
    Sep 12, 2018
    Member:
    #19320
    Messages:
    47
    Gender:
    Male
    Wichita Falls, TX
    Vehicle:
    2017 Inferno CrewMax
    I found basically the same exact magnet at harbor freight, but with 5 lb pull, for $0.99. Do you think that there would be an issue with the magnets messing with the camera?
     
    619Tundra likes this.
  14. May 12, 2019 at 7:22 AM
    #14
    markg

    markg New Member

    Joined:
    Mar 17, 2019
    Member:
    #27711
    Messages:
    472
    Gender:
    Male
    First Name:
    Mark
    NC
    Vehicle:
    2007 TRD
    What is this? Is this secured with the magnet?
    Where did you get this?

    F9009629-52C6-41B1-B8BA-EBF259E495F8.jpg
     
  15. May 12, 2019 at 7:56 AM
    #15
    Jim LE 1301

    Jim LE 1301 Camaro Lover, SSEM # 11,TTC#179

    Joined:
    Apr 29, 2018
    Member:
    #14884
    Messages:
    27,869
    Gender:
    Male
    First Name:
    Jim
    Hudson Valley, New York
    Vehicle:
    2018 MGM Tundra TRD Sport Double Cab
    See posts 7 & 8. ;)
     
  16. May 12, 2019 at 8:07 AM
    #16
    markg

    markg New Member

    Joined:
    Mar 17, 2019
    Member:
    #27711
    Messages:
    472
    Gender:
    Male
    First Name:
    Mark
    NC
    Vehicle:
    2007 TRD
    So, that black thing is a block magnet?
     
  17. May 12, 2019 at 8:15 AM
    #17
    Jim LE 1301

    Jim LE 1301 Camaro Lover, SSEM # 11,TTC#179

    Joined:
    Apr 29, 2018
    Member:
    #14884
    Messages:
    27,869
    Gender:
    Male
    First Name:
    Jim
    Hudson Valley, New York
    Vehicle:
    2018 MGM Tundra TRD Sport Double Cab
    Not my post but if you go to www.magnetsource.com

    Search 07044, you will see it is a block magnet.
     
  18. May 12, 2019 at 9:25 AM
    #18
    markg

    markg New Member

    Joined:
    Mar 17, 2019
    Member:
    #27711
    Messages:
    472
    Gender:
    Male
    First Name:
    Mark
    NC
    Vehicle:
    2007 TRD
    It is strong enough to stick to the metal under the liner?
     
  19. May 12, 2019 at 10:24 AM
    #19
    Jim LE 1301

    Jim LE 1301 Camaro Lover, SSEM # 11,TTC#179

    Joined:
    Apr 29, 2018
    Member:
    #14884
    Messages:
    27,869
    Gender:
    Male
    First Name:
    Jim
    Hudson Valley, New York
    Vehicle:
    2018 MGM Tundra TRD Sport Double Cab
    That is a question for the OP!
     
  20. May 12, 2019 at 11:11 AM
    #20
    Netmonkey

    Netmonkey [OP] Don't be a Dumbass

    Joined:
    Mar 21, 2016
    Member:
    #2971
    Messages:
    1,483
    Gender:
    Male
    Georgetown, TX
    Vehicle:
    2016 Texas Edition, 5.7, CM, MGM
    Icon stage 2 lift, 295 60 20 nitto ridge grapplers, fuel kranks, TRD dual exhaust, TRD rear sway bar
    i didnt use the magnet. you will have to ask @plumber802 :)
     
  21. Jan 12, 2020 at 12:40 PM
    #21
    BravoDeltaRomeo

    BravoDeltaRomeo Old Man Little Blue Finger

    Joined:
    Sep 3, 2019
    Member:
    #35569
    Messages:
    3,683
    Gender:
    Male
    First Name:
    Bruce
    MB Canada
    Vehicle:
    2019 Cavalry Blue Tundra CM
    Reviving an older thread as my single front cash can is being returned, tried a GoPro but can't get good coverage as it's too far from the windshield and it posses its own problems (auto on, thedt, etc).

    I tried a magnet today, not a super strong one and I found a spot just off center that a magnet will stick.

    Thoughts on if that will work for a rear dashcam mount, without having to access under the header to put a shim, if I attach a magnet to the base of say this one?

    Is the magnet block above simply just placed against the headliner and secured with magnet strength? If so, it sounds too easy.

    You can sort of see my magnet on the roof.
    IMG_20200112_143329.jpg Screenshot_20200112-143923.jpg
     
    Last edited: Jan 12, 2020
  22. Jan 12, 2020 at 3:28 PM
    #22
    TundraTSS19

    TundraTSS19 New Member

    Joined:
    Dec 5, 2018
    Member:
    #22626
    Messages:
    332
    San Antonio, TX
    Vehicle:
    2020 Tundra TSS SR5 Crewmax 5.7L
    LED step bar light strips
  23. Jan 12, 2020 at 3:57 PM
    #23
    Netmonkey

    Netmonkey [OP] Don't be a Dumbass

    Joined:
    Mar 21, 2016
    Member:
    #2971
    Messages:
    1,483
    Gender:
    Male
    Georgetown, TX
    Vehicle:
    2016 Texas Edition, 5.7, CM, MGM
    Icon stage 2 lift, 295 60 20 nitto ridge grapplers, fuel kranks, TRD dual exhaust, TRD rear sway bar
  24. Jan 12, 2020 at 6:16 PM
    #24
    TundraTSS19

    TundraTSS19 New Member

    Joined:
    Dec 5, 2018
    Member:
    #22626
    Messages:
    332
    San Antonio, TX
    Vehicle:
    2020 Tundra TSS SR5 Crewmax 5.7L
    LED step bar light strips
    I got the 2 inch and yes very simple to install. I got 2 sided tape and then placed between headliner and metal roof and pushed up to seal it. From there 2 sided tape on the camera to the bracket and done.
     
    BravoDeltaRomeo likes this.
  25. Jan 12, 2020 at 6:57 PM
    #25
    773_eddie

    773_eddie Trd Pro

    Joined:
    Feb 17, 2019
    Member:
    #26204
    Messages:
    660
    Gender:
    Male
    First Name:
    Eddie
    Chicago
    Vehicle:
    Tundra Trd Pro
    12volt remote start, weathertec accessories, Trd Pro decals, Toyota console safe,VLEDS Puddle Lights,Frac Harness,TRD PRO front and Rear Sway Bar,NSV Hood Light Bar,ESP long box,AJT accessories,Thinkware U1000 dashcam, coachbuilder 1/3 Lift, HR LED’s,Pro comp Traction bars, JL complete System wit 2 10” subs, Kenwood DDX9907XR HU
    I used a Binder Clip to hold my Thinkware U1000 Rear Camera worked good holding strong took a second To install and cost me .99 for 2
    EA6DF05B-1DB8-4CE5-8861-313C8F2F6757.jpg
    D3C8C454-9AA5-43CC-93A4-A59AADAB93D9.jpg 4F685AC1-4382-4F38-A411-3FB3AE1D0674.jpg 2760F010-C6FD-408F-A508-37D4074FFD2F.jpg
     
  26. Jan 12, 2020 at 7:19 PM
    #26
    ZPMAN

    ZPMAN 2nd place is the 1st looser

    Joined:
    Nov 1, 2017
    Member:
    #10678
    Messages:
    1,720
    Gender:
    Male
    First Name:
    John
    Minnesota
    Vehicle:
    2016 Black Platinum Supercharged
    4" lift, 35s, Magnuson Supercharger
    When I get time I'm going to install one of these: TOGUARD Backup Camera 10" Mirror Dash Cam, Dash Cam Front and Rear Full Touch Screen Video Streaming Rear View Mirror Camera,Night Vision Waterproof 1080P Rear Camera https://www.amazon.com/dp/B07PFPJ2DJ/ref=cm_sw_r_cp_apa_i_P-9gEbKYCFC7E
    Seen and used these in the Philippines.
    Has anyone tried incorporating the rear cam into the center break light lens ?
     
  27. Jan 12, 2020 at 8:10 PM
    #27
    porkitt

    porkitt New Member

    Joined:
    May 31, 2017
    Member:
    #7948
    Messages:
    2,201
    Gender:
    Male
    First Name:
    Ian
    Vehicle:
    Tundra Pro Cement
    DAP Tune ESP Storage RCI Skids Icon Rebound ABS Guards AVS Vent Visor FRAC Harness 50 Cal/Antenna X BFG KO2 HID Extra Light Bar White Knuckle Off Road Sliders BAK Industries Revolver X2 Oh Shit Handles Pop and Lock LED Internal and Reverse Lights LED Footwell lights Tuffy Storage Console organizers Viper Alarm and Remote Start
  28. Jan 20, 2020 at 7:17 PM
    #28
    2chains

    2chains New Member

    Joined:
    Apr 27, 2019
    Member:
    #29708
    Messages:
    290
    Southern Ablerta
    Great ideas, thanks for posting! Looking at Thinkware f800 dual setup.
     
  29. Jan 20, 2020 at 7:49 PM
    #29
    773_eddie

    773_eddie Trd Pro

    Joined:
    Feb 17, 2019
    Member:
    #26204
    Messages:
    660
    Gender:
    Male
    First Name:
    Eddie
    Chicago
    Vehicle:
    Tundra Trd Pro
    12volt remote start, weathertec accessories, Trd Pro decals, Toyota console safe,VLEDS Puddle Lights,Frac Harness,TRD PRO front and Rear Sway Bar,NSV Hood Light Bar,ESP long box,AJT accessories,Thinkware U1000 dashcam, coachbuilder 1/3 Lift, HR LED’s,Pro comp Traction bars, JL complete System wit 2 10” subs, Kenwood DDX9907XR HU
    I got the U1000 dual 128G with the parking sensor and OBD Hard wire harness and now a dedicated Hotspot in my truck for it from T-Mobile, i dont know how I feel about the set up it was a lot of money the picture is great maybe I don’t really understand how it’s suppose to work But I thought I was going to be able to live view the truck while it was parked and I still can’t do that cause the camera does not get power when the truck is off so next step is to get a Celllink for another $300 so the Dashcam can have its own dedicated power source i dont know will see maybe I’m missing something I need to call Thinkware just been super busy with the weather here in chicago truck is parked in the garage I don’t use it till spring
     
  30. Jan 20, 2020 at 9:06 PM
    #30
    2chains

    2chains New Member

    Joined:
    Apr 27, 2019
    Member:
    #29708
    Messages:
    290
    Southern Ablerta
    Looking at the Cellink feature. Mostly interested in the parking mode aspect... these bundle's are surprisingly expensive.
     

Products Discussed in

To Top