

-
Welcome to Tundras.com!
You are currently viewing as a guest! To get full-access, you need to register for a FREE account.
As a registered member, you’ll be able to:- Participate in all Tundra discussion topics
- Transfer over your build thread from a different forum to this one
- Communicate privately with other Tundra owners from around the world
- Post your own photos in our Members Gallery
- Access all special features of the site
Quick Links: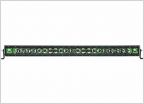 RIGID INDUSTRIES blowout sale on Amazon (Green backlit models)
 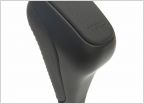 The elusive "black" TRD shift knob 20% off today (June6/18)
 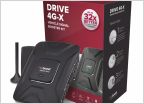 Group Buy (Extended): WeBoost and Wilson Pro Cell Boosters - Current Discount Ends Feb. 28, 2021
 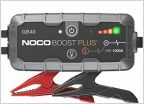 NOCO GB40 on sale at Amazon for $80
 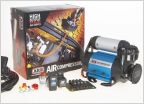 **CLOSED**ARB compressors 3.0 - Group Buy**
  Hydroflask Sale at REI
***UPDATE***Tech12volts door and/or dash speaker group buy.-valid through 2/28/19
Discussion in 'Deals & Group Buys' started by Pudge, Jan 30, 2019.
Page 17 of 32
Page 17 of 32
Products Discussed in


